How to Create Categories and Subcategories in Zen Cart
Updated on Dec 10, 2015
To sort your products appropriately, you will need to create categories and subcategories for them. It is worth noting that you cannot have a category and a product in the same location, meaning that you will have to first create the categories and then populate them with products.
To manage your Product Categories, you will need to:
Step 1 Add a Category
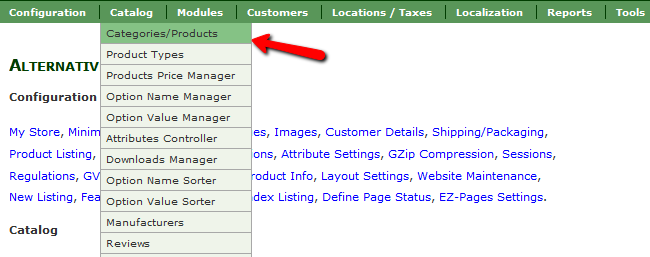
Login to your Admin Dashboard and navigate to the Catalog>Categories/Products section.

Here you will be able to see all of your existing main categories and create new ones. Click on the new category button.

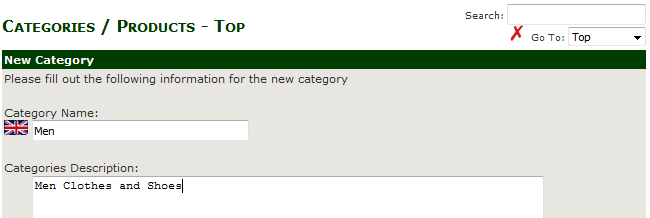
Now you will be able to add a Title and Description for the new category.

You will also be able to select an image for the category and location.

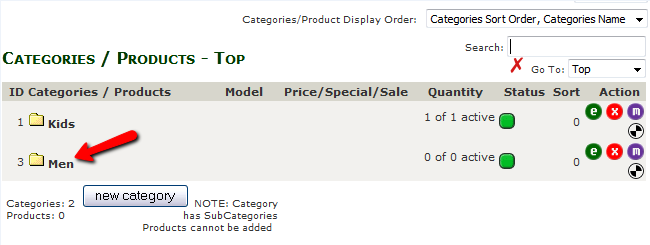
Click the Save button to add the category. Now you will be able to see the new category in the category page.
Step 2 Add a Subcategory
To create a subcategory, you will have to click on the newly created category and access it.

Let us create a new Subcategory for Men’s Shoes. Click on the new category button and repeat the process from step 1.

Click on the subcategory to access it and you will now be able to add products to it. For more information on how to add products in Zen Cart visit our tutorial.

Zen Cart Hosting
- Free Zen Cart Installation
- 24/7 Zen Cart Support
- Free Domain Transfer
- Hack-free Protection
- Fast SSD Storage
- Free Cloudflare CDN
- Free Zen Cart Transfer
- Immediate Activation