How to Install WooCommerce via the WordPress Plugin Installer
Updated on Dec 8, 2022
As mentioned in the introduction WooCommerce is a Wordpress plugin created and developed by WooThemes. The process of its installation is the same as for every other Wordpress plugin and in the next few lines of this tutorial we will fully cover it. First and foremost you will need to have a fully functional WordPress installation and of course access to its admin area.
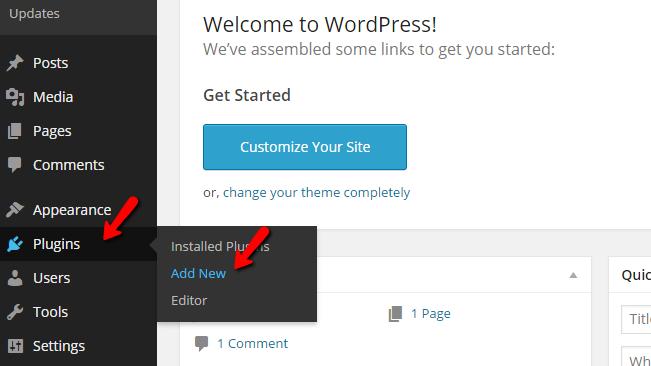
As soon as you login you should be able to notice the left vertical admin menu where you will need to access Plugins → Add new.

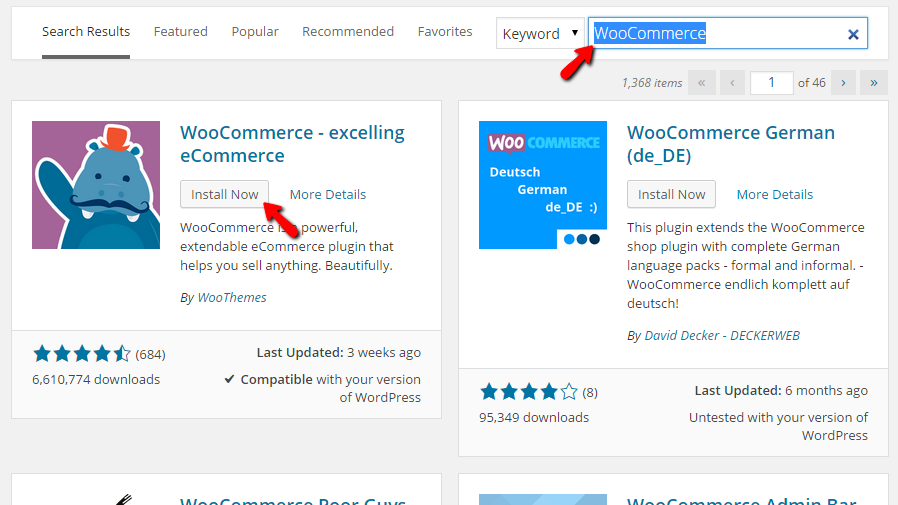
Thee you will need to type in the search box WooCommerce so you can be able to find the Module in the list on modules supplied on that page.

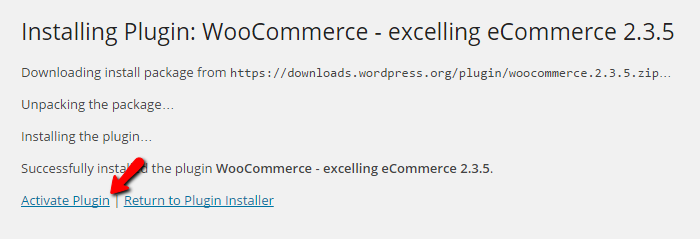
The 1st result will be the plugin you are looking for and the only thing remaining to do here is to click on the Install button so the plugin can be properly installed. In few seconds you will receive a brief report on the installation and at the end you will find the Activate Plugin link which you should click on if you would like to have the plugin activated right after this installation process.

Now that you have installed and activated the plugin there are few more things you need to do in order to get it fully functional.
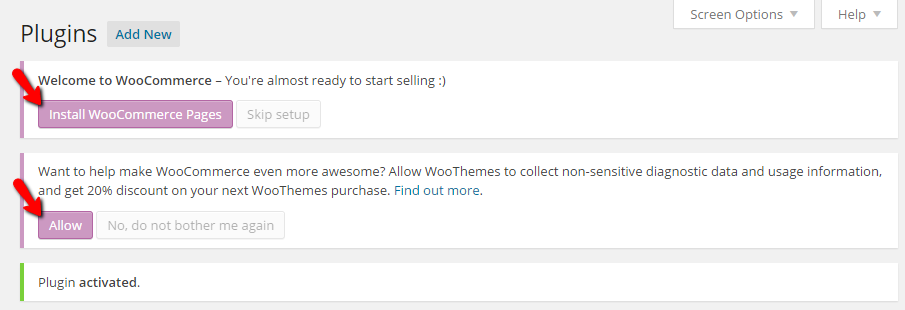
First and foremost you should click on the Install WooCommerce Pages button which will install the default pages used by this module.

Right after the pages are installed you will be redirected to the administration page of the plugin where you will find all the settings related to the same.
The second this is that you should allow WooCommerce to collect "non-sensitive diagnostic data" by clicking on the Allow button from the top notification area of Wordpress. This is not a mandatory but hey, you can get a nice discount on any future themes purchase from their Store.
Congratulations! You have successfully installed WooCommerce on your Wordpress based website!

WooCommerce Hosting
- Free Installation
- 24/7 WooCommerce Support
- Free Domain Transfer
- Hack-free Protection
- Fast SSD Storage
- Free WooCommerce Transfer
- Free Cloudflare CDN
