How to Manage Widgets in Pagekit
Updated on Dec 10, 2015
From the first time you visited your website's admin dashboard you have come across the basic Widgets in Pagekit.

These are (from left to right ) the Users, Location and Feed Widgets. Widgets correspond to features/extensions and are the visual representation of those elements on your admin dashboard. Without them, you would not be able to actually receive the data these features provide.
To manage the Widgets in Pagekit, you will need to:
Add a New Dashboard Widget
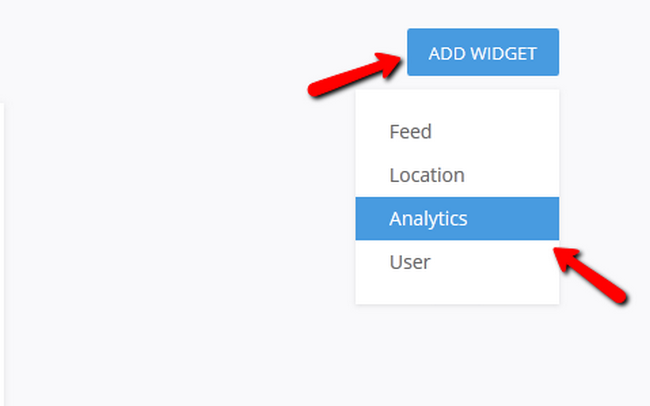
In our Extensions tutorial, we have installed and enabled a new Extension called Analytics. Let us now create a Widget for it so we can benefit from the data it provides. In your admin dashboard, click on the Add Widget button and select the newly added Analytics option.
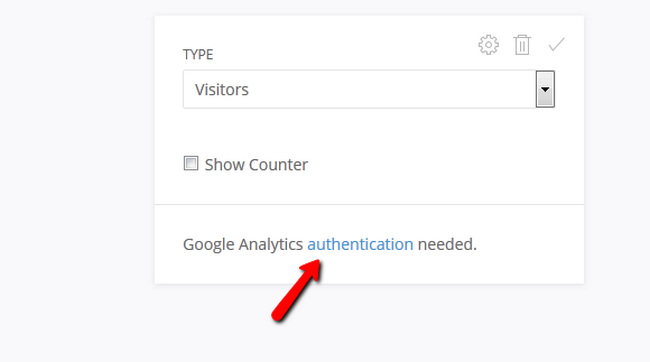
Now you will see that the Analytics Extension is actually Google Analytics. To configure it you can click on the cogwheel icon or the authentication link.
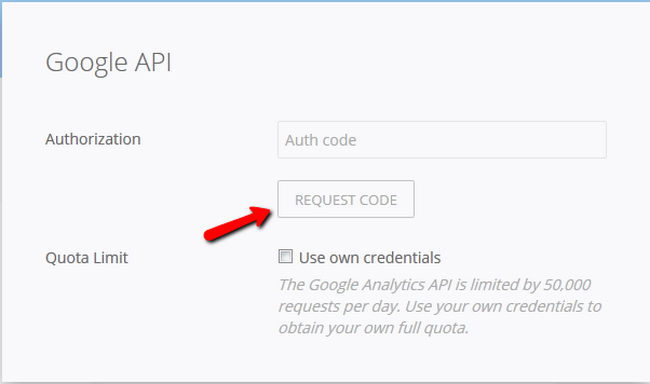
Here you can request an Authorization Code or use your Google Analytics account to get full quota as the first option is limited to 50 000 requests per day.
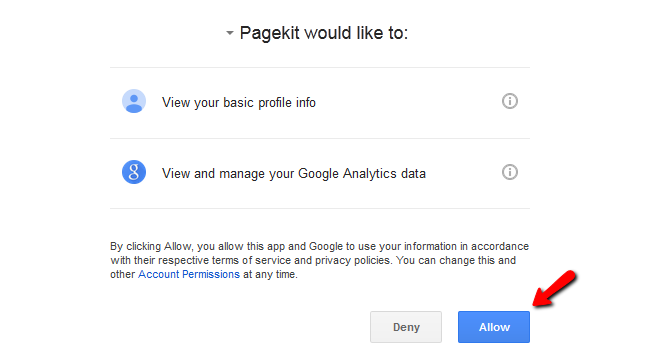
If you request a code you will be prompted to allow Pagekit certain permissions in order to connect it to your Google Service.
Afterwards, you will be redirected to the code, which you must copy and paste in the appropriate field in Pagekit. The result should look like this.
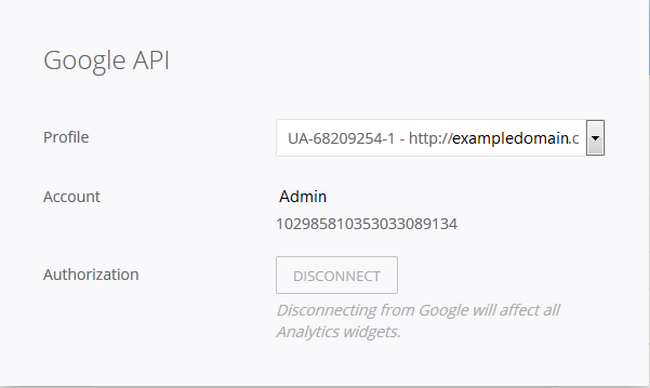
Now you will be able to configure exactly what information you want the widget to show.
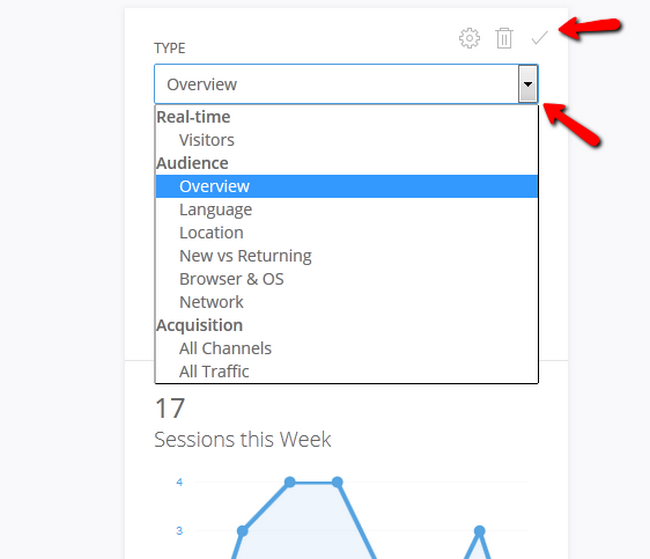
Click the Checkmark icon when you are ready to save your settings.
Move, Edit and Delete Dashboard Widgets
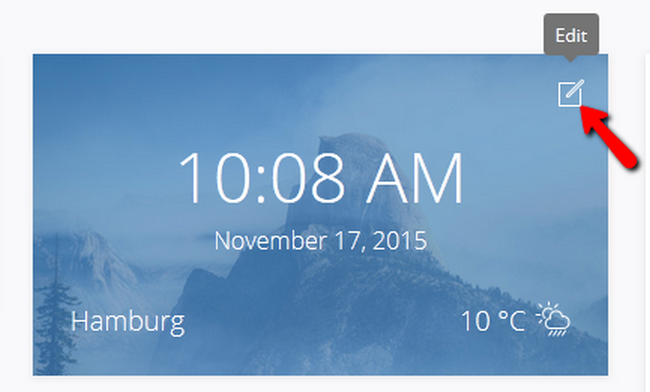
Moving widgets is seamless as you will only need to click and hold the widget of your chose and drag it to the appropriate position. You can edit the settings of a widget by clicking on the edit icon.
Now we can change the location in the widget and even the measuring units for the information provided in it.
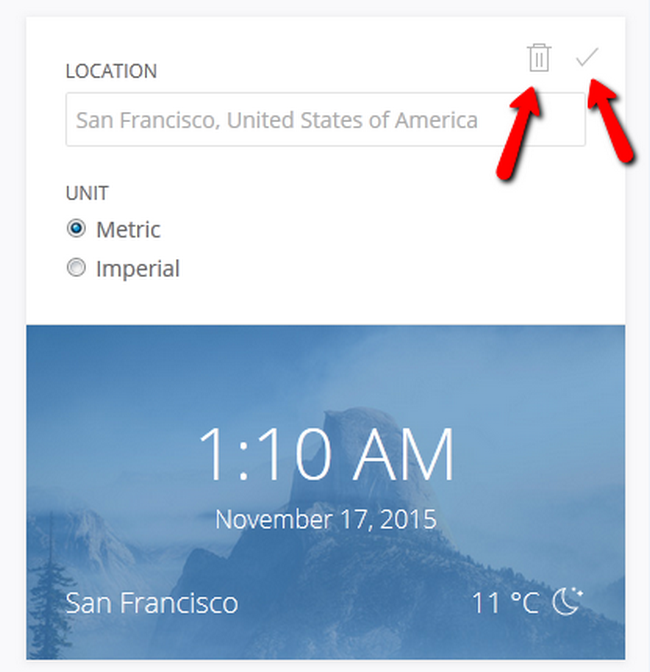
Click on the Checkmark Icon when you are ready to save your new settings or click on the trash bin icon if you wish to remove this widget.
Congratulations, you now know how to Manage Widgets and how to enable Google Analytics for your Pagekit based website.

Pagekit Hosting
- Free Pagekit Installation
- 24/7 Pagekit Support
- Free Domain Transfer
- Hack-free Protection
- Fast SSD Storage
- Free Cloudflare CDN
- Free Pagekit Transfer
- Immediate Activation
