How to Manage Extensions in Pagekit
Updated on Dec 10, 2015
The Extensions of Pagekit will help you with specific tasks that were not included in the core version of the application (excluding the Blog extension which is installed by default). You can Install and Uninstall them at will and some of them will prove to be a valuable addition to your website.
To manage your Pagekit Extensions, you need to be able to:
Install an Extension
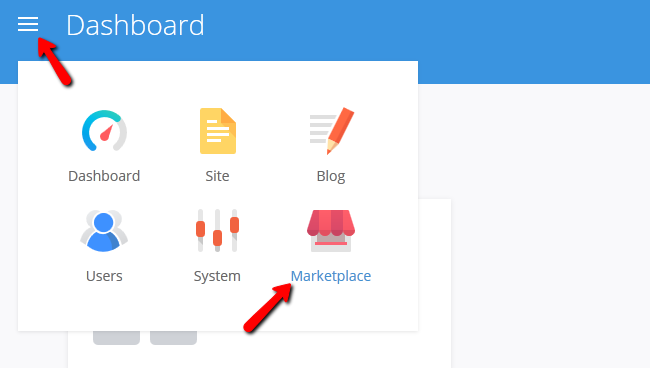
To access the Extensions market, you will need to log into your admin area and select the Marketplace section.

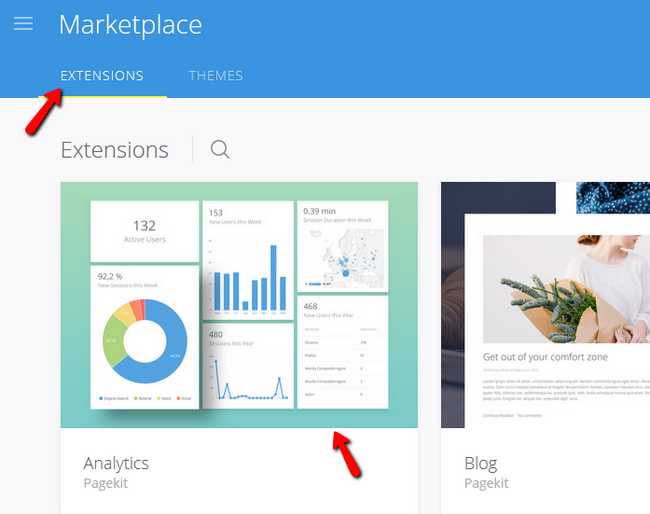
Now go to the Extensions tab and click on the Analytics Extension.

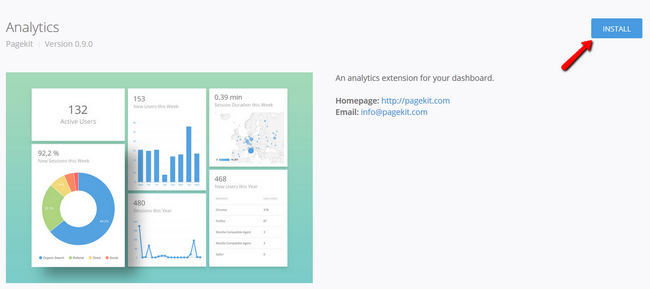
Now you will see more information regarding the extension and you will see and Install button which you must click.

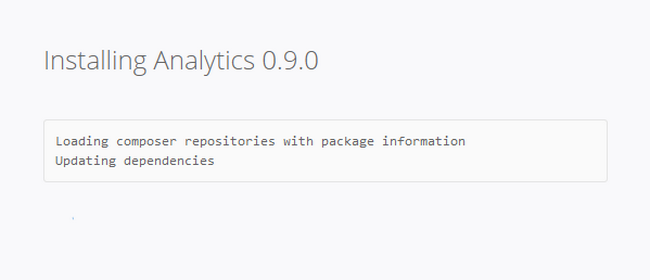
The installation process will take a few seconds and during this time you will see extra details in the Installation log.

Enable an Extension
After installing some extensions you will also need to enable them so they can work properly. To do that, you will need to navigate to System → Extensions.

Click on the red status light to enable the extension and it will change to a green status light indicating that you have successfully enabled this extensions. To get the extension showing on your admin dashboard, you will need to add a widget for it.
Remove Extensions
To remove an extension you must first disable it. After that you will see a new icon corresponding to that extension that looks like a trash bin. Click on it to delete the extension.

Now you will only need to confirm your choice by clicking yes when the pop up message asks you if you are sure you want to uninstall the extension.

Congratulations, you can now fully manage the extensions on your Pagekit website.

Pagekit Hosting
- Free Pagekit Installation
- 24/7 Pagekit Support
- Free Domain Transfer
- Hack-free Protection
- Fast SSD Storage
- Free Cloudflare CDN
- Free Pagekit Transfer
- Immediate Activation
