How to create full osCommerce backup
Updated on Dec 10, 2015
This tutorial will review the process of creating a full backup of your osCommerce website. The process is recommended, before making major changes on your website. This way, if something goes wrong, you will be able to restore your website to a fully operational state from the backup.
To Create a Full osCommerce Backup, you need to:
Backup the osCommerce Files
The first step is to create a backup of your osCommerce files. The important thing here is to locate the directory, where you have installed osCommerce and then download it on your local computer. If your website is accessible directly via the primary domain of your account, this indicates that the osCommerce files are in the public_html/ directory of your account. However, this may differ if you are using subfolder or subdomain for your website.
Download Files
There are two ways of downloading your files to the server - using an FTP client, following our FTP tutorial, or downloading directly through your cPanel account → File Manager, following our cPanel tutorial.
Backup the osCommerce Database
To create a backup of your database, you will first have to get it's name. For that purpose, you can review the osCommerce configuration files, which contain the details for the database set on your website.
When you get the name of your database, you can proceed further with the backup. Access your cPanel account and locate the Databases section. Click on the phpMyAdmin service.

The system will display a list of all databases on your account. Select the one that is set on your osCommerce website to proceed further.

You will be presented with a list of all tables on your database. Click on the Export button at the top menu.

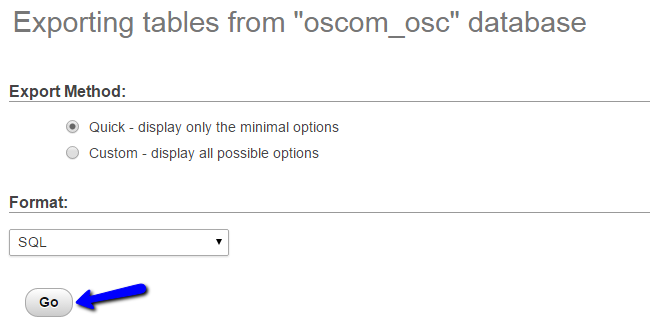
Click on the Go button to download a dump backup copy of your database on your local computer.


osCommerce Hosting - free features
- Free Install
- 24/7 Expert Support
- Free Domain Transfer
- Hack-free Protection
- Fast SSD Storage
- Free Transfer
- Free Cloudflare CDN
- Immediate Activation