SocialEngine 4.8.9 Upgrade – Patch for YouTube v3.0 API
Since YouTube deprecated the v2.0 API, SocialEngine clients were experiencing difficulties adding YouTube videos to their websites. Of course, the SocialEngine team was already aware of that and took immediate actions to resolve any issues related to the YouTube API. This was the main priority in SocialEngine v4.8.9, as it is now patched up for the latest YouTube v3.0 API.
The Issue
When trying to add videos to your SocialEngine installation prior version 48.9, you will receive an error message. Reviewing the main.log of SocialEngine, the actual error you will see is:
exception 'Zend_Gdata_App_HttpException' with message 'Expected response code 200, got 410This is because older SocialEngine releases were not updated for the YouTube v3.0 API, which required some modifications. The issue was reported in GitHub, but the SocialEngine team were already aware of that and working to release a fix in new version product. The official SocialEngine 4.8.9 changelog provides more information about the fixes you get with it.
Today, we will review the steps for resolving the issue by adding YouTube videos on your website. We will review them for you, so you can fix the YouTube video upload completely.
Upgrade Video Sharing Module
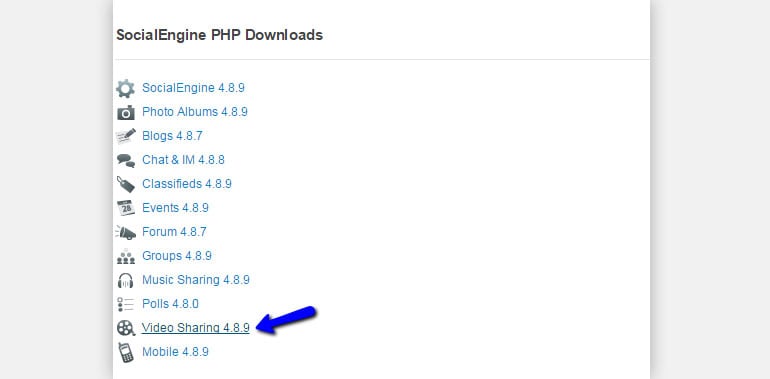
To resolve any issues that you are experiencing when adding YouTube videos to your website, there are a few things you need to do first. You will have to update the Video Sharing module on your website. Log into your SocialEngine Client Panel and download the latest release.
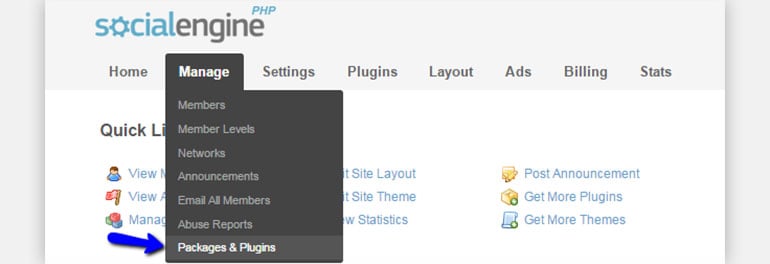
The next thing is to log into the administrative area of your website. Click on the Manage menu item and then Packages & Plugins.
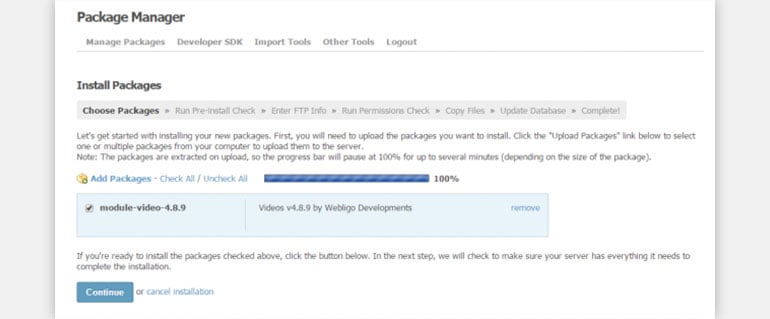
Upload your Video Sharing v4.8.9 package and complete the installation the usual way. You can also have a look at our tutorial on how to install SocialEngine modules, for more detailed information about the process.
Get YouTube API Key
The second step is to get a YouTube API Key. If you do not have a Google Account, you will have to create one. When you have an account and you are logged in, you can navigate to the Developer Console so you can create your API key. Click on the Create Project button to proceed further. First, you will have to set a name for it.
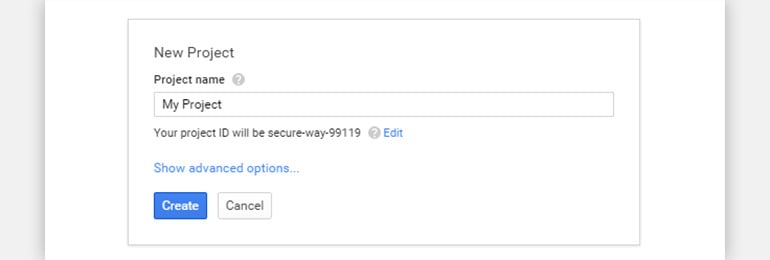
You have just created a new project and you will now have to give it the authorization to use the YouTube API. For that purpose, click on the APIs & auth button on the left-side menu and then APIs.

You will be presented with a list of options. Locate and select the YouTube Data API.
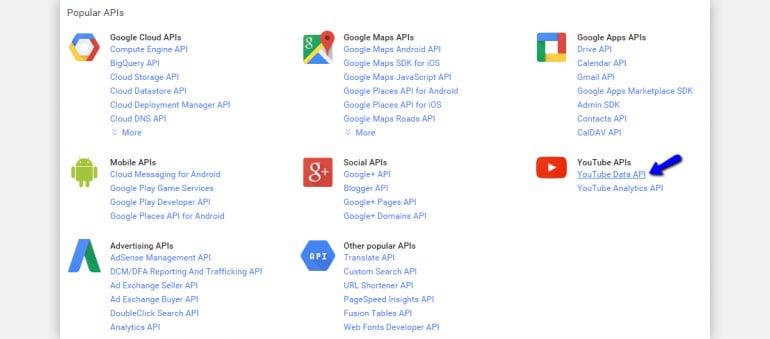
Click on the Enable API button and allow some time. Once it is enabled, click on the Credentials button on the left-side menu.

In the Public API Access section, click on Create New Key button. A pop-up window will come up on the screen. You need to select the Server Key option on it.
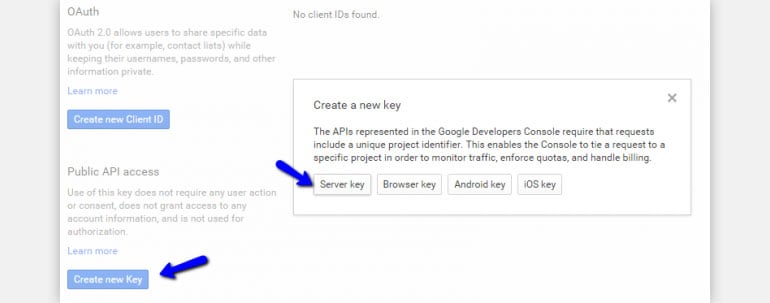
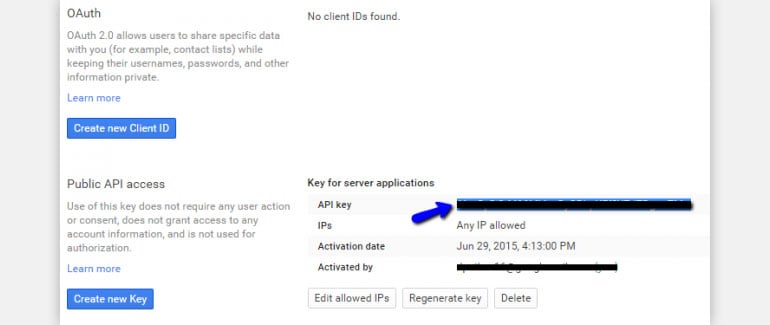
You will be prompted for additional options, but you need to leave them blank. Do not enter any information and simply click on the Create button. Your API key will be created successfully and displayed on the same page.
Configure the Video Sharing Module
When you obtain the YouTube API key, you can proceed with the configuration of your Video Sharing module. For that purpose, log into the administrative area of your SocialEngine website. Click on Plugins and then select Videos.

Select the Global Settings tab and then enter your YouTube API key.
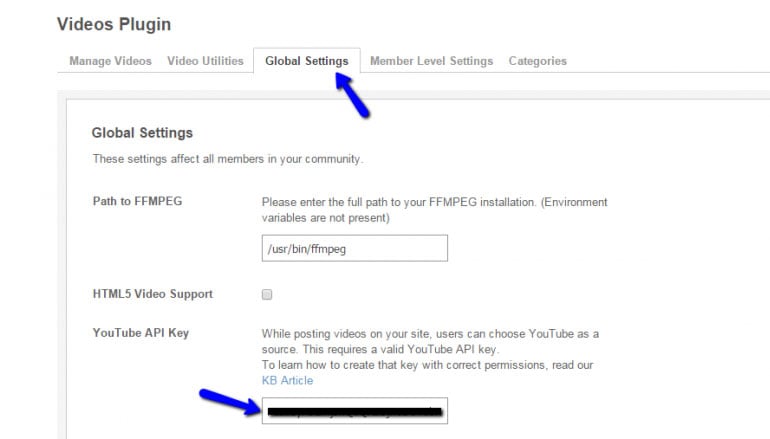
Save the new settings and test adding YouTube videos on your website. This will work without any issues at all now. Still, if you experience any difficulties at all, you can open a ticket to our Technical Support team so they can assist you with the configuration. If you are not a client of our company, we definitely suggest reviewing our SocialEngine Hosting plans for better performance and security for your website, as well as full 24/7 Technical Support assistance whenever you need that!

The latest tips and news from the industry straight to your inbox!
Join 30,000+ subscribers for exclusive access to our monthly newsletter with insider cloud, hosting and WordPress tips!

No Comments