How to Configure the SMTP Settings in Zen Cart
Updated on Dec 10, 2015
In this tutorial, we will review the steps on how to configure the mail service of your Zen Cart website with SMTP. The Simple Mail Transfer Protocol will ensure that all system emails from your website are sent via a specific email account and are properly delivered to your customers.
To configure SMTP for your Zen Cart Store, please:
Step 1 Create an Email Account
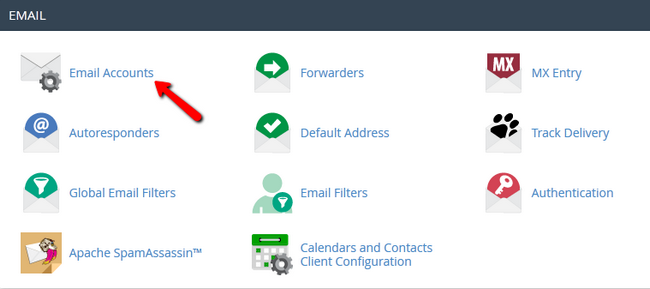
To create an email account on your hosting package, you need to log into your cPanel and navigate to the Email Accounts icon.

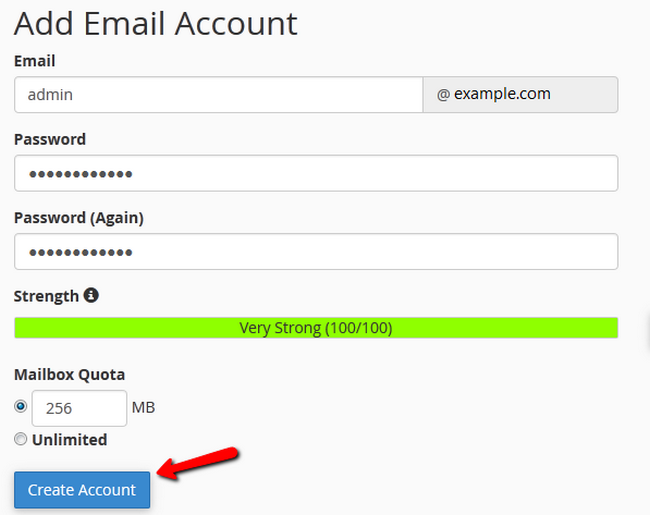
Fill in the information for the new email account and then click on the Create account button to keep the changes.

Your new email account will be displayed just below the creation form. Next to your email address, click on the More button and then Access Webmail, from where you will be able to access that email account.
Step 2 Enable SMTP
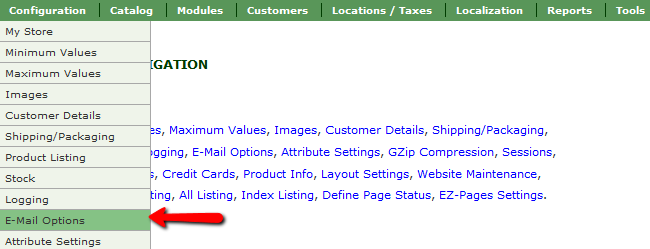
To configure the mail service of your website with SMTP you will need to log into the administrative area of Zen Cart and go to the Configuration>E-mail Options section.

Here you will see all of the email options for your website, the one you will need to change first is the E-mail Transport Method located at the very top of the list. Just click on the Info icon and then hit the edit button.

Now scroll down to the bottom of the list of options and configure these 4 settings:
- SMTP Email Account Mailbox – The full email address name
- SMTP Email Account Password – The email account password
- SMTP Email Mail Host – If you host your application on our Zen Cart Hosting plans, you can input just your domain name here. If your host has a non-standard SMTP configuration, please consult with our technical support team for additional information.
- SMTP Email Mail Server Port - The default SMTP port is 25

Congratulations, you have enabled SMTP for the mail service of your Zen Cart Store.

Zen Cart Hosting
- Free Zen Cart Installation
- 24/7 Zen Cart Support
- Free Domain Transfer
- Hack-free Protection
- Fast SSD Storage
- Free Cloudflare CDN
- Free Zen Cart Transfer
- Immediate Activation
