How to Manage Banners in Zen Cart
Updated on Dec 10, 2015
With more traffic going towards your store, you might start thinking about adding banners for advertising your partners or your other websites. Adding and configuring a banner won’t take you more than 5 minutes thanks to Zen Cart’s Banner Manager.
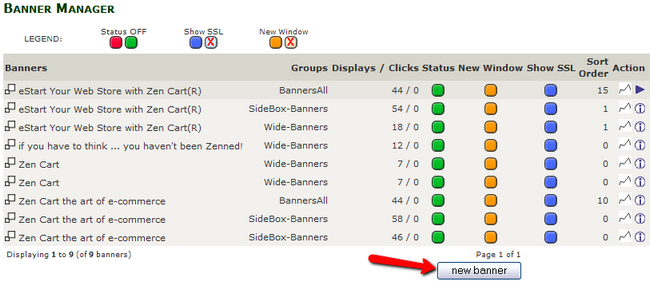
To start off, you will have to login to your Admin Dashboard and navigate to the Tools>Banner Manager from your main admin panel.

Once there you will be able to see all of the current banners on your website along with statistic regarding their views/clicks and status (active/inactive).

Click on the new banner button to start configuring a new banner.

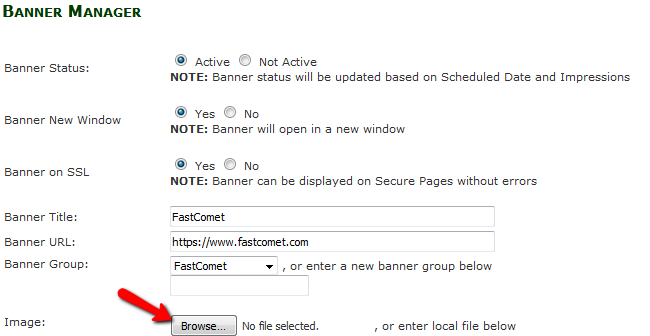
Here you will find the following settings:
- Banner Status – Set the banner to Active/Inactive
- Banner New Window – If set to Yes the banner will open in a new window (recommended)
- Banner on SSL – Set to Yes to make the banner visible with active SSL on the website
- Banner Title – The title of the banner
- Banner URL – The location to which the banner will lead the customer after being clicked
- Banner Group – The group in which you want to situate the banner (this makes it easy to manage the banner if the future)
- Image – Select the image for the banner with the Browse… button (if you want to use an image banner)

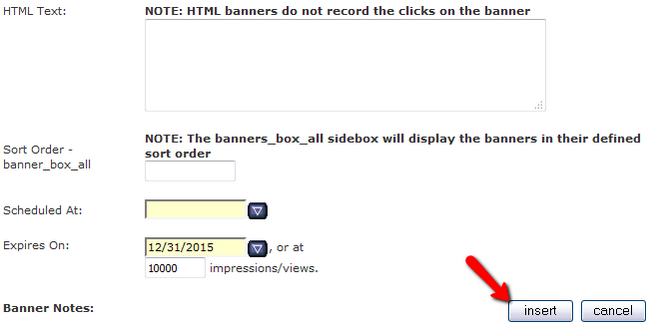
- HTML Text – If you want to use an HTML banner copy the HTML text here (HTML banners won’t record clicks)
- Scheduled At – If you wish to schedule this banner to activate on a specific date, select the date from the calendar here
- Expires On – If you want the banner to expire on a specific date or after a certain amount of impressions/views add the value in the bottom field.
When you are ready click on the insert button to finish the configuring and create the banner.

Zen Cart Hosting
- Free Zen Cart Installation
- 24/7 Zen Cart Support
- Free Domain Transfer
- Hack-free Protection
- Fast SSD Storage
- Free Cloudflare CDN
- Free Zen Cart Transfer
- Immediate Activation
