How to Restore a Backup of X-Cart
Updated on Dec 10, 2015
This tutorial will review the process of restoring a full backup of your X-Cart website. This process may be required if there was an issue with your website and you wish to restore a backup to get it up and running again.
To fully restore your X-Cart website, you should:
Restore your Files
The first step of the process is to restore the files of your X-Cart backup. First, you need to decide the location, where you wish to restore your X-Cart website. If you wish to access it directly via the primary domain of your account, you need to restore the files in the public_html/ directory of your account. This may differ if you are restoring your files on a subdomain or subfolder.
Once you decide where you wish to restore your X-Cart backup, you need to ensure that the directory is empty. Then simply upload the files of your backup to it.
Upload Files
There are two ways of uploading your files to the server - using an FTP client, following our FTP tutorial, or uploading directly through your cPanel account > File Manager, following our cPanel tutorial.
Restore the Database
The next step is to restore the database of your X-Cart backup. For this purpose, you need to create a new database and a user assigned to it with full privileges.
MariaDB Configuration
You can create a new database and a user assigned to it via cPanel. Simply follow our Database Wizard tutorial for information on that.
Once you create your database, you can proceed with the restore of your X-Cart backup. Log into your cPanel account and locate the Databases section. Click on the phpMyAdmin service.

The system will display a list of all available databases on your account. Select the newly created one.

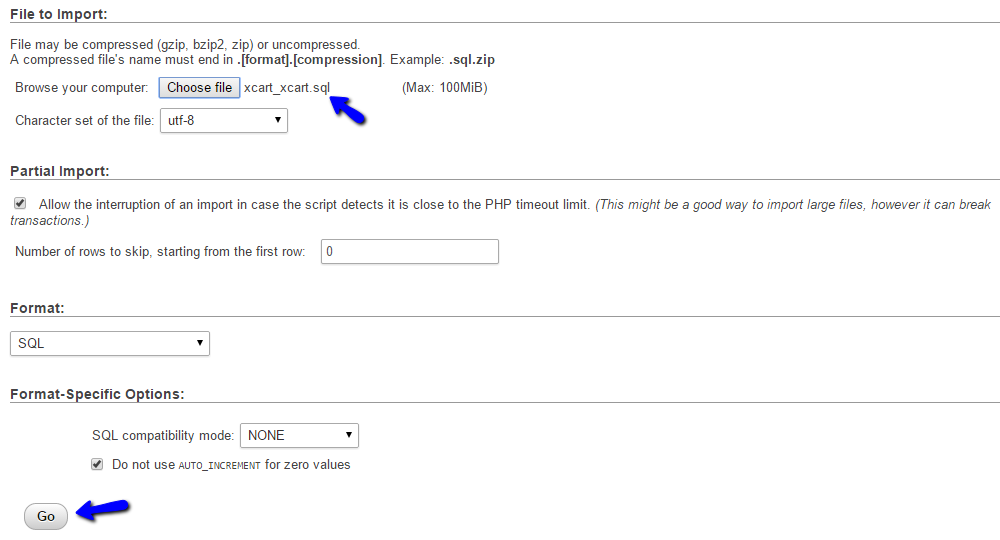
Click on the Import button from the top menu.

Select the database backup from your local computer and click on the Go button to proceed with the import.

Link the Files and Database
Up until now, you will have a location on your account that contains all of the files of your X-Cart backup. You will also have a database that contains the required data for the restore. It is now time to link them together and complete the restore.
For this purpose, you will have to edit the X-Cart main configuration file. You need to change two sections:
- database_details
The database details section will allow you to enter the details of the newly created database. The lines you need to edit are:
[database_details]
hostspec = "localhost"
socket = ""
port = ""
database = "xcart_xcar424"
username = "xcart_xcar424"
password = "S1-1WJ3PV!"
table_prefix = "xc_"
- host_details
The host details are about the domain, which is used on your website. You need to edit the following lines of code.
[host_details]
http_host = "xcart.fcomet.com"
https_host = "xcart.fcomet.com"
web_dir = ""
domains = ""

X-Cart Hosting - free features
- Free CS-Cart Install
- 24/7 Expert Support
- Free Domain Transfer
- Hack-free Protection
- Fast SSD Storage
- Free CubeCart Transfer
- Free Cloudflare CDN
- Immediate Activation