How to install WP Rocket automatically
Updated on Jun 28, 2023
This section of our WP Rocket tutorial will review the process of installing WP Rocket on your WordPress website. The process is easy; we will show you the installation steps.
To auto install WP Rocket plugin, you have to :
Obtain a License
WP Rocket is a paid product. Therefore, you need a valid license for your domain. FastComet is an official WP Rocket partner, and we provide a 20% discount on all licenses for our existing customers. You can find the discount within your Client Area if you have an active account with us. Click Products from the bar on the left, and then View Addons. You can also contact us to get more information or if you have any suggestions.
Initiate the Install
The easiest way to install WP Rocket is to allow your website to handle the process automatically. That will ensure the plugin is installed correctly.
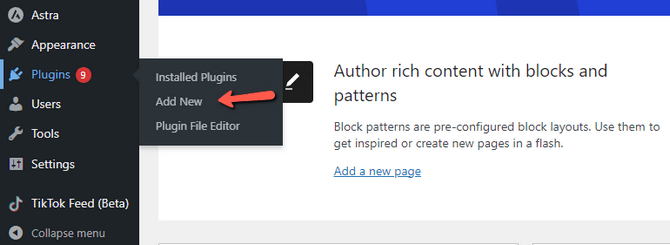
Once you download the WP Rocket installation package, go to the dashboard of your WordPress installation. Click on the Plugins tab and then Add New button.

Click on the Upload Plugin button at the top of the page to proceed with the installation.

Click Choose File and upload the WP Rocket installation package. Click on Install Now to proceed. The system will complete the installation of the WP Rocket plugin for you. You should see a successful message to confirm that.
Activate the Plugin
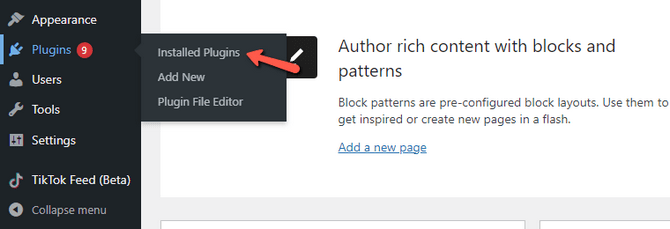
To activate the WP Rocket plugin on your website, go to the Plugins page of your website's dashboard. Then go to Installed Plugins.

Locate WP Rocket from the list of installed plugins on your website. Under the name of the plugin will be an Activate button. Click on it to proceed with the activation.

WP Rocket Hosting
- Free Installation
- 24/7 Support
- Free Domain Transfer
- Hack-free Protection
- Fast SSD Storage
- 20% WP Rocket Discount
- Immediate Activation
