How to install WP eCommerce
Updated on Mar 13, 2019
In this tutorial we will show you how to install WP eCommerce in two different ways. The installation process is eased by the WordPress Plugins Manager and won’t take more than 5 minutes.
To install WP eCommerce, you need to complete the following steps:
Let’s begin!
Step 1 Automatic Installation
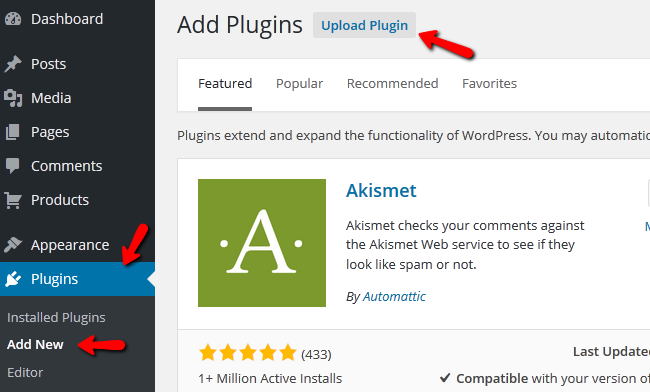
The first way to install this eCommerce plugin is by login into your WordPress admin dashboard and nabigating to Plugins>Add New section of your main panel.

Now type WP eCommerce in the search bar and click enter. When the results are shown, find WP eCommerce and hit the Install Now button.

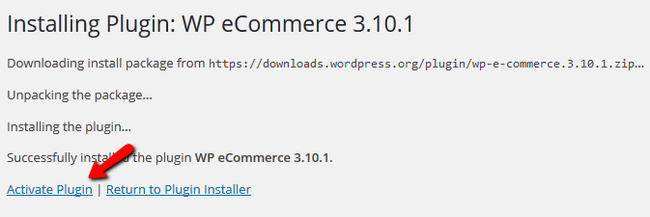
Now after the plugin has been successfully installed, select the ActivatePlugin option on the bottom of the install log.

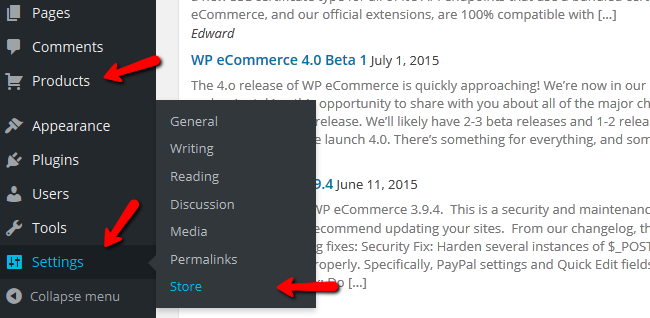
Congratulations, WP eCommerce is active and ready to use. You will now see an additional Products section in your main menu and a new tab in your Setttings section called Store.

Step 2 Manual Installation
Warning
After years of development, the wpecommerce team has moved to other projects and the official website is no longer available. However, the plugin can still be downloaded and installed as per the instructions in step one
The second way to install WP eCommerce is by visiting their official websiteand downloading the plugin from there by clicking on the Download button located at the top of the page.

Now login to your admin dashboard, navigate to Plugins>Add New and hitting the Upload Plugin button.

Click on the Browse… button and then select the archive file from your PC. Then click the Install Now button to initiate the installation.

Again, you will need to Activate the plugin and you will have the WP eCommerce active in a few seconds.

WP eCommerce Hosting
- Free Installation
- 24/7 WP eCommerce Support
- Free Domain Transfer
- Hack-free Protection
- Fast SSD Storage
- Free Cloudflare CDN
- Free WP eCommerce Transfer
