Integrate Google Analytics with WP eCommerce
Updated on Mar 13, 2019
Google Analytics is a freemium tracking service that can analyzes the traffic on your website and improve your client engagement ratings. In this tutorial, we will show you how to enable Google Analytics for your WP eCommerce website.
To integrate the Google Analytics script in your Store, you need to complete the following steps:
Step 1 Installation and Activation
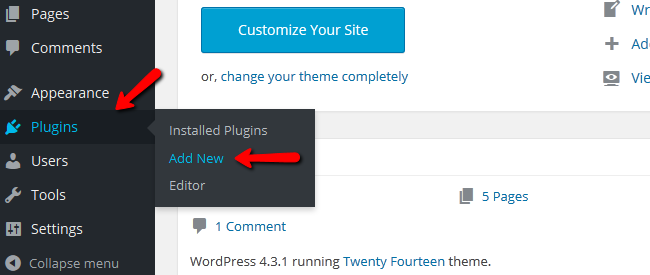
Firstly, you will need to login to your WordPress admin dashboard and navigate to Plugins>Add New.
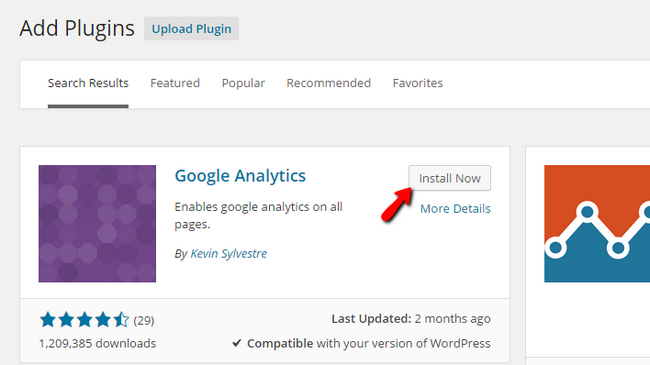
In the Plugins page you will have to search for Google Analytics and click the Install Now button.
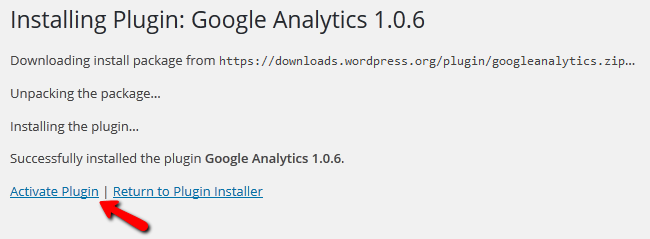
Once the installation process is completed you will need to hit the Activate Plugin link below the installation log.
Step 2 Configuring Google Analytics
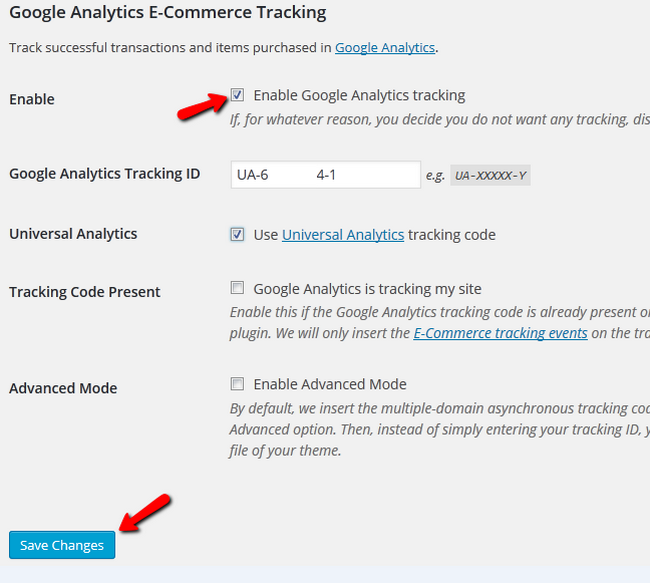
Now you will need to configure the plugin. In order to do that, you will need to navigate to Settings> Store>Marketing. Here you can see the Google Analytics configuration options. You will need to check the Enable box and copy your Google Analytics Tracking ID in the corresponding field. To obtain this tracking ID you have to create an account with Google Analytics

Hit the Sign in with Google Analytics button and then click Sign up.

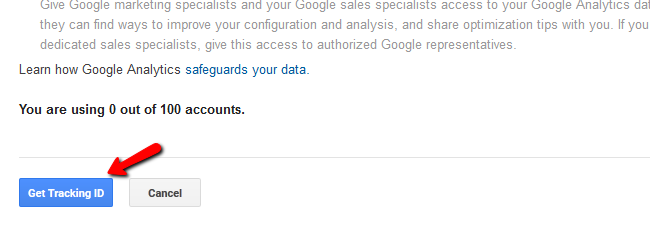
After you fill your account details scroll to the bottom of the page and select the Get Tracking ID button.
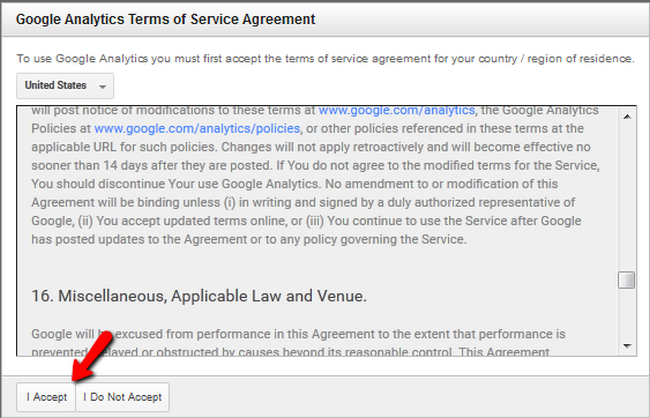
Now you will have to read and accept the Google Analytics Terms of Service if you agree with them. If you do not see the I Accept button and you cannot scroll down, use ctr and – to zoom out of the page. This is a known issue with smaller screens.
Now you will see your tracking ID and you should copy it to the field in your store settings.
You have successfully activated Google Analytics tracking service for your WP eCommerce Website. Congratulations!

WP eCommerce Hosting
- Free Installation
- 24/7 WP eCommerce Support
- Free Domain Transfer
- Hack-free Protection
- Fast SSD Storage
- Free Cloudflare CDN
- Free WP eCommerce Transfer
