How to Add Social Links to your WordPress Website
Updated on Dec 6, 2022
It's a good idea to make it possible for users to contact you via social media sites like Facebook, Twitter, Flickr, and others if you want to maintain contact with your site's visitors.
In this tutorial, we will show you how to add social links for the pages you have related to your website using an additional plugin called Social Profiles Widget.
To be able to add social links, you need to complete these steps:
How to Install the Social Profiles Widget
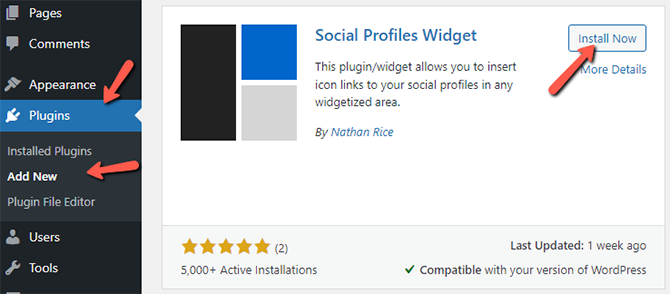
First, we will begin with the installation of the plugin. The process can be easily managed via your WordPress Admin Area by navigating to Plugins → Add New.
The next step is to find and install the Social Profiles Widget plugin on your website. We strongly advise checking out our other tutorial from this series, "How to manage your plugins in WordPress," if you're not exactly sure how to install plugins in WordPress.

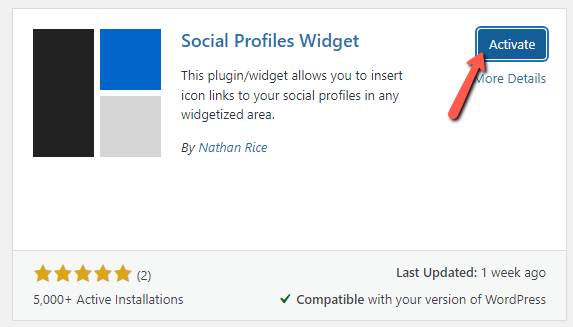
You must activate your plugin after installing it before the installation and activation processes are complete.

Once activated, this plugin adds a new widget to your list of widgets, which may be used in any widgetized area of your website. You can check out another tutorial from our WordPress series on the management of the widgets on your website if you're still unsure how to handle your widgets.
How to Configure and Activate the Social Profiles Widget
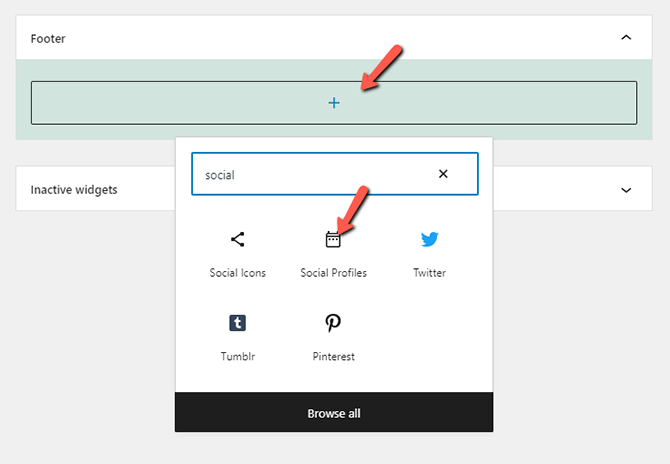
Once you go to Appearance → Widgets, you will be able to add your Social Profiles widget to a section of your website. In this case, we will include it in the Footer.

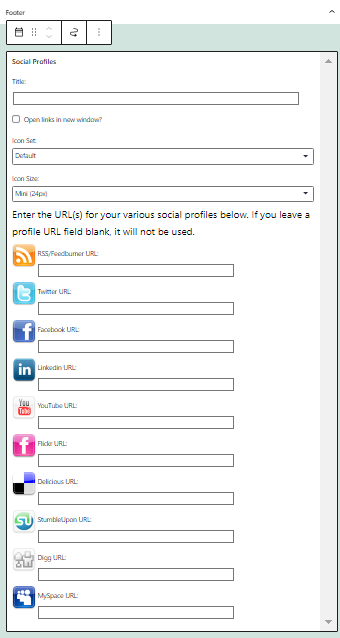
After you've added the Social Profiles Widget, you can go ahead and edit all the links you need to be shown on your website.

After you're done, simply click on the Update button.
Congratulations! You have successfully installed the Social Icons widget.

WordPress Hosting
- Free WordPress Installation
- 24/7 WordPress Support
- Free Domain Transfer
- Hack-free Protection
- Fast SSD Storage
- Free WordPress Transfer
- Free CloudFlare CDN
- Immediate Activation
