How to Manage Widgets in WordPress
Updated on Dec 6, 2022
WordPress widgets can be thought of as blocks that are typically added to the sidebars that your theme supports. The information shown in these blocks is typically associated with the widget's functionality, which is predefined in the widgets that are supported by the theme you are using.
This tutorial will demonstrate how to use the WordPress admin area to manage the widgets your website uses simply and practically.
To learn how to manage the widgets on your WordPress, please follow the steps provided:
How to Navigate the Widgets Page
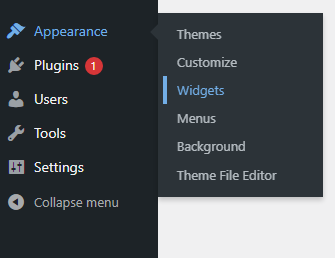
You can review the numerous helpful widgets that WordPress by default offers you by entering into your WordPress admin area and going to Appearance → Widgets.
You'll note that the available Widgets are presented on the page via the block inserter, while the usable Sidebars, according to your theme's functionality—where you'll need to drag and drop the widgets—are shown in the middle of the screen.

Understanding how to actually activate a widget on your website is the first thing you'll need to learn. You must comprehend the sections on this particular page in order to accomplish this.
- Widgets - This collapsible section serves to present you with the actual blocks your theme supports, for example, the following general types:
- Text
- Media
- Design
- Widgets
- Themes
- Embeds
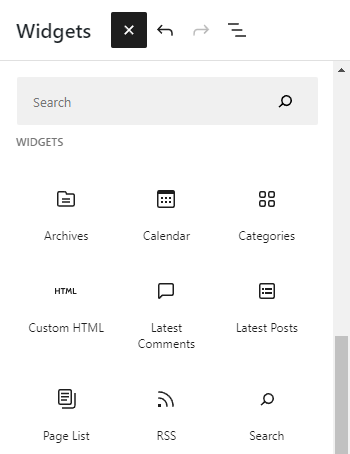
Upon selection, each widget offers a sentence on the right part of the screen, providing some context for the information it displays. The sidebars to which you can add this widget are displayed in the middle of the page.
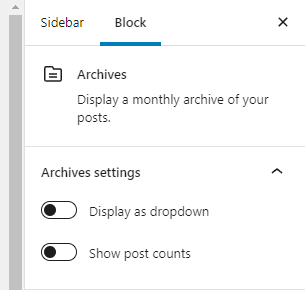
- Sidebar – If your theme offers this component, this one is the sidebar that appears to the right of or right next to the content on your pages.
- Footer – The widgets that appear in your footer are located in this area. For the sake of this tutorial, we will add the Archives, Search, and Latest Posts widgets to it as it is, by default, empty. This footer may be found directly beneath the title of your website because for this lesson we are using the "Twenty Twenty-One" theme.
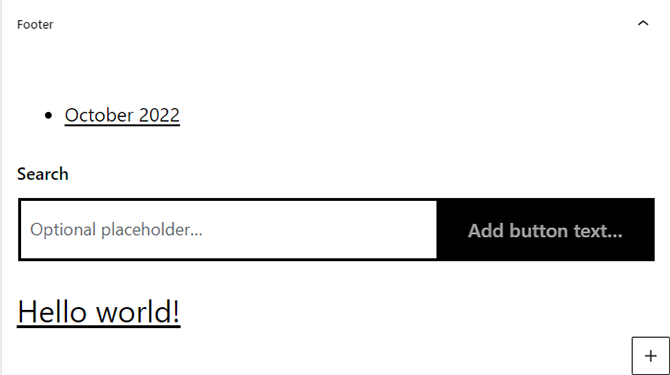
Next, if you check your website, you will notice that the new widgets have already appeared in the footer of your website.

- Inactive Widgets – The widgets you are actually deleting from your sidebar sections but for which you would like to keep the settings you have made for the specific widget are preserved in this area.

We'll show you how the actual process of adding widgets works now that we understand how the various widget locations are scattered throughout your theme.
How to Add a Widget to Your Page
You will be shown a list of all the widgets your theme supports on the left and the widget areas on the right if you visit the Appearance → Widgets page a second time.
You can drag and drop a widget from the supported list into a certain location (Footer) in one of two ways:
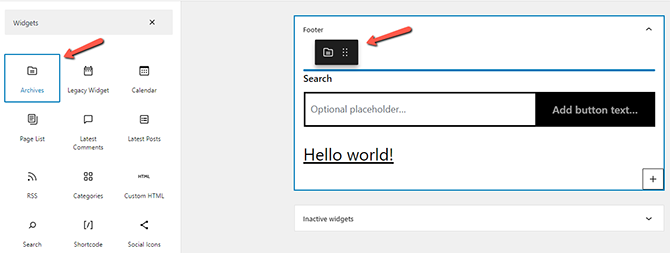
Alternatively, you may just click on a Footer and add a Block, then choose the desired widgets for the appropriate location:
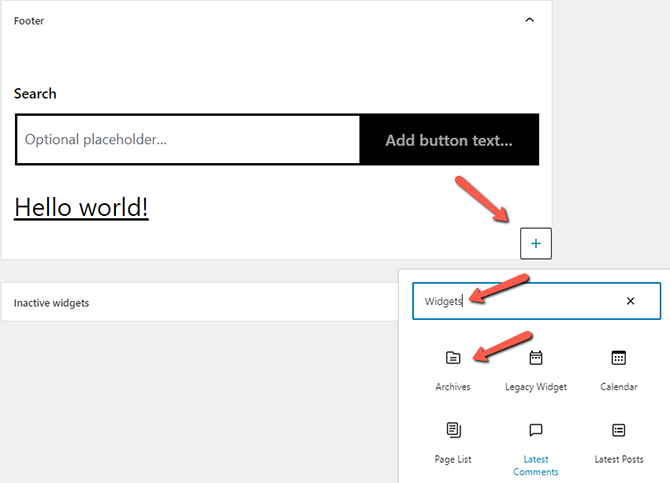
You can successfully add a widget to your sidebars by performing any of these actions. However, keep in mind that after a widget is created, its content needs to be configured. This information varies depending on the widget. Therefore, you need to modify it specifically for your requirements. The Title of the widget, which you must specify for each widget you use, will be the only shared component in this setup.
Congratulations, you can now fully manage the widgets on your website!

WordPress Hosting
- Free WordPress Installation
- 24/7 WordPress Support
- Free Domain Transfer
- Hack-free Protection
- Fast SSD Storage
- Free WordPress Transfer
- Free CloudFlare CDN
- Immediate Activation
