How to Integrate Google Analytics in WordPress
Updated on Dec 6, 2022
Google Analytics is a tracking tool offered by Google that is frequently used to monitor website access rates and the countries from which users are accessing your site. In-depth analyses and visualizations are also provided on the accessed parts, which are often pages from your website. This guide will teach you how to integrate that service with your current website.
You can sign up for the service at its official homepage.
The service will be incorporated utilizing a plugin that is publicly available for free. The plugin is called “Site Kit by Google – Analytics, Search Console, AdSense, Speed,” and you can directly search for it via your WordPress Аdmin Аrea → Plugins → Add New.
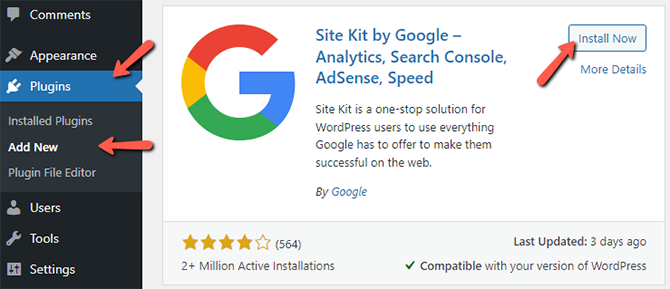
If you have missed our tutorial titled "How to install plugins on your website" in WordPress, please read it carefully before installing it.
When the Google Site Kit plugin is installed and activated, a message will appear. This message will prompt you to Start Setup, so you should click on the button:
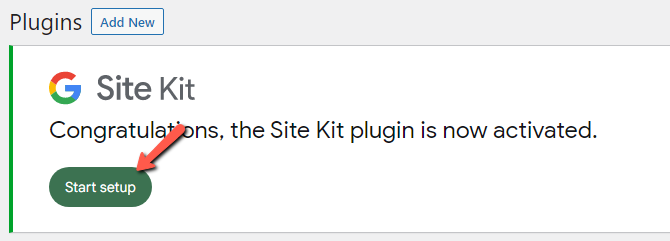
You will be taken to the plugin setup page, where you need to check the "Connect Google Analytics as part of your setup" field, and then click on Sign in with Google.
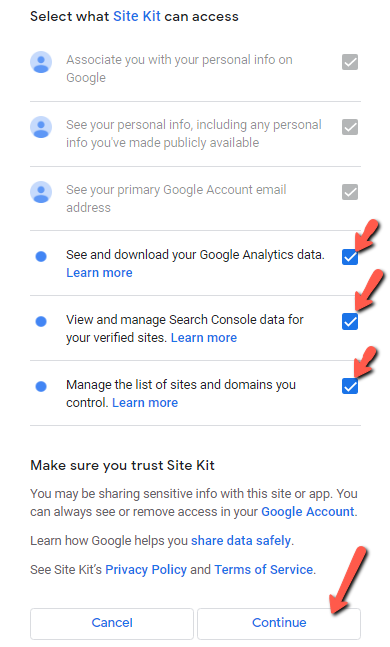
When signing in with your Google account, check the boxes as seen in the screenshot below and click on Continue:
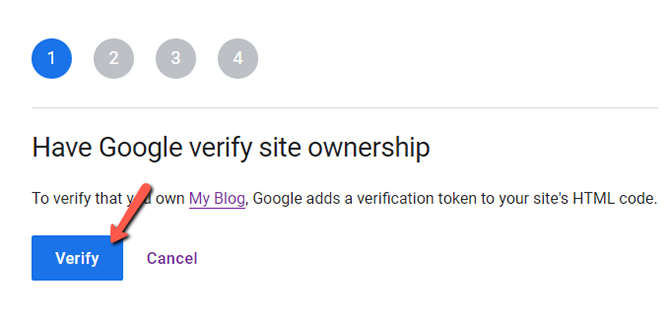
Then, have Google Verify Site Ownership:
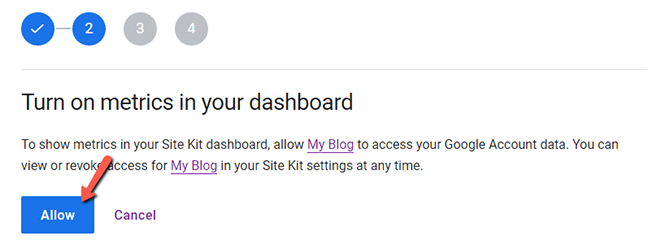
Turn on metrics in your dashboard:
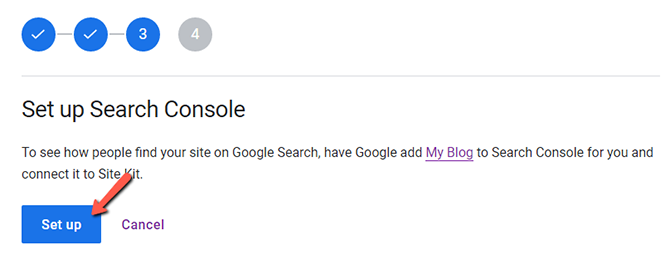
Set up Search Console:
Set up Google Analytics;
Create your Analytics Account:
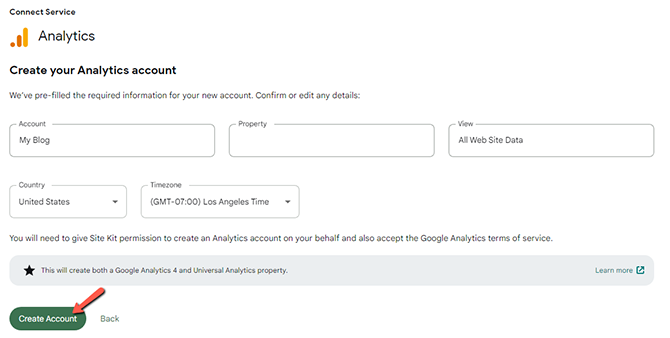
Google will ask you for two additional permissions, and then you need to accept their terms of service. After you do that, you will see the following screen:

- Go to your dashboard and click on the green button Complete Setup.
Congratulations, you have successfully integrated Google Analytics with your website!

WordPress Hosting
- Free WordPress Installation
- 24/7 WordPress Support
- Free Domain Transfer
- Hack-free Protection
- Fast SSD Storage
- Free WordPress Transfer
- Free CloudFlare CDN
- Immediate Activation
