Enable SSL and Force HTTPS
Updated on Apr 27, 2023
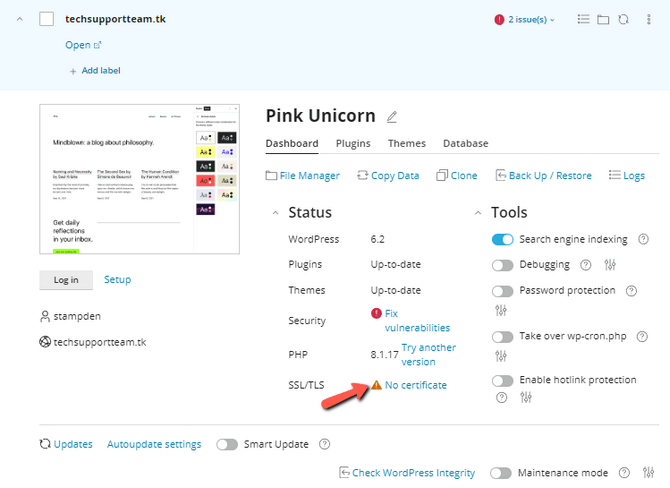
One of the most important things for the security of a website is to have an SSL certificate installed. It is also vital that the website itself is forced to resolve securely via HTTPS to take advantage of that SSL certificate. Fortunately, our services come with free and reliable AutoSSL certificates, which are easy to install. If your website doesn't have an SSL certificate installed, the WP Toolkit interface will inform you about it. There will be an orange triangle next to SSL/TLS. If it is not there, that means you already have an SSL certificate installed on the website!

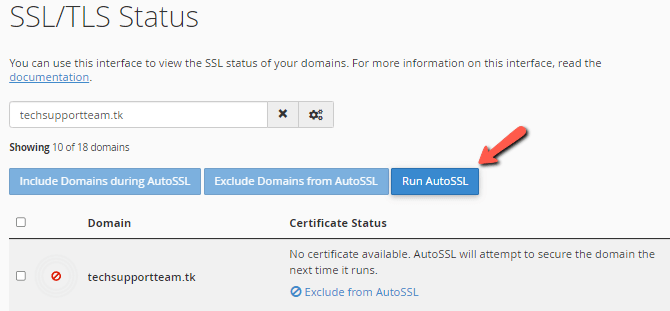
Not having an SSL certificate installed is elementary to fix, though, since all that needs to be done is click on the No Certificate itself. That will take you to the SSL/TLS Status page of your cPanel. On this page, you will see all the domains currently added to cPanel, and the ones that don't have an SSL certificate will have a red circle next to them. Click on Run AutoSSL to issue certificates to them.

The process will take a few seconds, depending on how many domains it has to install an SSL certificate on. Once it is finished, you will see a success message. The page will refresh itself in five seconds. When it refreshes, the certificates will be installed.
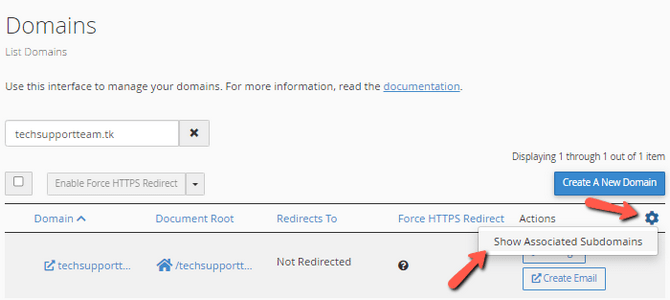
If we return to the WP Toolkit, the warning will still be there. That is because the Toolkit also recommends that forcing HTTPS also be enabled. To do this, return to the Domains tool, where you added the domain initially, and then click on the cog. Afterward, click Show Associated Subdomains.

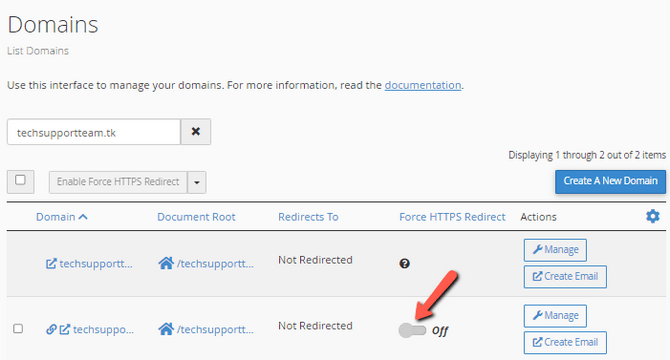
Then, find the subdomain which is associated with your actual domain and turn on the HTTPS redirect.

If we go back to the WP Toolkit, we will see that the SSL/TLS warning is no longer there and has been replaced with a reassuring green padlock. That signifies the WP Toolkit cannot find any issues with the SSL of the domain and the website.

WordPress Hosting
- Free WordPress Installation
- 24/7 WordPress Support
- Free Domain Transfer
- Hack-free Protection
- Fast SSD Storage
- Free WordPress Transfer
- Free CloudFlare CDN
- Immediate Activation
