How to Install Plugins in WooCommerce
Updated on Dec 8, 2022
Since WooCommerce is a WordPress plugin the installation of plugins for WooCommerce is an actual installation on your WordPress website. Thus the process is relatively simple, and we will cover it in the next few lines of this tutorial.
To complete this tutorial, you will need to:
Access the Plugin Installation page
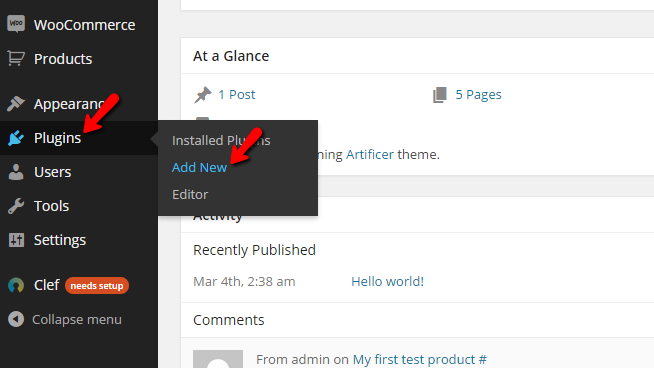
Typically in WordPress, you are provided with a dedicated page where you can manage your plugins, and respectively part of that page is the plugin installation section. In order to access the plugin management page you will need to login into your admin dashboard and navigate to Plugins>Add New.

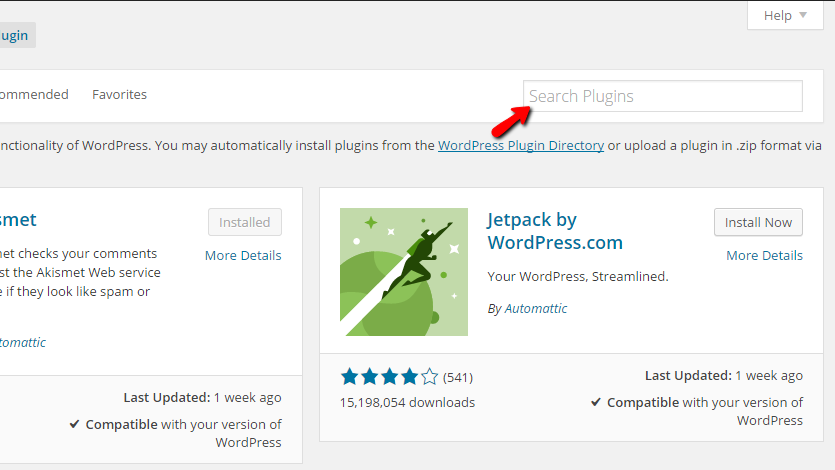
On that page, you will be able to search for plugins or upload a plugin if you have downloaded such.
Install a Plugin
Assuming that you would like to install a plugin, you should be able to search for the desired plugin by using the search box on that page.

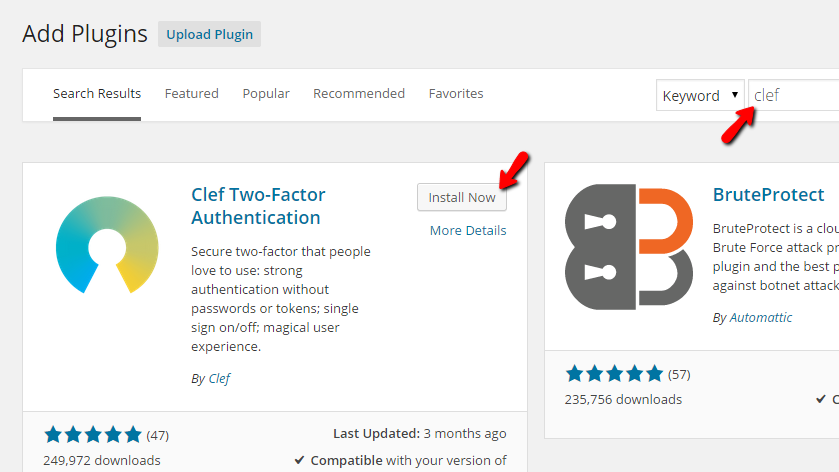
Once you type the plugin name and press Enter, you will be presented with the results from the search. If the name is correct, you should be provided with the desired plugin as the first result of the plugin you are looking for.

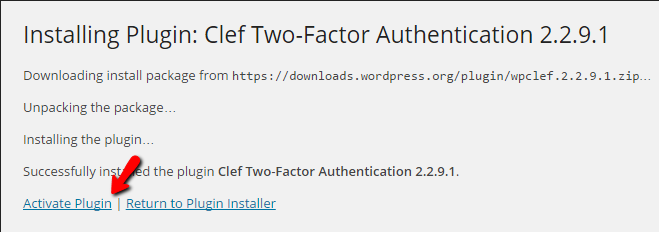
Once you find the plugin you are looking for, you should click on the Install button for that plugin so the plugin can actually be installed on your website. On the next page, you will be presented with a brief installation log, at the end of which, you will be able to activate the plugin immediately.

Typically when you activate the plugin, you will be redirected to the plugin configuration page, but that depends entirely on the developers of the plugin as sometimes you might get redirected to the plugins page of WordPress so you can verify that the plugin is successfully installed.
Congratulations! You now know how to install plugins on your WooCommerce Online Store!

WooCommerce Hosting
- Free Installation
- 24/7 WooCommerce Support
- Free Domain Transfer
- Hack-free Protection
- Fast SSD Storage
- Free WooCommerce Transfer
- Free Cloudflare CDN
