How to Manage WooCommerce Tags
Updated on Dec 8, 2022
The tags used by your products are just another way of categorizing the products you have on your Online Store. The same as the product categories WooCommerce provides you with the option to create and manage the products' tags on a dedicated page and in the next few lines of this tutorial we will show you how exactly you should be able to do that.
To manage the Tags of your Store, you need to complete these steps:
Add a New Tag
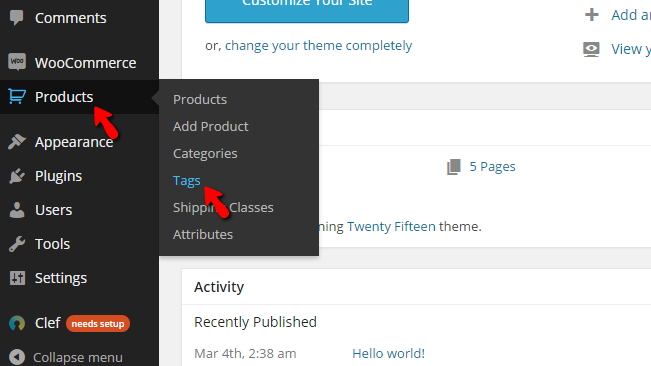
In order to manage the Tags on your Online Store you are provided with a dedicated page within the admin area of your WordPress-based website. Once logged in there you will need to navigate to Products > Tags.
You will most probably first notice how the page is vertically separated into two halves. The left section is used for creating categories and in order to do so, you will need to fill in the following options:
- Name - The name of the tag.
- Slug - The slug to the URL used by this tag.
- Description - The description of the tag.
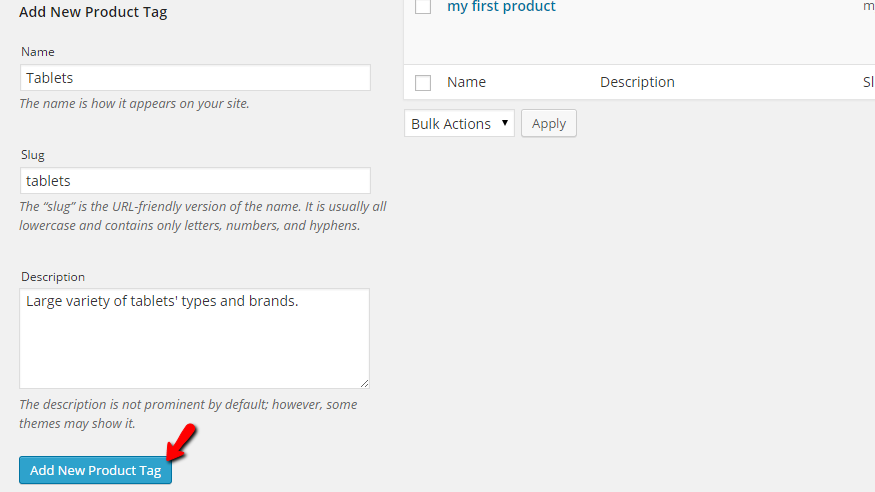
Once you are done with these simple settings please click on the Add New Product Tag button so you can be able to add the new tag.
Edit and Delete Existing Tags
Now that you know how to add Tags, it is time for you to learn how to edit and delete the already existing Tags. This is quite easy and we will begin first with the process of editing Tags. In the right section of the Tags management page, you will find a table view containing all of the tags you have currently on your Store.
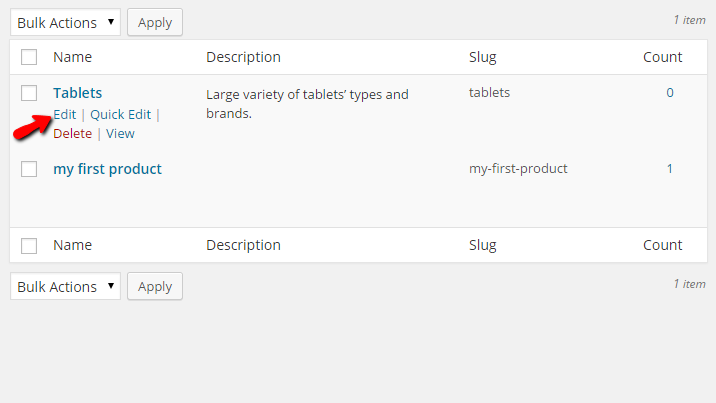
In order to edit a tag you will need to simply hover over the tag and click on the Edit button. Once this is done you will be redirected to a separate page called Edit Product Tag where you will be able to perform edits on the selected Tag.
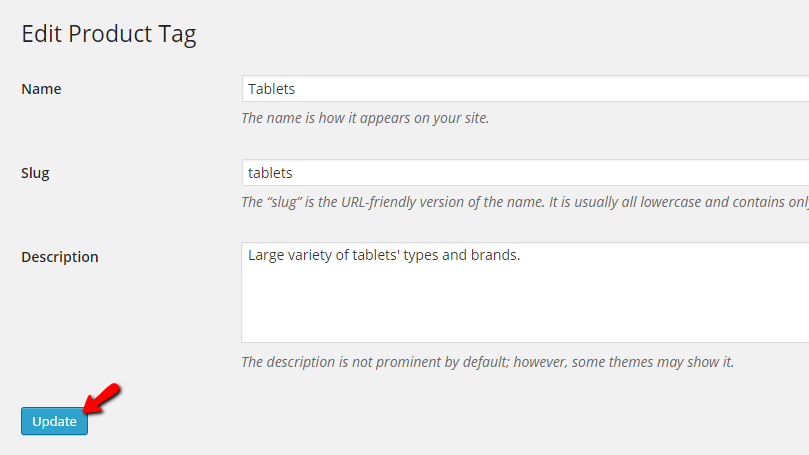
Once you are done editing the Tag, please click on the Update button so the edits can be saved.
The last action is the delete action, and you will be able to vide it when you hover over an existing Tag on the Tags management page.
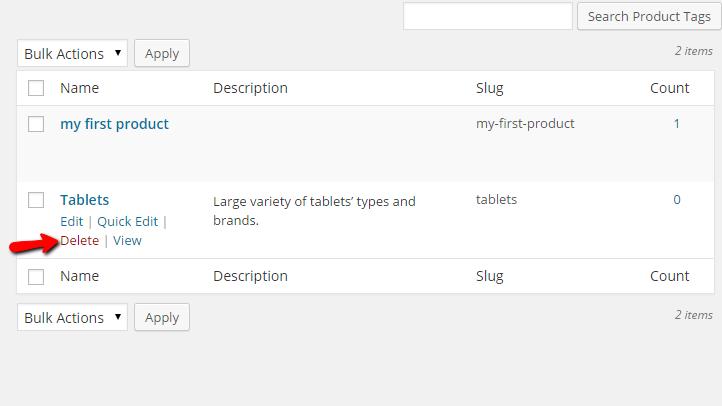
By simply clicking on the Delete link colored in red you will be able to easily delete any of the existing tags you have on your Online Store.
Congratulations! You now know how to fully manage the Tags on your WooCommerce-based Online Store!

WooCommerce Hosting
- Free Installation
- 24/7 WooCommerce Support
- Free Domain Transfer
- Hack-free Protection
- Fast SSD Storage
- Free WooCommerce Transfer
- Free Cloudflare CDN
