How to Activate Maintenance Mode in WooCommerce
Updated on Dec 8, 2022
The Maintenance mod of your Online Store will allow you to deploy changes on the live version of your website, however, without the option for any orders or website access to be generated. This is required so no orders or user registration can be lost during any changes you apply to the live version of your website. In the next few lines of this tutorial, we will show you how to enable the Maintenance mode of your Online Store using an additional plugin.
To Activate Maintenance Mode for your Store, you need to:
Install the Maintenance plugin
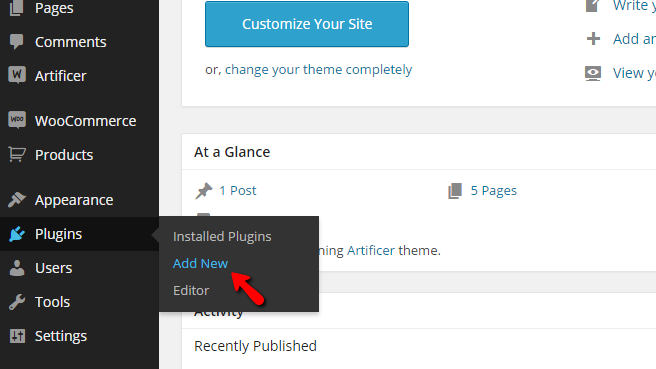
By default, neither WordPress nor WooCommerce has the Maintenance functionality integrated so you will need to add it additionally. In order for this to be achieved you will need to login into the admin area of your website and then navigate to Plugins > Add new.

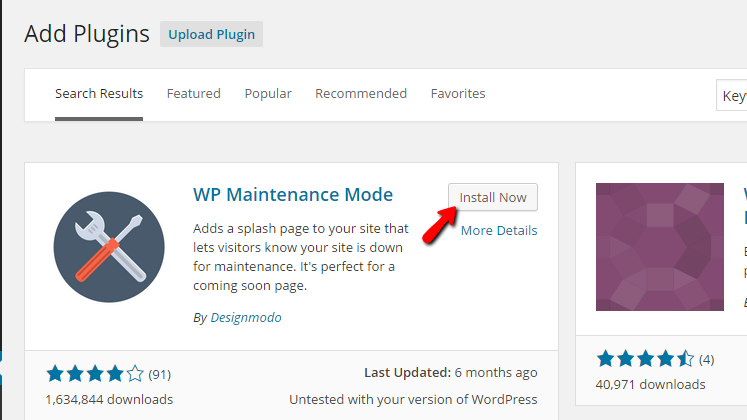
Then you will need to put a search term into the search feature. You can search for the word "WP Maintenance Mode," and probably the first result you will get will be the plugin you will need.

By pressing the Install button you will be able to install that plugin, and then from the Activate Plugin link, you will be able to activate it.
Step 2 Configuring the Maintenance plugin
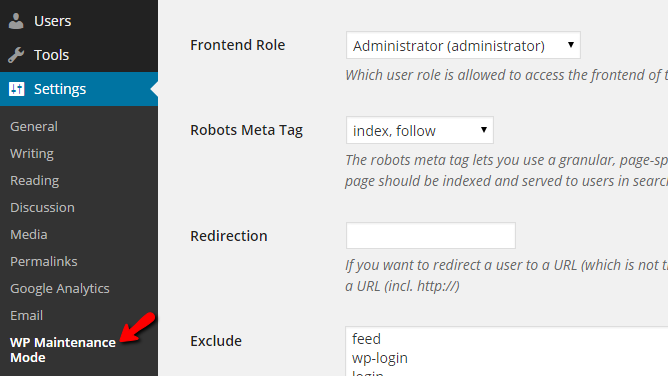
Once installed, the plugin can be reached via the Settings menu and then WP Maintenance Mode.

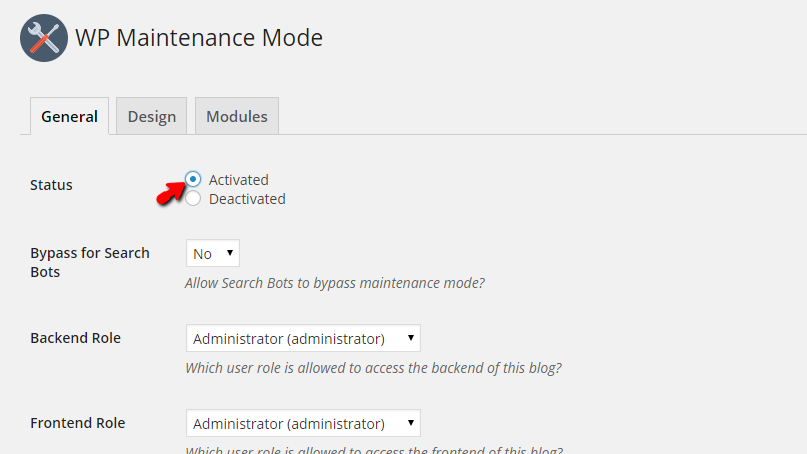
When you access the page for the Maintenance plugin, you will notice quite a lot of settings as the plugin is quite useful. You will be able to configure the plugin using the three tabs located at the top of the page - General, Design, and Modules.
To be able to activate the maintenance mode, you will need to choose the Activate Status from the General tab.

Once you are ready, scroll down to the bottom of the page and click on the Save Settings button.
Congratulations! You can now activate the Maintenance Mode of your WooCommerce online Store whenever you need to!

WooCommerce Hosting
- Free Installation
- 24/7 WooCommerce Support
- Free Domain Transfer
- Hack-free Protection
- Fast SSD Storage
- Free WooCommerce Transfer
- Free Cloudflare CDN
