How to Integrate Google Analytics in WooCommerce
Updated on Dec 8, 2022
Google Analytics is a tracking service provided by Google which will allow you to track the visitors on your website and to receive different statistics about the overall access rate of your website. In the next few lines of this tutorial we will show you how to integrate that service with your WooCommerce Online Store.
To track the traffic on your website, you will need to:
Install the Google Analytics Plugin
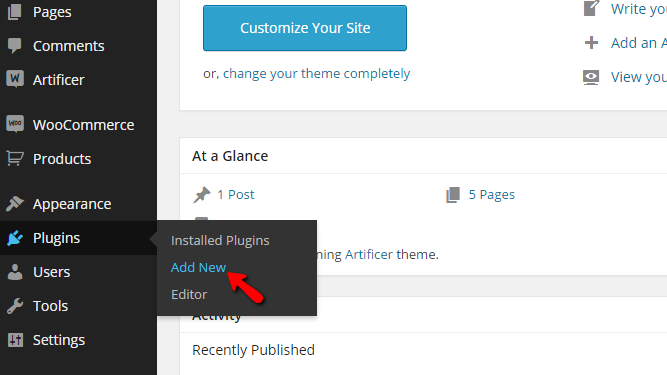
In order for the Google Analytics tracking service to be activated on your Online Store, you will need to first install the "Google Analytics" WordPress plugin. This will require for you to login into the wp-admin area of your website and navigate to Plugins > Add new.

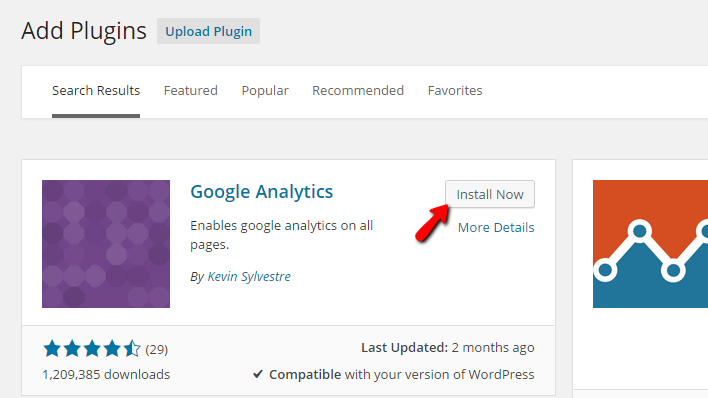
On the Plugins page, you will need to search for Google Analytics as a plugin name and the first result from the search will be the plugin you will need to install.

Once the plugin is installed, you will need to activate it via the Activate Plugin provided in the post-installation log.
Now that the plugin is activated, you will need to configure it properly, which we will do in the second step of this tutorial.
Step 2 Configure the Google Analytics Plugin
In order to configure the plugin you have just installed, you will need to navigate to Settings>Google Analytics.

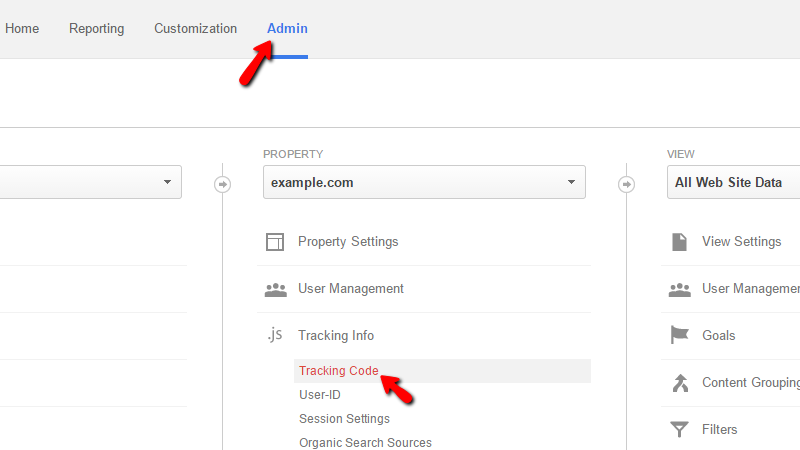
There you will be able to find a simple interface that requires you to put in the Web Property ID or the so-called Tracking ID. In order to obtain that code, you will need to create an account with Google Analytics, and once you log in there you will need to navigate to Admin>Tracking Info > Tracking Code.

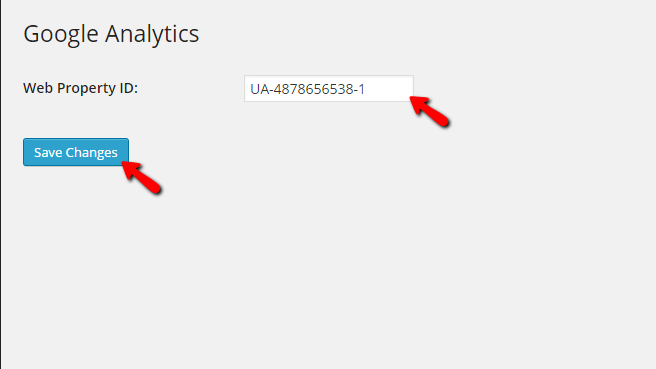
Once you obtain the Tracking ID you should return to the Google Analytics plugin in the WordPress admin area and enter the tracking ID into the Web Property ID field. Once you are ready, please press the Save Changes button to activate the service.

Congratulations! You have successfully activate the Google Analytics service for your WooCommerce Online Store!

WooCommerce Hosting
- Free Installation
- 24/7 WooCommerce Support
- Free Domain Transfer
- Hack-free Protection
- Fast SSD Storage
- Free WooCommerce Transfer
- Free Cloudflare CDN
