How to Create a Full Backup of vTiger
Updated on Mar 13, 2019
FastComet generates backups of your website on a weekly basis. However, it is always a good idea to create such a backup yourself, at least before any major changes on your website.
The actual backup process involves two steps that we will review so you can get a better understanding.
To Backup your vTiger, please complete these steps:
Step 1 Backup Files
The first thing that you need to do is to locate the folder that contains all of the files of your vTiger installation. This is usually the public_html/ directory of your account, if your website is accessible directly via the primary domain set on your package. However, if you are accessing your website from a subfolder or a subdomain, make sure that you review that carefully as the path to your vTiger files will be different.
Once you locate the vTiger folder, simply download it on your local computer. You can complete this process, using your favorite FTP client.
Download Files
There are two ways of downloading your files to the server - using an FTP client, following our FTP tutorial, or downloading them directly through your cPanel account > File Manager, following our cPanel tutorial.
Step 2 Backup Database
To create a backup of your database, you first need to see it’s name. You can see such information within the main configuration file of your vTiger website.
Configuration File
If you are not aware how to complete that, we recommend to review our excellent tutorial on how to locate the vTiger configuration file.
Once you find the database set on your vTiger website, you need to log into your cPanel account on the server. Navigate to the Databases tab and then open the phpMyAdmin service.

Select the database of your vTiger website from the list on the left-side of the screen.

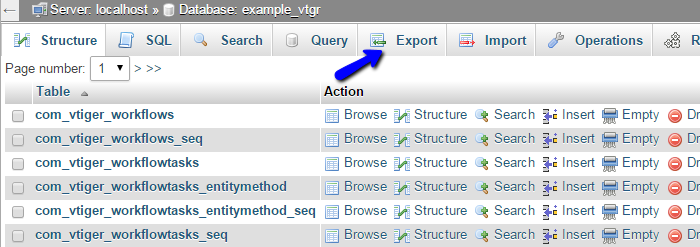
Select the Export button from the top-menu.

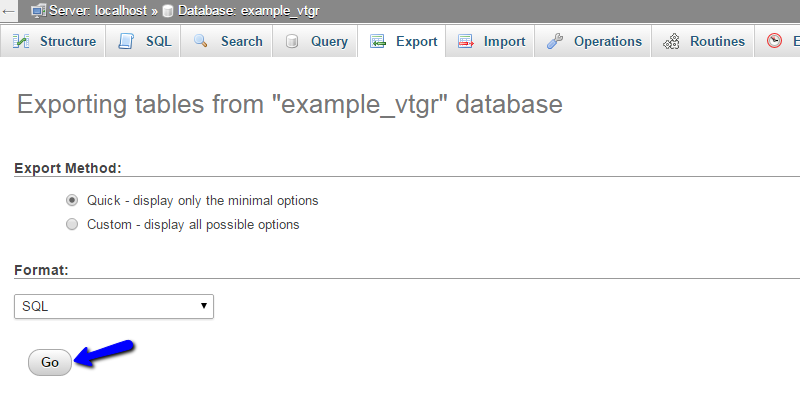
Click on the Go button to export a dump backup copy of your database on your local computer.


vTiger Hosting
- Free Installation
- 24/7 Support
- Free Domain Transfer
- Hack-free Protection
- Fast SSD Storage
- Free Transfer
- Free Cloudflare CDN
- Immediate Activation
