How to create a full backup of Thelia
Updated on Dec 10, 2015
It is important to create a full backup of your Thelia website before you make major changes on it. This way, if something goes wrong with your website, you can always reverse the changes back to a functional state.
The Thelia backup process includes the following two steps:
Backup your Files
The first step is to back up the files and folders of your Thelia website. For that purpose, you need to locate the actual directory, where you have installed the application. For example, if your website is accessible via example.com, the directory of your website would be the public_html/ directory of your account. To back up that directory, you can simply download it on your local computer via FTP.
Download Files
There are two ways of downloading your files to the server - using an FTP client, following our FTP tutorial, or downloading directly through your cPanel account → File Manager, following our cPanel tutorial.
Backup the Database
The second step is to generate a backup of the database set on your website. To complete that, you need to review the main configuration file of your Thelia website, which will allow you to get the name of the database you are using.
Configuration File
We recommend reviewing our tutorial on how to locate and edit the Thelia Configuration File.
Once you get the name of your database, you will have to access your cPanel account. Then, simply navigate to the Databases section and click on the phpMyAdmin service.

You will notice a list of all databases on your account. Click on the one that is set for your Thelia website.

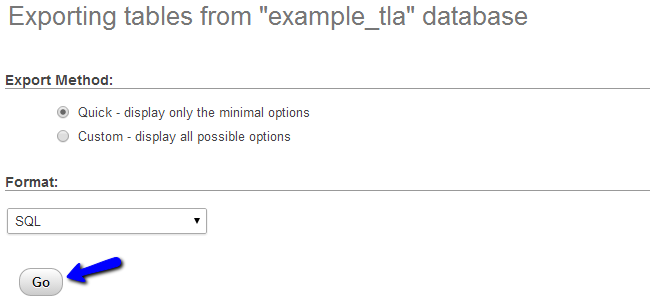
This will open up the database and display all of the tables in it. Click on the Export button at the top menu to proceed with the backup.

Click on the Go button to export a dump backup file of your database on your local computer.

With this you have completed the backup process for your Thelia installation. Check our "How to restore a full backup of Thelia" for details on the restoration procedure.

Thelia Hosting
- Free Installation
- 24/7 Thelia Support
- Free Domain Transfer
- Hack-free Protection
- Fast SSD Storage
- Free Thelia Transfer
- Free Cloudflare CDN
- Immediate Activation
