How to Manage the Customers of your Store
Updated on Sep 12, 2016
Every customer of your Store will have the option to create an account upon purchasing a product or just as a standard user. PrestaShop 1.6 fully enables you to manage all of the accounts created by your customers and in the next few lines of this tutorial we will show you how exactly this should be done.
To manage the Customers of your Store, you will need to:
Add a New Customer
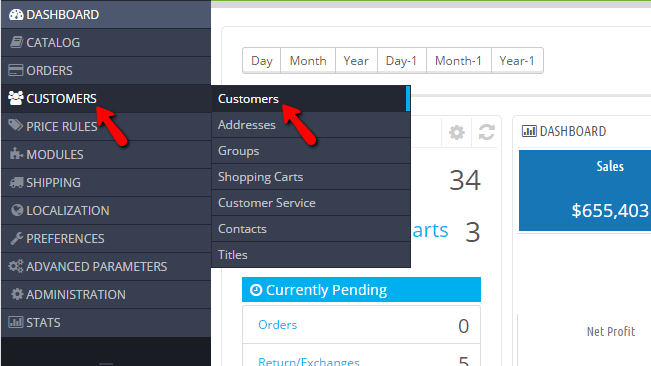
In order to be able to fully manage the customers of your Store, PrestaShop 1.6 provides you with fully dedicated page. The "Manage your Customers" page is available in the Back Office of your website under Customers → Customers.

Once there you will notice how the list of customers is conveniently structured in a table view so you can be able to easily manage all of them if you will need to.
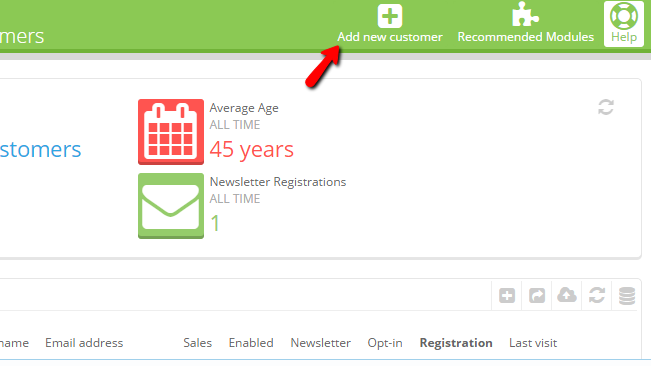
Sometimes you might want to add a customer manually to your Store. This can be easily achieved via the Add new customer button located at the top action bad.

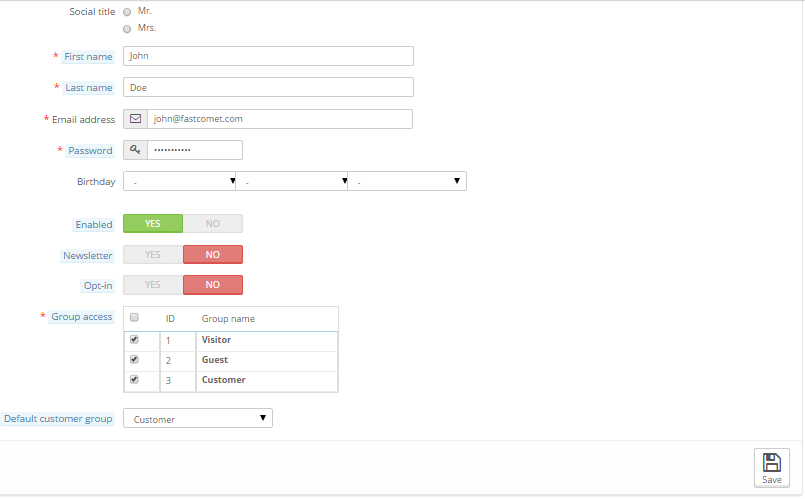
The information you need to add on the next page is pretty standard and you will be able to easily configure it.

Once you are ready with the configuration please press the Save button so the new customer can be added to your Store.
Edit and Delete Customers
In order to edit or delete a customer you will need to go back to the Customers and use the Edit button presented next to every customer in the table view located at the center of the page.

Then you will be presented with basically the same form as the one you have used for adding a new customer, however this time the fields will be automatically filled and you will need to edit them. Once you are ready with the edits please click on the Save button so the changes can be saved.
Deleting a customer is as easy as it sounds. The only thing you need to do is to get back to the Customers page and to click on the small arrow next to the Edit button and once the Delete action pops out you will need to select it.

Congratulations! You can now fully manage the customers of your website!

PrestaShop 1.6 Hosting
- Free Installation
- 24/7 Tech Support
- Free Domain Transfer
- Hack-free Protection
- Fast SSD Storage
- Free Cloudflare CDN
- Free Website Transfer
- Immediate Activation