How to Integrate Google Analytics with your Store
Updated on Sep 12, 2016
Google Analytics is a tool which will allow you to monitor the traffic on your website and to of course analyze the gathered data over the past month. Widely used currently this is one of the best free service to provide you with great insight on how your website is accessed and where the customers are mainly coming from.
In the next few lines of this tutorial we will provide you with detailed information on how exactly you should integrate the Google Analytics with your PrestaShop 1.6 based Online Store.
To integrate Google Analytics with your Store, you need to:
Activate the Google Analytics Module
The whole process of the integration between the Google Analytics service and your Online Store is handled via an additional Module which is provided absolutely free of charge by PrestaShop 1.6. This basically mean that you should and will not edit any of the code for your website as the module will take care for everything.
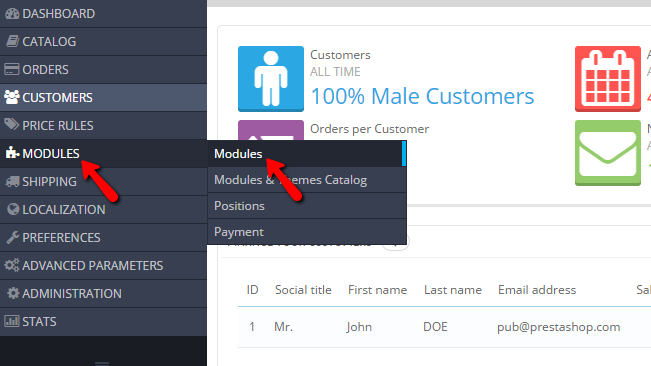
In order to install the module you will need to access the Back Office of your website and then to navigate to Modules →Modules.

Then you can use the search feature to locate the Google Analytics module and to install it following the usual Module installation process by simply pressing the Install button next to the module in question.

Once the module is installed you will be redirected to the configuration page for the module where you will need to simply enter the Google Analytics Tracking ID which you will obtain following the second step of this tutorial.

If you already have the tracking code then you can simply paste it in the field and use the Save button located at the bottom of the configuration page.
Obtain your Google Analytics Tracking ID
Right when you install the Google Analytics module and you get redirected to the configuration page you will notice a big blue button labeled Create your account and get started. If you click on this button you will be redirected to a page where you will be provided with a detailed explanation on the installation and the configuration process of the Google Analytics feature.
If you would like to you can directly proceed with the signup process via the official Google Analytics page.
Once you are ready with the signup process and you have verified your website, you will need to login into the Google Analytics service and to find the Tracking ID. This can be easily achieved if you access the Admin link directly from your Google Analytics Dashboard.

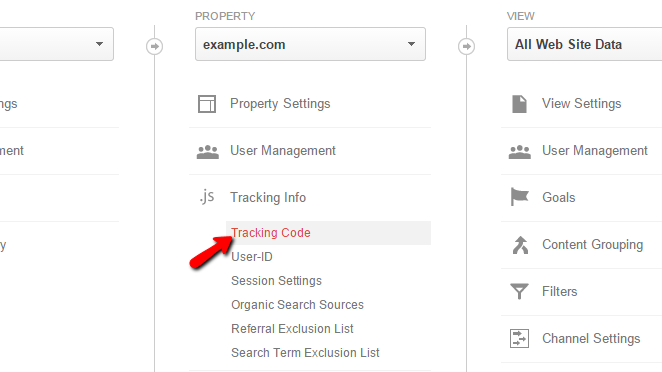
And then by clicking on the Tracking Info → Tracking Code link.

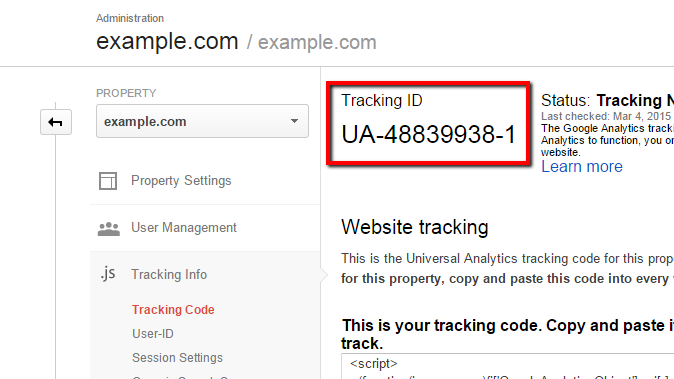
On the top of the page you will find the Tracking ID which is needed for your PrestaShop 1.6 Google Analytics module as mentioned in Step 1 of this tutorial.

Now that you have obtained the tracking code you will need to simply access the configuration screen for the module and add the Tracking ID.

Finally you will need to click on the Save button so all the changes can be saved.
Congratulations! You can now integrate your PrestaShop 1.6 based website with the Google Analytics service.

PrestaShop 1.6 Hosting
- Free Installation
- 24/7 Tech Support
- Free Domain Transfer
- Hack-free Protection
- Fast SSD Storage
- Free Cloudflare CDN
- Free Website Transfer
- Immediate Activation
