Adding Tax Rates
Updated on Dec 10, 2015
PrestaShop allows the use of different tax rates depending on the country or on the state which the client is purchasing your product from.
To manage the tax rates of your PrestaShop, you will learn to:
Add a New Tax
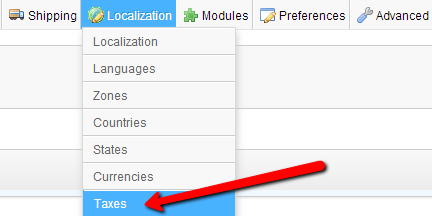
In order to setup a tax rate first you will need to go to your Store's admin area → Localization → Taxes.

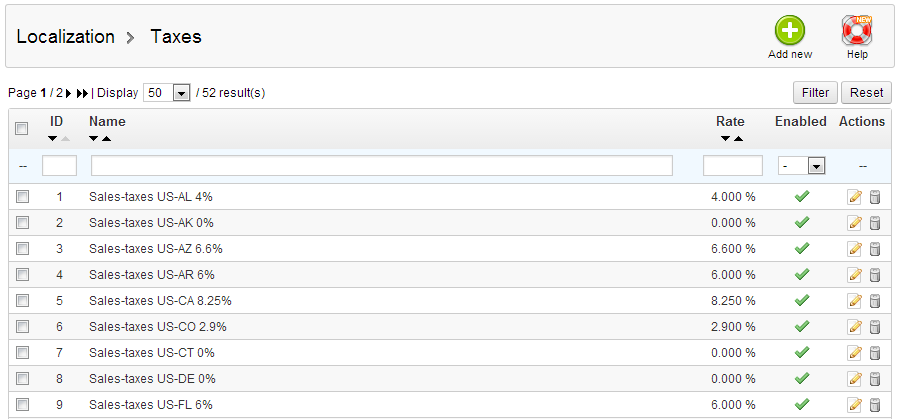
The home page for the taxes will display the complete list for all of the taxes you currently have configured on your Store.

In order to add a new Tax you will need to click the Add New button located on the top action bar of the Taxes home page:

You will then be presented with the interface for adding a Taxes which contains 3 options that need to be considered:

The first field is the Name of the Tax. This option will be shown in few location but most importantly in Customer's cart and also it will be included in the invoice upon purchasing a product.
The second field is the Rate of the Tax. This option is for the rate you would like to set for your tax and it is a percentage value.The last option is for you to choose if the tax should be Enabled or not.
Once you have all these options configured please press the Save button from the top action bar so your new Tax can be saved.
Edit Existing Taxes
In order to change any existing Tax rate on your application you should access the Taxes home page via your Stores admin backend → Localization → Taxes.
From the table view at the center of the page you will be able to see all of the currently configured Tax rules. Find the one you would like to change and click on it so the Editing interface can be shown.

Once you finish editing your Tax simply press the save button and your edit will be saved for the specific Tax.
Congratulations! You can now manage the Taxes on your Store!

PrestaShop Hosting
- Free Installation
- 24/7 Tech Support
- Free Domain Transfer
- Hack-free Protection
- Fast SSD Storage
- Free CloudFlare CDN
- Free Website Transfer
- Immediate Activation
