Creating Product Categories
Updated on Dec 10, 2015
In order to group the products in your Store you will need universal solution such as the Product Categories. They are also used for easily structuring your main navigation menu and presenting the type of products you will be selling.
To create a Product Category, you will need to:
Access the Categories Page
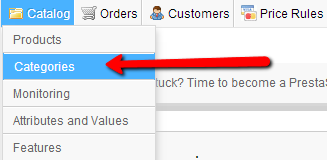
Product Categories are managed via the admin Backend of your store → Catalog → Categories.

Once accessed, this feature will present you with the home page for all of your categories listed in a table. In order to add a new category you should simply click on the Add New Button from the top horizontal menu.

In the next step of this tutorial we will show you how to configure the newly added category
Configure a new Category
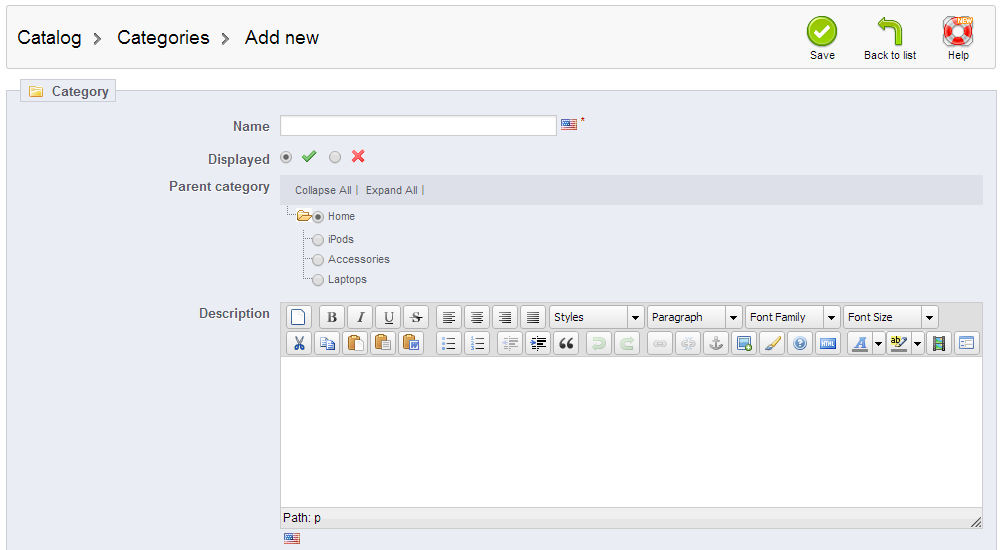
You will be then redirected to the category creation page where all of the information required for a category is presented and you should be able to input/edit it.

Once created the category can be either edited or you can directly add subcategories to it by simply clicking on the category name from the table located on the Product Categories default page mentioned above and located in the admin backend of your store → Catalog → Categories. Once you are located in certain category view you will be able to add subcategories by clicking on the Add New button.
If you would like to assign new products to the newly created category please check our tutorial related to the adding of products for PrestaShop 1.5.
Congratulations! You have successfully added a new category to your online store!

PrestaShop Hosting
- Free Installation
- 24/7 Tech Support
- Free Domain Transfer
- Hack-free Protection
- Fast SSD Storage
- Free CloudFlare CDN
- Free Website Transfer
- Immediate Activation
