Installing PrestaShop 1.5 Manually
Updated on Dec 10, 2015
PrestaShop is an E-commerce type of web application based on php programming language and using MariaDB type of database for storing information.
To install PrestaShop 1.5 manually, you need to:
Download the Installation Archive
In order to download the installation files of the application you will need to access the official web-site of the application.
Once downloaded the installation archive should be extracted on your local computer. When the extraction process is finished you will be presented with the folder containing the installation files of the application named prestashop and an html file redirecting to the installation section of the official PrestaShop documentation.
In order for the application installation process to be initiated you will need to upload the contents of the prestashop folder (received after the extraction of the installation archive) on your hosting hosting acount, to create a new empty database with database user assigner with full privileges to the database and to follow the installation steps provided by the Installation Assistant of the application.
Upload the Files and Create the Database
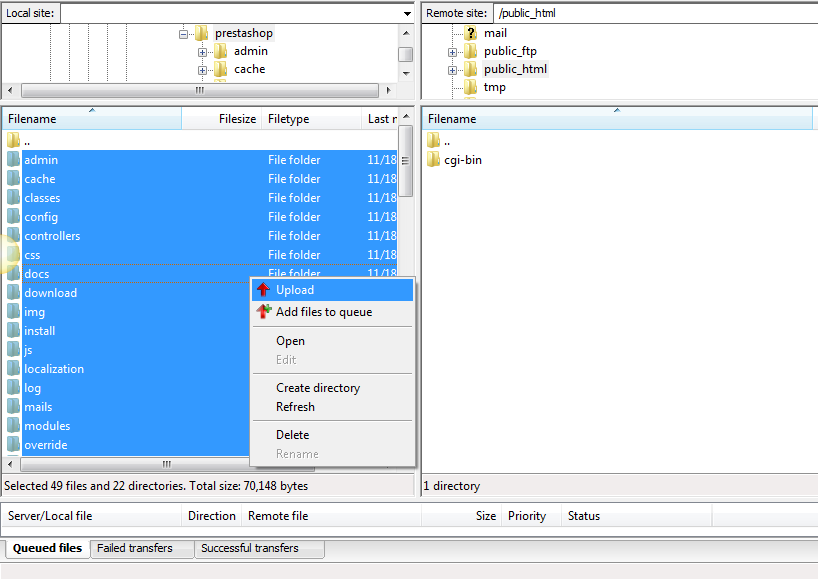
In order to upload the installation files of the application you will need to use the FTP service available for your account. If you are not sure how to use that service please check our FTP tutorial series.

The directory where you should upload the installation files depends entirely on how you would like the application to be accessed.
For Example
If you would like your application to be directly available via your domain name (example.com) the files should be placed inside the public_html folder . If the application should be accessed via subdomain (subdomain.example.com) or a subfolder (example.com/subfolder) then you will need to upload the files in the corresponding folder usually located inside the public_html folder of your hosting account.
Once the files are properly uploaded you should create a database for your new website. The database username and password can be easily obtained after their creation via your cPanel → Manage My Databases or by simply using the Database Wizard. More information on how to create a database and database username is available in one of our cPanel database management tutorials. As soon as you create the databse and the username for the same please copy their names for future use.
Initiate the Install Wizard
In order for the Installation Assistant to be accessed you will need to consider the location you have uploaded your application files at. If you have uploaded the files directly into the public_html folder of your account the installation interface should be available right under your domain name followed by the install/ string in the URL:
example.com/install/
If the application was uploaded in a subfolder for example named "prestashop" the Installation Assistant should be available under your domain name followed by the name of the subfolder and again the install/ sting at the end of the URL:
example.com/prestashop/install/
Once accessed the Installation Assistant will guide you through the 6 steps which you need to complete before your application is successfully installed:
- Installation Step 1 - Choose your language
In this step you should only select the language you would like your application installed with.
- Installation Step 2 - License agreements
This step is for you to get familiar with the License Agreement and to respectively agree with it so you can proceed with the installation.
- Installation Step 3 - System Compatibility
This step will automatically test if all of the application requirements in regards to the web hosting environment are met. Usually if there are no compatibility issues this step will be automatically taken and you will be redirected to the next one. In case there is some incompatibility you will be informed for it and the installation will not proceed until the incompatibility notice is resolved.
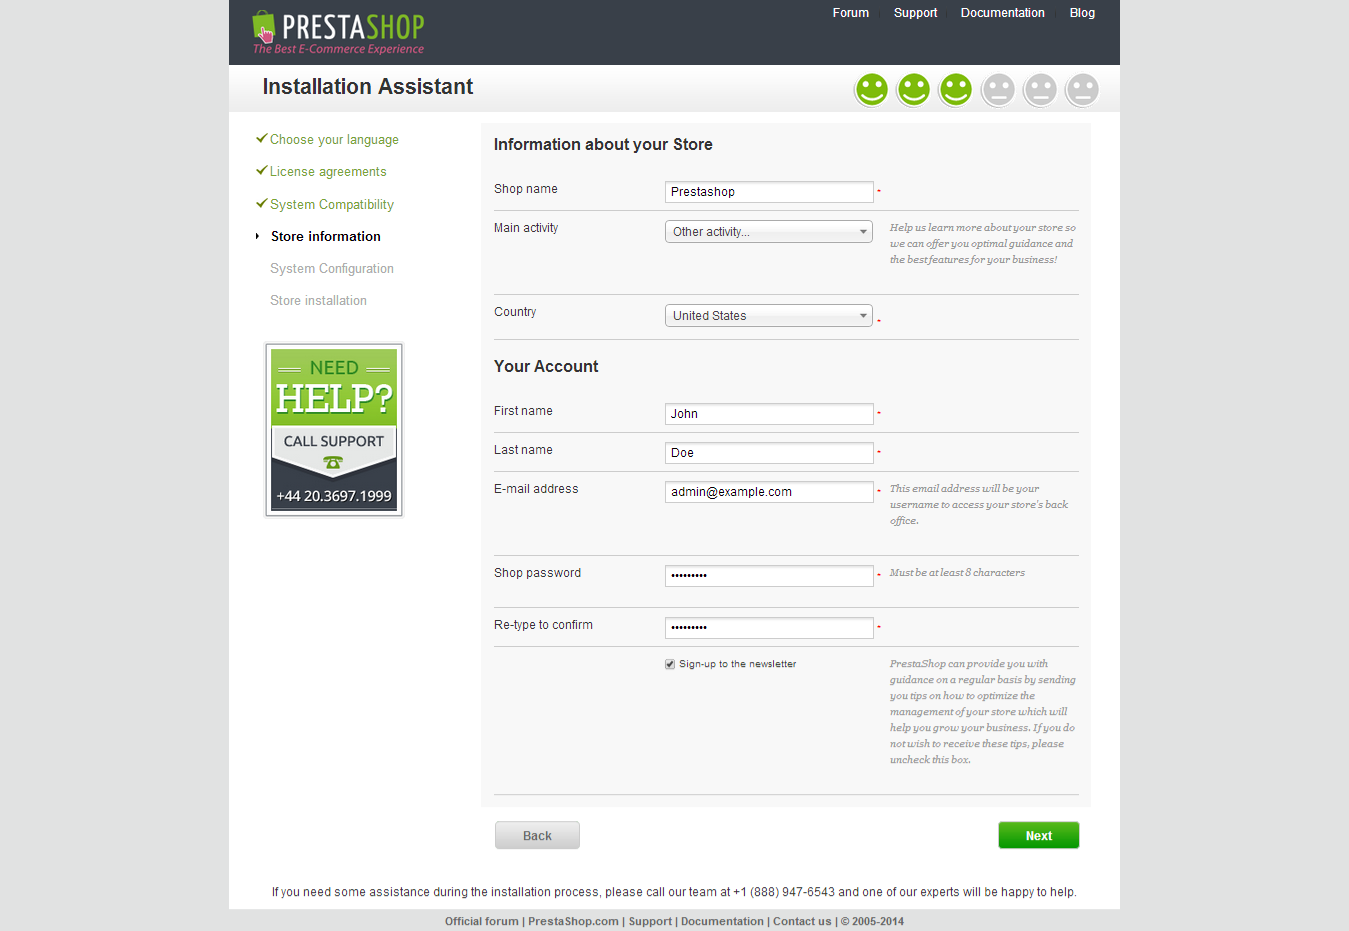
- Installation Step 4- Store information

In this step you will need to fill all of the mandatory fields presented on the page and related to the Information about your Store. All of the fields in the "Information about your Store" section are standard and entirely informative. Under the Your Account section you should note that the E-mail address and the Shop password files should be remembered or noted as these will be the login credentials for the admin user of your store.
- Installation Step 5 - System Configuration
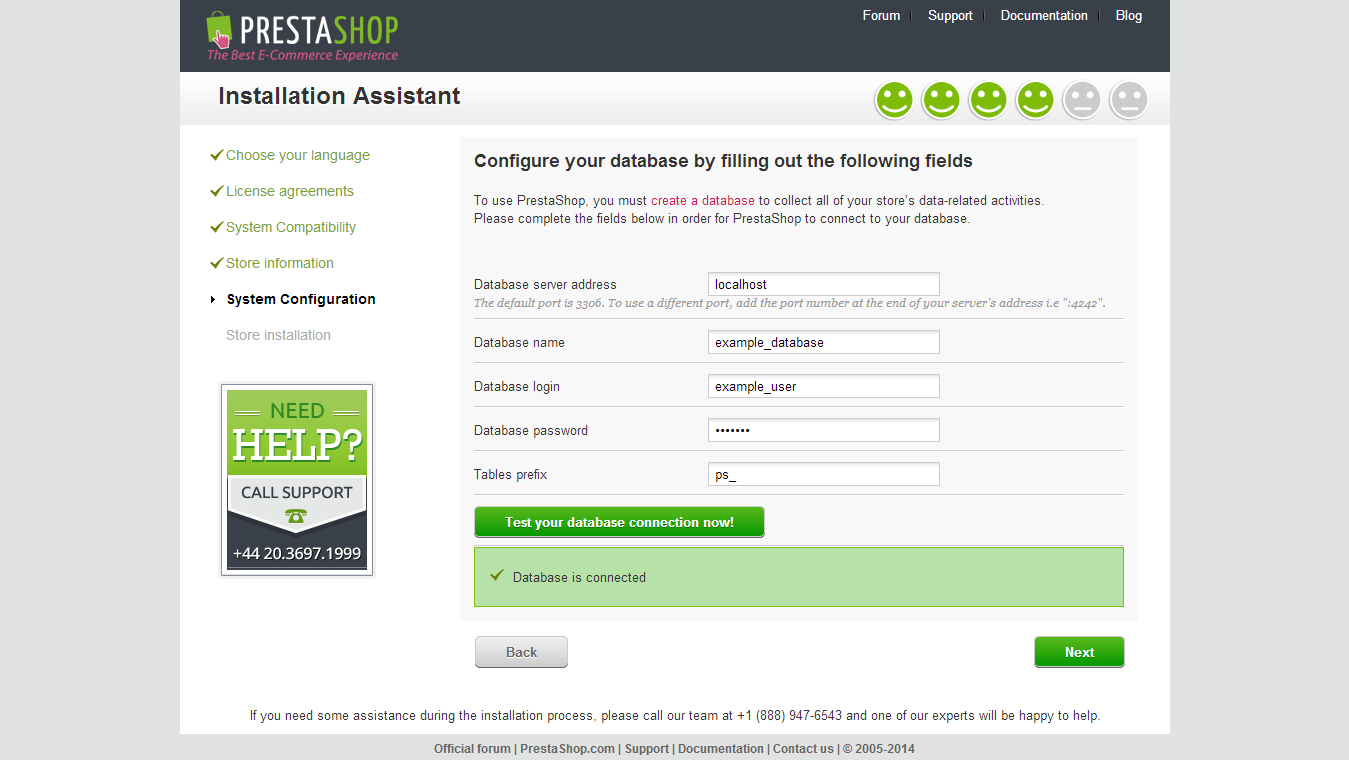
This is probably the most important step that should be taken since it is related to the database information your application will use in order for the data to be stored.There are 5 fields that should be filled with data before this step can be taken.
- The first field is called Database server address and it is automatically filled by the application with value "localhost". This field should remain unchanged or filled with the address of the database server if you are planning to use a separate from your service with us, remote database service.
- The second field is for the Database name of your application. Earlier in this tutorial you have created a database and assigned a user to operate with it. Here is the place where the database name should be input.
- The third field is related to the Database login or the username assigned to operate with the above filled database.
- The forth field is for the Database password. This password is the actual password you have chosen when you were creating the username for the database you are using.
- The last field is related to the Tables prefix. In case you would like some specific prefix for the tables of your database you should change this field appropriately otherwise you should leave it as it is.
Once all of the required information is filled you can test the database connectivity by simply pressing the Test your database connection now! button located right after the required fields. If everything with the database of the application is properly configured you will receive a message indicating that the Database is connected.

By pressing the Next button the installation process will begin.
- Installation Step 6 - Store installation
This final step is for the installation process to be completed and it is entirely automatic. Once the installation process is finished you will be presented with a summary page informing that the process is completed and providing you with the required information for you to access your Store.

If you would like to access your Store frontend or backend simply use one of the buttons provided at this summary page. As previously noted the username and the password for the backend of your application were created in Step 4: Store information explained in this tutorial.
Congratulations! You have successfully installed PrestaShop!

PrestaShop Hosting
- Free Installation
- 24/7 Tech Support
- Free Domain Transfer
- Hack-free Protection
- Fast SSD Storage
- Free CloudFlare CDN
- Free Website Transfer
- Immediate Activation