How to Manage Currencies in PrestaShop
Updated on Dec 10, 2015
your online store will support multiple countries where your products will be sold into, you most probably will need to allow for a multiple Currencies to be supported for your client convenience as well. In tutorial we will show you how to create, edit or remove existing Currencies from/to your Store using PrestaShop.
To manage the currencies of your store, you need to complete the following steps:
Add a new Currency
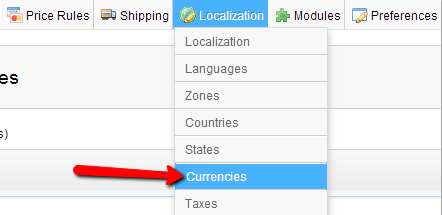
In order to access the Currencies home page you will need to login into your Store's admin backend and to navigate to Localization → Currencies.

Once you land on the Currencies home page you will be able to notice a table view where all of the currently configured Currencies are presented. Note that by default PrestaShop have a single Currency configured depending on the installation options you have chosen.

In order to add a new Currency you will need to press the Add New button located at the top action bar.
Configure the New Currency
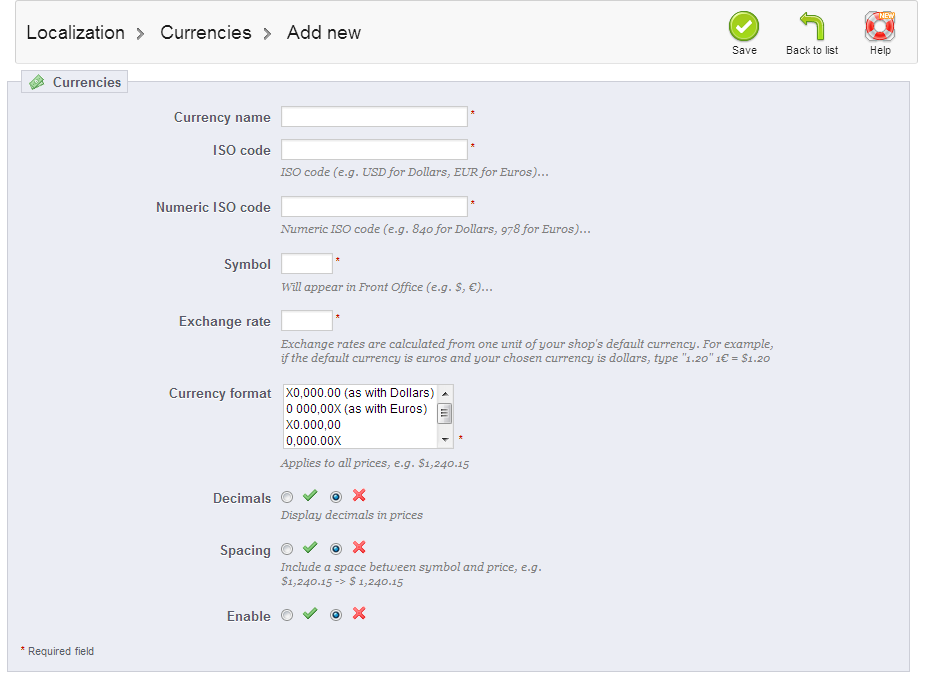
Once you press that button you will be redirected to the Currencies adding interface where after you fill all of the required fields your new Currency will be added.

There are the following fields available for edit on that interface:
- Currency Name - The actual name of the Currency you would like to add.
- ISO Code - The code of the Currency you would like to add USD(Dollar), EUR (Euro) etc.
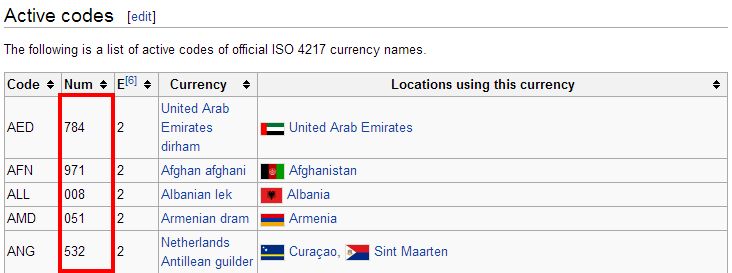
- Numeric ISO Code - The ISO code of the Currency. You can check which is the ISO code of the Currency you add by searching over the web or via the related page in Wikipedia.
There under the Active Codes section you will be presented with the ISO codes of the supported countries.

- Symbol - The symbol of your Currency, such as $ (Dollar), € (Euro) etc.
- Exchange Rate - The value of this field is related to the conversion of the currently added Currency to the default Currency you have selected for your Store. For example if the default Currency you have selected is Euro and you are adding Dollar now the Exchange rate should be 1.20 due to the fact that 1Euro is equal to 1.20 Dollars.
- Currency Format - The format your Currency will be displayed.
- Decimals - The option for your prices to be displayed in decimal values.
- Spacing - Include a single space between the Currency symbol and the value of the price.
- Enable - Specifies if the currently added Currency should be enabled or disabled.
Once all of these fields are filled and you press the Save button from the top action bar you will be redirected to the Currency home page and a message that your currency is successfully created will be displayed.
Your new Currency will be displayed in the table view of your currencies so you can be able to edit or delete it if necessary.
Delete Currencies
If you would like to remove a Currency from the already existing Currencies on your store, this can be easily done at the Currencies home page. Once the table view of your Currencies is displayed you can choose the delete icon next to each Currency in order to remove the currency.

Another option for deleting existing Currency is if you select the Currency you would like to remove and press the Delete Selected bellow the table view.
Coungratulations! You can now manage the Currencies on your Store!

PrestaShop Hosting
- Free Installation
- 24/7 Tech Support
- Free Domain Transfer
- Hack-free Protection
- Fast SSD Storage
- Free CloudFlare CDN
- Free Website Transfer
- Immediate Activation
