Installing Additional Modules
Updated on Dec 10, 2015
Every once and a while you might need to install custom modules to your Store. This is fairly easy task if the module you are installing does not have some additional installation instructions different than the default procedure for installing a module on your Store.
In this tutorial we will cover how a module can be installed no matter if the module is presented in the modules' list or you have it on file.
To get you familiar with the module UI, we will assist you to:
Find a Module
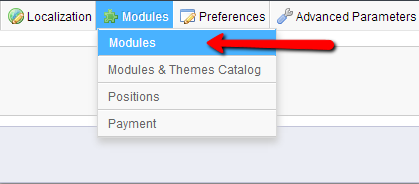
First you will need to login into your Store's admin backend and to navigate to Modules → Modules.

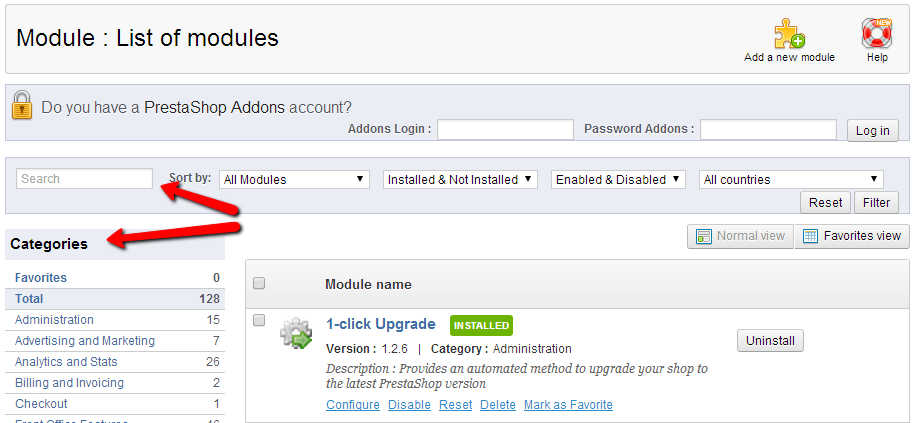
Once you access the home page for your modules you can either search for new modules from the supported modules or you can upload your own module.
Searching for a module from the supported modules this task can be achieved by simply entering the module's name in the search box. PrestaShop will then automatically display the results if there are such.

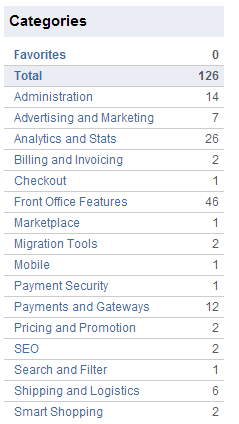
Another way of searching for modules is by displaying the results of modules via the Categories located in the left vertical menu at the Modules.

All of the modules are structure in categories as the name of the block suggest and you should be able to easily find the module you are looking for.
Install the Module
Now that you have found the module you would like to install you should simply click on the Install button next to every module so you can be able to successfully install the module.

Another option you can consider is uploading the module form your local computer In order to use this feature you will need to click the Add a new module button located at the top action bar. This button will show an upload interface where you will be able to upload and install your module.

Once you point your module's installation archive you should simply press the Upload this module button and the module you would like to use will be uploaded.
Congratulations! You are now familiar with the modules your Store will be using!

PrestaShop Hosting
- Free Installation
- 24/7 Tech Support
- Free Domain Transfer
- Hack-free Protection
- Fast SSD Storage
- Free CloudFlare CDN
- Free Website Transfer
- Immediate Activation
