- phpFox Tutorial
- PHPFox overview
- Install/Upgrade PHPFox
- Configuration
-
Manage PHPFox
- User Groups
- Custom User Group
- Edit Users in PHPFox
- Custom Fields in PHPFox
- Custom tab on user profiles
- Manage Cancellations
- Manage Promotions
- Manage Menus
- Manage Blocks
- Manage Pages
- Manage Currencies
- Ban Members
- Manage Subscriptions
- Manage Countries and States/Provinces
- Manage Newsletters
- Manage Advertisements
- Manage Announcements
- Clear Cache
- Extend PHPFox
- Backup and Restore
- PHPFox Hosting
How to Ban Members in PHPFox
Updated on Dec 18, 2015
With each community, we always have the need of restricting the access to our websites for certain people. There is a good feature in PHPFox that will allow you to do just that. To ban a member on your website, you need to access your website as administrator and then click on the AdminCP button at the top-right corner.

You do have 5 ways of banning a member on your website. They are:
Step 1 Ban Username
Click on the Tools button at the top menu and then Ban Filters > Usernames.

Edit the following options:
- Username - Enter the username that you wish to add. Note that you can enter parts of the username and then add (*) asterisk in order to ban the different variations
- Ban User - Activate/Deactivate the ban filter
- Reason: State the reason for the ban
- Ban for how many days - Set how many days the ban will be effective. Enter 0 for indefinite
- User group to move the user when the ban expires - Self-explanatory
- User groups affected - Set the user groups to be checked by the system for ban filter violation
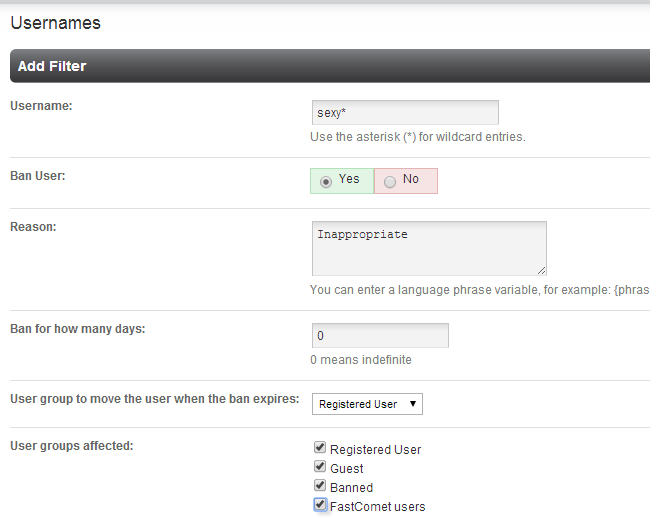
Click on the Add button to create the actual filter.
Step 2 Ban Emails
Click on the Tools button at the top menu and then Ban Filters > Emails.

Edit the following options:
- Email - Enter the email address that you wish to add. Note that you can enter parts of the email and then add (*) asterisk in order to ban the different variations
- Ban User - Activate/Deactivate the ban filter
- Reason: State the reason for the ban
- Ban for how many days - Set how many days the ban will be effective. Enter 0 for indefinite
- User group to move the user when the ban expires - Self-explanatory
- User groups affected - Set the user groups to be checked by the system for ban filter violation
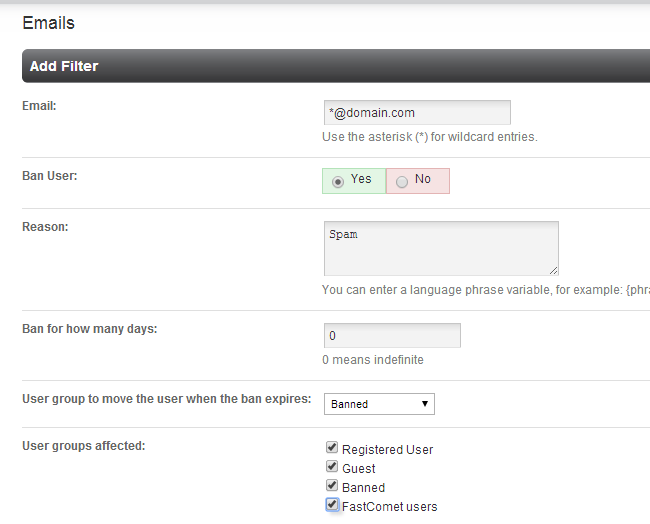
Click on the Add button to create the actual filter.
Step 3 Ban Display Names
Click on the Tools button at the top menu and then Ban Filters > Display Names.

Edit the following options:
- Display Name - Enter the display name that you wish to add. Note that you can enter parts of the name and then add (*) asterisk in order to ban the different variations
- Ban User: Activate/Deactivate the ban filter
- Reason: State the reason for the ban
- Ban for how many days - Set how many days the ban will be effective. Enter 0 for indefinite
- User group to move the user when the ban expires - Self-explanatory
- User groups affected - Set the user groups to be checked by the system for ban filter violation
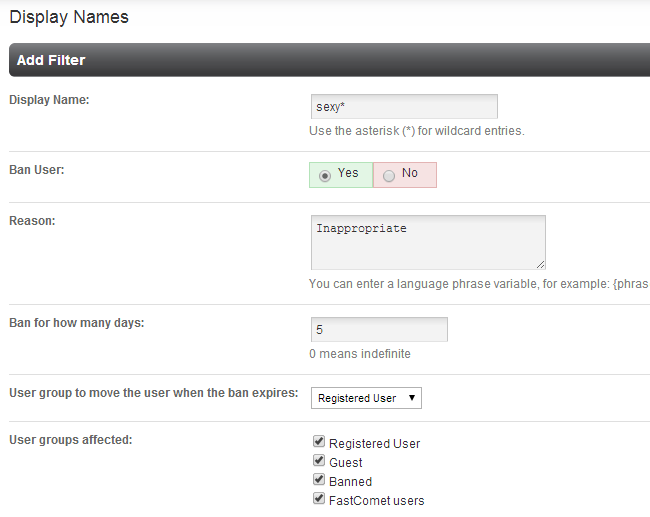
Click on the Add button to create the actual filter.
Step 4 Ban IP Address
Click on the Tools button at the top menu and then Ban Filters > IP Address.

Edit the following options:
- IP Address - Enter the IP address that you wish to add. Note that you can enter parts of IP and then add (*) asterisk in order to ban the different variations
- Ban User - Activate/Deactivate the ban filter
- Reason - State the reason for the ban
- Ban for how many days - Set how many days the ban will be effective. Enter 0 for indefinite
- User group to move the user when the ban expires - Self-explanatory
- User groups affected - Set the user groups to be checked by the system for ban filter violation
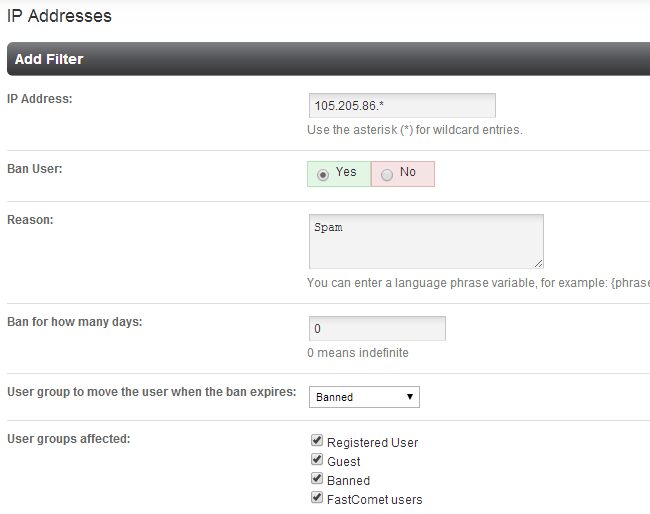
Click on the Add button to create the actual filter.
Step 5 Ban Words
Click on the Tools button at the top menu and then Ban Filters > Words.

Edit the following options:
- Word - Enter a word that you wish to add. Note that you can enter parts of the word and then add (*) asterisk in order to ban the different variations
- Replacement - Enter a replacement word for the one you want to ban
- Ban User - Activate/Deactivate the ban filter
- Reason - State the reason for the ban
- Ban for how many days - Set how many days the ban will be effective. Enter 0 for indefinite
- User group to move the user when the ban expires - Self-explanatory
- User groups affected - Set the user groups to be checked by the system for ban filter violation
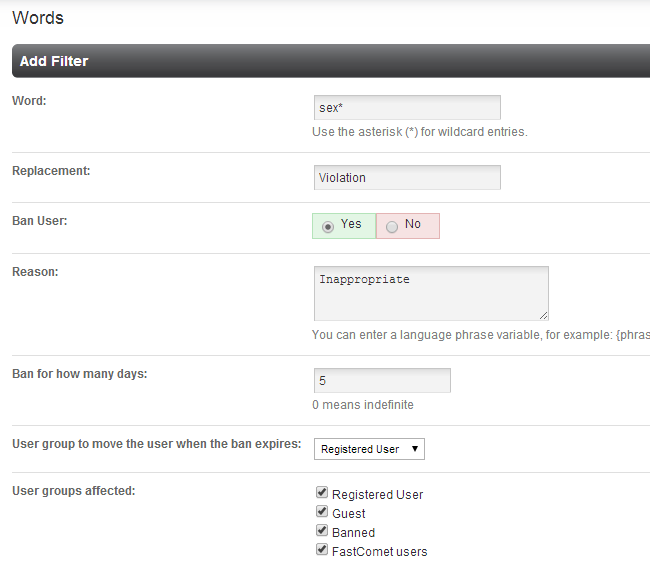
Click on the Add button to create the actual filter.

PHPFox Hosting
- Free PHPFox Installation
- 24/7 PHPFox Support
- Free Domain Transfer
- Hack-free Protection
- Fast SSD Storage
- Free PHPFox Transfer
- Free CloudFlare CDN
- Immediate Activation
