Enable reCaptcha on registration in PHPFox Neutron
Updated on Nov 1, 2018
In order to increase the security and to prevent spam bots from creating fake profiles on your website you will need to take advantage of the reCaptcha human verification service. PHPFox Neutron comes fully integrated with that service and the only thing you will need to do is to enable it.
In this tutorial we will illustrate how to enable and configure the reCaptcha human verification method in just two easy to follow steps.
Steps to enable reCaptcha:
Step 1 Generate reCaptcha Keys
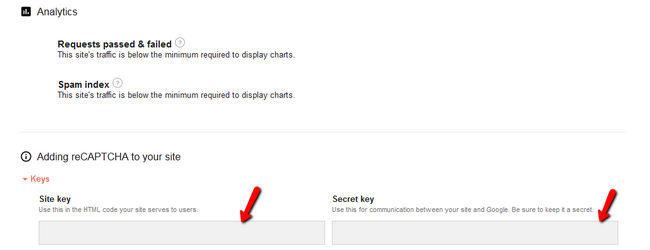
First before you can begin configuring the feature you will need to have the appropriate keys issued. These are two randomly generated strings called Public key and Private key. These should be generated at:
www.google.com/recaptcha
Click on the Get reCAPTCHA button at the top right corner.

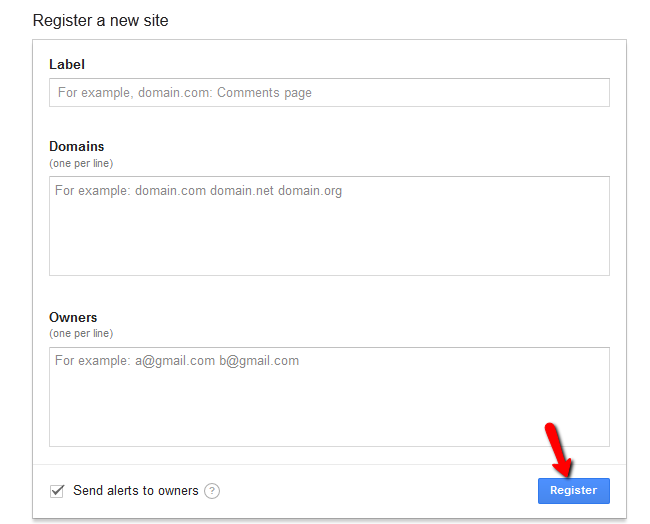
This will direct you to a registration form which you must fill:

- Label - Use a label that will make it easy for you to identify the site(website name)
- Domains - Note that your registration is restricted to te domains you enter in this field, plus any subdomains. Put your domain name here.
- Owners - Emaill account of the owner of the domain.
Once you have entered the correct information click on the Register button. Next you will be directed to your just generated Public key and Private key.

Step 2 Enable reCAPTCHA on your Website
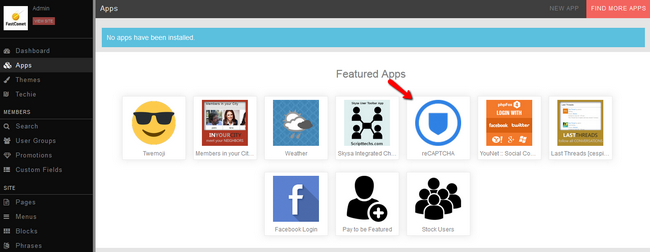
You will need to copy those keys to the appropriate fields in the reCAPTCHA application form in your website. To do so you will need to login to your admin dashboard on your site and click on the Apps section in your main panel.

Select the application reCAPTCHA.

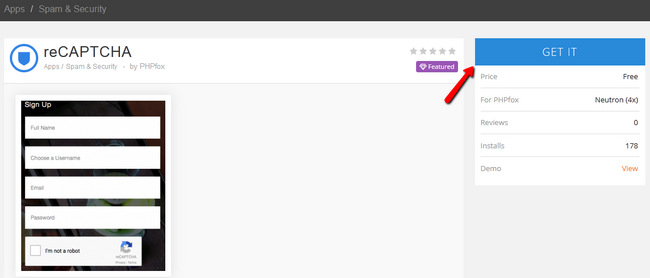
Click on the Get It button and copy the Public and Private key to the corresponding fields in the application. Don’t forget to click the Save button once you are done.
You have successfully enabled reCAPTCHA for your website. Congratulations.

PHPFox Neutron
- Free Installation
- 24/7 PHPFox Neutron Support
- Free Domain Transfer
- Hack-free Protection
- Fast SSD Storage
- Free Cloudflare CDN
- Immediate Activation