Create and manage ban filters in PHPFox Neutron
Updated on Nov 1, 2018
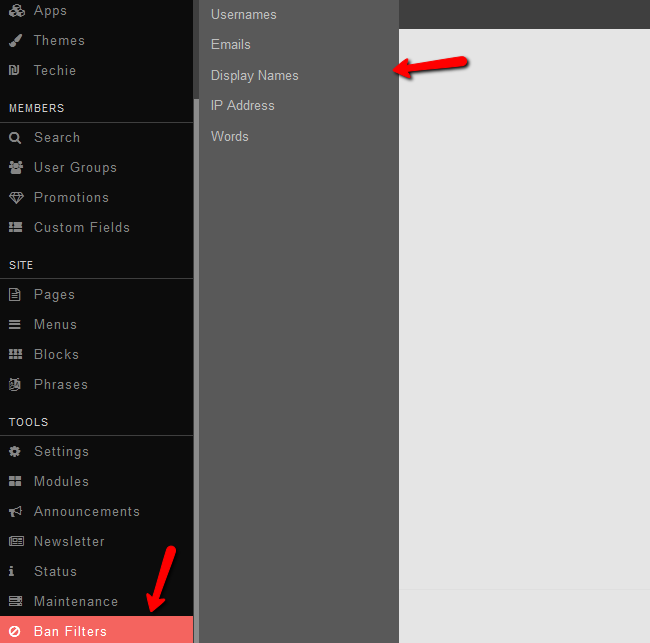
With each community, there will be a need for options that allow the administrator to restrict the access to his websites for certain people. In PHPFox Neutron there are Ban Filters that will allow you to do this in a very clean and automated way. To configure the ban filters you will need to login to your admin dashboard and click on the Ban Filters section in the main panel.

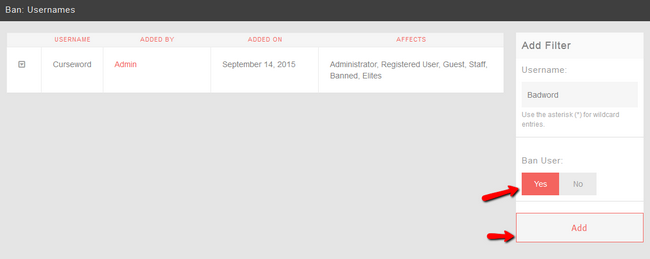
You can choose to ban certain usernames, emails, display names, IP addresses and words. If you wish to ban a certain username from being used, you can do so by clicking on the Usernames section and then typing the username in question. You can also manage all existing ban filters for usernames from here. Click on the Add button to add the username to the ban filter. Now when someone tries to make an account with that username he will not be able to do so.
Existing Users
If you have clicked the Yes button on the Ban User option this will not only forbit the use of such usersname, but will also ban a user that is currently using it, if such exists. The same rules apply for the email and display name ban filters.

When you add a ban filter for an IP address, this will block all connections from that IP address to your website. If you have clicked Yes on the Ban User option, this will automatically ban all already existing accounts from that IP.
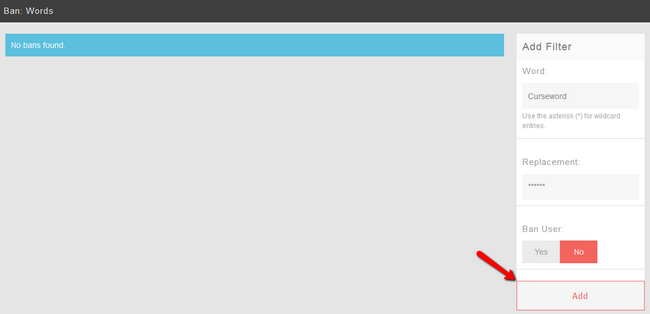
When you add words you wish to ban you can choose a replacement for the word that will replace all instances of that word on the entire website. This is a good feature when you are trying to restrict the bad language on your website. Again you can choose if you wish to ban the users that use that word or only to replace it.

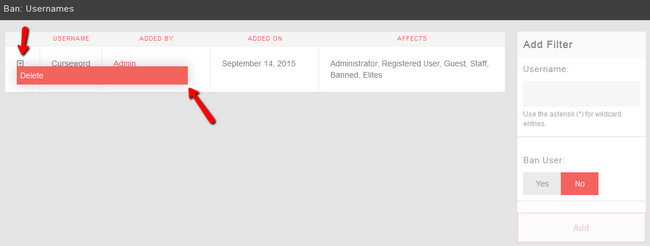
If you wish to remove a ban filter simply click on the drop-down arrow for that filter and click Delete.

Now you can use this knowledge in order to make your Website safer and more reliable.

PHPFox Neutron
- Free Installation
- 24/7 PHPFox Neutron Support
- Free Domain Transfer
- Hack-free Protection
- Fast SSD Storage
- Free Cloudflare CDN
- Immediate Activation