How to Manually Install Pagekit
Updated on Feb 1, 2017
In this tutorial, we will review the manual installation process of Pagekit. We will provide you with the steps necessary to complete the installation on your FastComet account and mention any specifics regarding the process.
To Install Pagekit Manually, you need to complete the following steps:
Download and Prepare the Files
Firstly, you will need to download the latest version of Pagekit. You can do this by accessing the official Pagekit Website and clicking on the Download button.

Now you will need to extract the content of the archive file which will look like this.
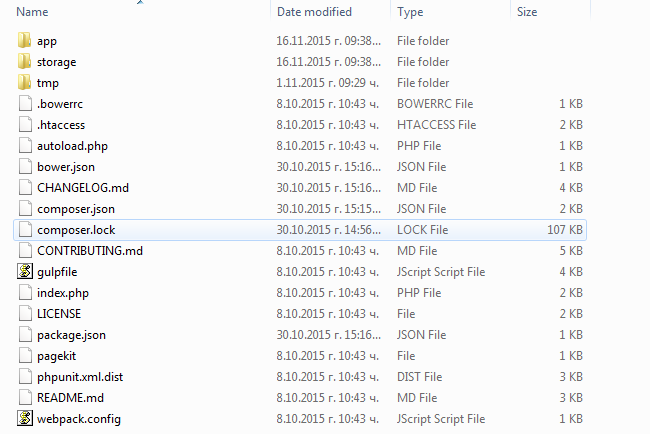
Once extracted the content is ready to be uploaded to your account on the server.
Upload Files
There are two ways of uploading your files to the server - using an FTP client, following our FTP tutorial, or uploading directly through your cPanel account > File Manager, following our cPanel tutorial.
It is important to make sure that all of the files and folders of Pagekit are properly uploaded to your account and located in the correct directory, where you would like to install the CMS.
If you would like to access your new website directly using your domain (example.com), you need to upload the Pagekit files to the public_html/ directory of your account.
If you would like to access your website from a subfolder, such as example.com/pagekit/, in this case, you will need to create a "pagekit" folder within the public_html/ directory of your account and then upload the files in it.
Initiate the Install
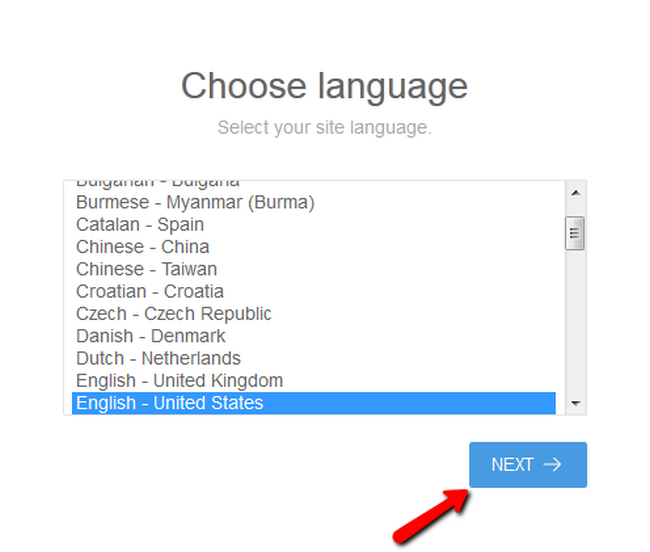
To initiate the Installation process you will need to open your browser of choice and navigate to the location of your Pagekit files. Once there you will see the installation wizard and you will need to click on the arrow to proceed.

Now you will be able to choose the language for your Pagekit Website. You can change this afterward. When you have made your choice, click the Next button.
Configure a Database and an Administrators Account
In the next installation step, you will be able to connect an existing database or let Pagekit create a new database for you.
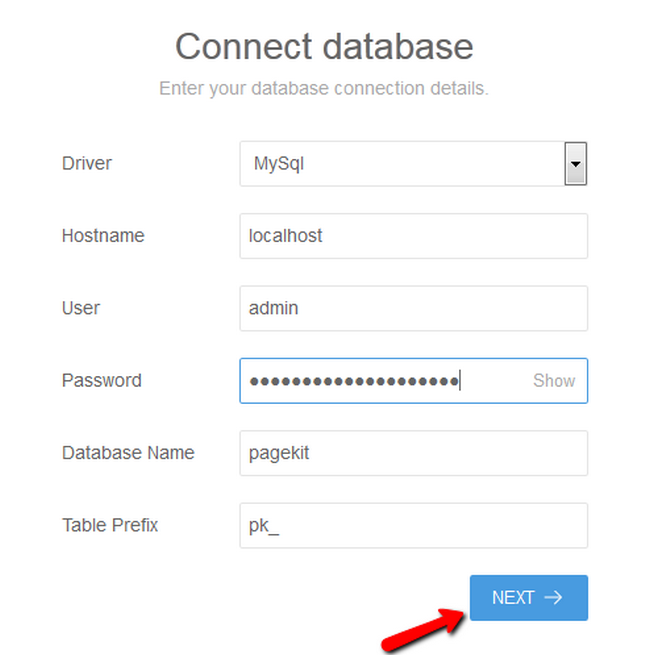
- Driver - The driver of the database will be either MariaDB (MySQLi) or MySQLi. If you experience issues when creating or connecting to a database, make sure MySQLi is selected and that the pdo_mysql / pdo_mysqli PHP extension is enabled, as MariaDB is fully compatible with these drivers.
- Hostname - Enter localhost if the database is stored on the same server as the files of your new installation
- User - The User assigned to the Database
- Password - The password for the Database
- Database Name - The name of the Database
- Table Prefix - This is used to distinguish the tables corresponding to Pagekit, from other tables and avoid a possible interference if you use the database for multiple applications
When you are ready with the database configuration, click the Next button. The last part of the Manual Installation includes the creation of your Admin Account.
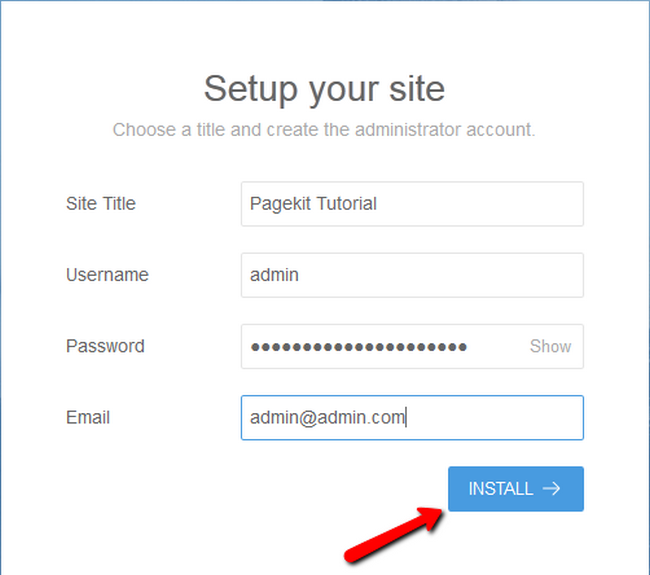
- Site Title - The Title of your Website (You can change that later on from the Admin Dashboard)
- Username - The Username for your Administrators Account
- Password - The Password for your Administrators Account
- Email - The Email corresponding your Administrators Account (please use a valid email as this email will be used for a password recovery, if you forget your password)
Click on the Install button to complete the Installation process. Now you can access your website's back-end by navigating to example.com/admin and login with your admin credentials which you have just set up at the end of the installation.
Congratulations, you have successfully installed Pagekit on your hosting account.

Pagekit Hosting
- Free Pagekit Installation
- 24/7 Pagekit Support
- Free Domain Transfer
- Hack-free Protection
- Fast SSD Storage
- Free Cloudflare CDN
- Free Pagekit Transfer
- Immediate Activation