How to Manage Users in Pagekit
Updated on Dec 10, 2015
As the most valuable resource on your website, you must take good care for your userbase. To make sure you can manage the users on your website, we have created this tutorial to help you in this task.
To access the Users menu you will first need to login as an administrator to your website's back-end.
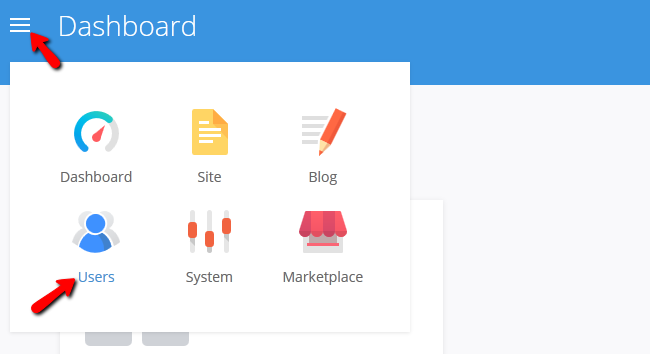
To manage your Userbase in Pagekit, you need to learn to:
Manually Add a User
To add a new user manually, you will need to navigate to the List tab and click on the Add User button.

Here you can add all of the details a normal user will have like Username, Name, Email and a password. You will also be able to set up a status for the user and the User Role.
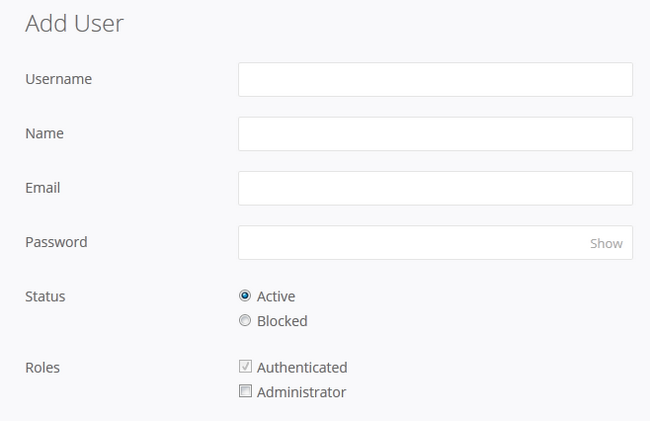
When you are ready, click on the Save button.
Edit and Delete Users
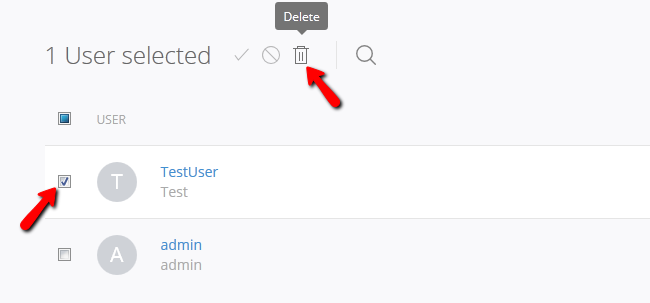
If you wish to edit a user, you can do so by navigating to the Users → List and clicking on the user you want to edit. To delete a user however, you will need to select the user and then click on the trashcan icon that will appear at the top of the menu.
To block a user, again - select the user you wish to block and click the block icon
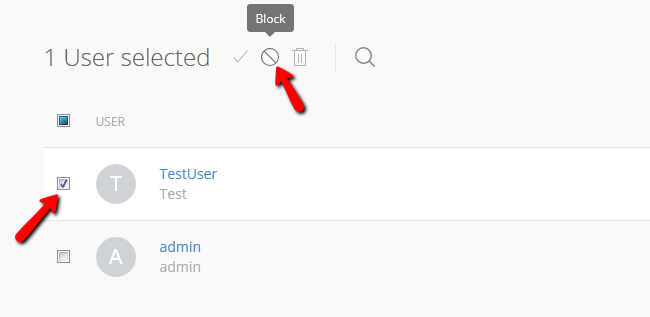
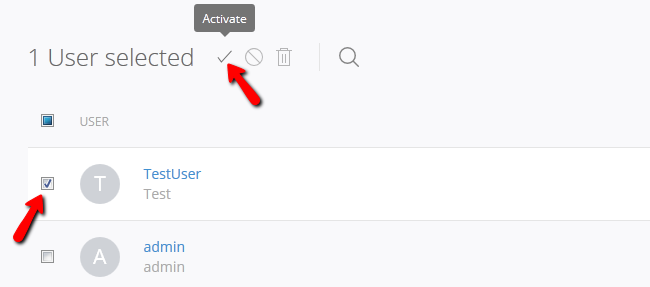
After this the user's status will change to red, indicating that it has been blocked. You can re-activate the user by selecting him and hitting the checkmark icon.
Enable the Registration Form
Guests on your account will not be able to register a new account, unless you have enabled the Registration form for them. To do that, you will need to navigate to Users → Settings section of your admin dashboard.
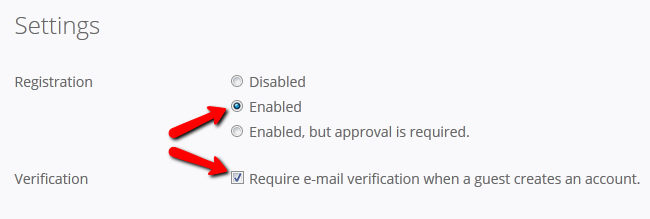
Now select the Enable option to enable the registration of new users. Here you can also make e-mail verification a requirement for new registrations which is a good way to deal with the simple spam bots on the internet.

Pagekit Hosting
- Free Pagekit Installation
- 24/7 Pagekit Support
- Free Domain Transfer
- Hack-free Protection
- Fast SSD Storage
- Free Cloudflare CDN
- Free Pagekit Transfer
- Immediate Activation
