How to Add Product Categories
Updated on Sep 8, 2016
Product categories group products with similar characteristics to help your customers browse and find the product they need more easily.
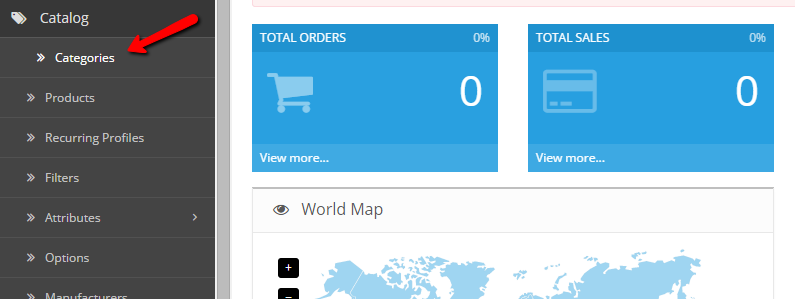
To add a new product category in your OpenCart 2 store, please login your admin dashboard and refer to the Catalog → Categories section from the main navigation menu.

From the category list page you can edit or remove your existing categories. To add a new one click on the add button from the top. There are several settings that you should configure for your product category.
First, you should set your Category name and Category Description. For SEO purposes, you may also add custom Meta information which will help search engines such as Google and Yahoo to index your product category better and associate it with your products.
Next, click on the Data tab to proceed with the additional Category Settings. Here you can setup the following options:
- Parent - If you are creating a subcategory of an existing category, please select the parent category name.
- Filters - If you have any filters created you may set them via this field.
- Stores - If you have multiply stores configured on your OpenCart 2, please select the exact stores for which this category will be visible.
Additionally, you may add keywords to your category for better SEO and set a category image. Last, choose if the category should be displayed in your top navigation menu and the sort order of the category. The sort order will be used to position the category in compare to other categories displayed in the main menu. Make sure that your Category Status is Enabled before you proceed to the third tab to complete the setup.
Under the design tab for your Category you may select the desired Layout. If you have custom theme which requires a specific layout to be select, please choose it from the drop down menu. Otherwise you may leave the default layout. To apply your configuration changes, please click on the save icon from the top.
Now your category has been created and you may add products under it.

OpenCart 2 Hosting
- Free Installation
- 24/7 OpenCart Support
- Free Domain Transfer
- Hack-free Protection
- Fast SSD Storage
- Free OpenCart Transfer
- Free Cloudflare CDN