How to setup Geo Locations and Tax Rates
Updated on Dec 10, 2015
In this tutorial we will show you how to create different Geo Zones and apply tax rates per geo location. This is useful when you plan to reach customers from different geo locations and would like to apply custom tax rates for each location.
When you complete this tutorial, you will know how to:
Create Geo Zones
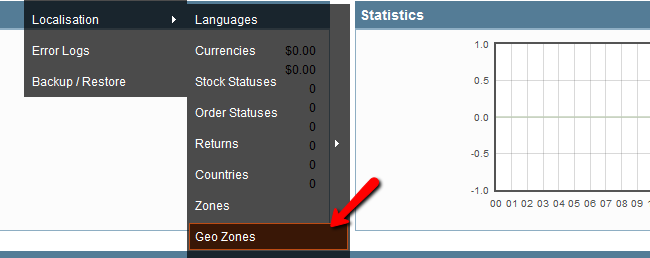
First, let's create a geo zone. For the purpose of this tutorial we will create a Geo Zone for US. To begin, please login into your OpenCart admin dashboard and navigate to the System → Localization → Geo Zones.

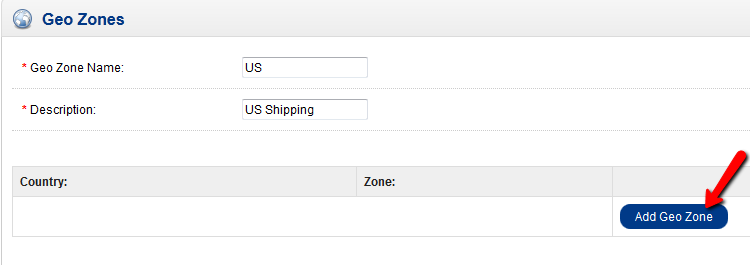
On the next page you will see all existing geo zones. To add a new one click on the Insert button. Fill in the name Geo Zone name and Description on the next page and click on the Add Geo Zone button.

In the Country settings, select the desired country and the zone or leave it to all zones if you would like to create a country-wide geo location.

When you are ready with your settings save your zone by clicking on the Save button. Now you should see your new Geo Zone in the list.
Create Tax Rates
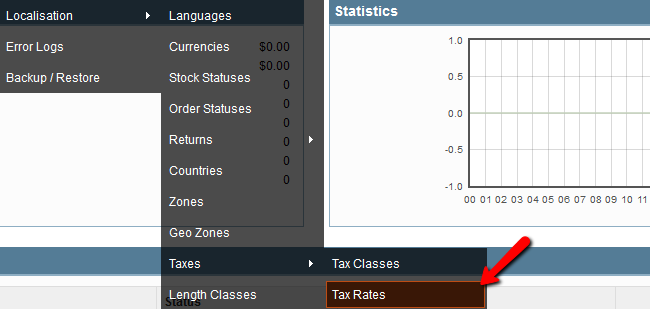
Now when we have a Geo Zone created, let's create a custom tax rate for the newly added zone. To do this, please refer to the System → Localisation → Taxes → Tax Rates.

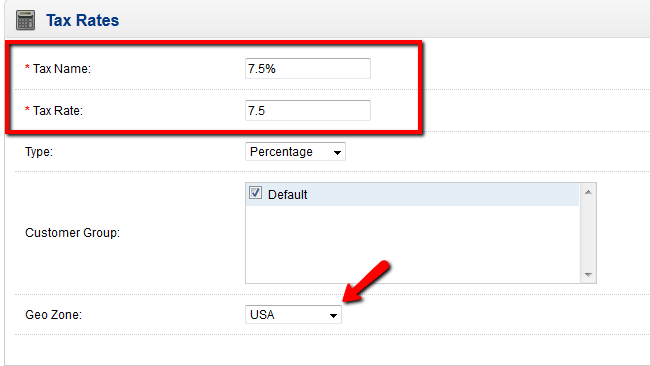
On the Tax Rates page click on the Insert button to begin creating your new tax class. The next step is to configure the tax rate. First, we need to input the name and the actual rate. For the purpose of this tutorial we will use the Percentage type but if you prefer a flat fee to be applied you may choose this option from the drop down menu.

Additionally, you should select the customer group and the geo location we have just created. When you are satisfied with your settings, please click on the Save option to create the new Tax Rate.
You should see your newly created Tax Rate now in the list. You may proceed and add different geo locations and tax rates for your store.

OpenCart Hosting
- Free Installation
- 24/7 OpenCart Support
- Free Domain Transfer
- Hack-free Protection
- Fast SSD Storage
- Free OpenCart Themes
- Free OpenCart Transfer
- Free CloudFlare CDN
