How to add a new Section within a space on your website
Updated on Mar 13, 2019
Sections are the next level of page components you in the hierarchy of content types you can add to your Open Atrium. In this tutorial we are going to show you how to create sections within already created space.
To manage the Sections in Open Atrium, you will need to:
Step 1 Create a Section
There are two possible ways of adding a section and no matter which one you will be choosing you will need to select a space first. You can select a space from the Spaces drop-down available in the top navigation menu directly when you login.
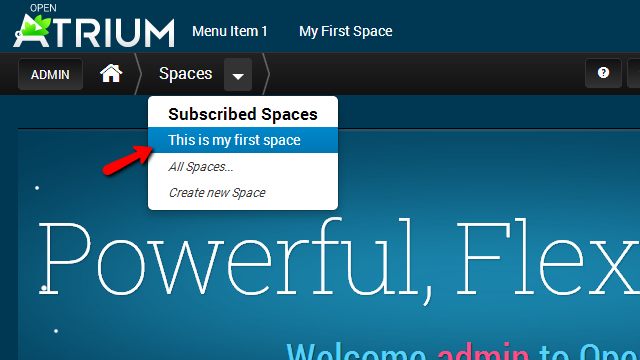
When a space is selected you will be redirected to the space home page. From this position you can considering the following two options for creating a section.
Option 1
From the sections’s drop down menu select create a new section and then choose the type of section you would like to add. For the purpose of this tutorial we will add a new default section.
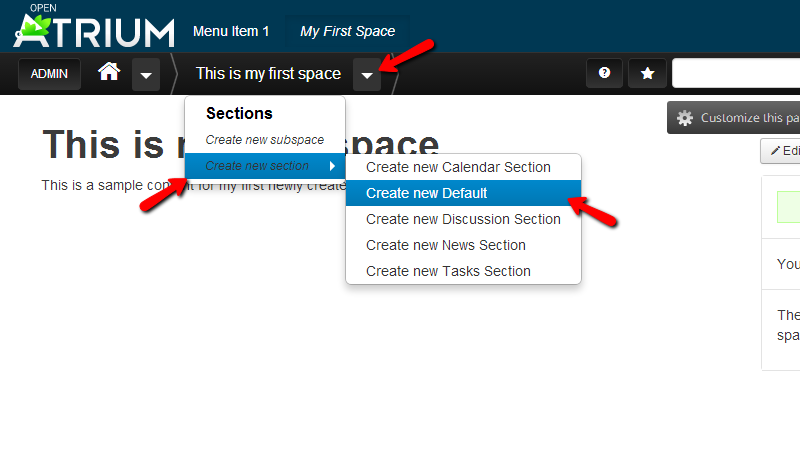
The types of section you can create are:
- Calendar Section
- Default Section
- Discussion Section
- News Section
- Tasks Section
Once you click on the Create new Default link you will be redirected to the section creation window where you will need to configure the new section you are about to add. We will discuss the configuration of the new section in Step 2 of this tutorial.
Option 2
From the Admin>Add Content>Section Page you will be also able to choose the type of section you would like to add. The sections types are the same as those listed in Option 1.
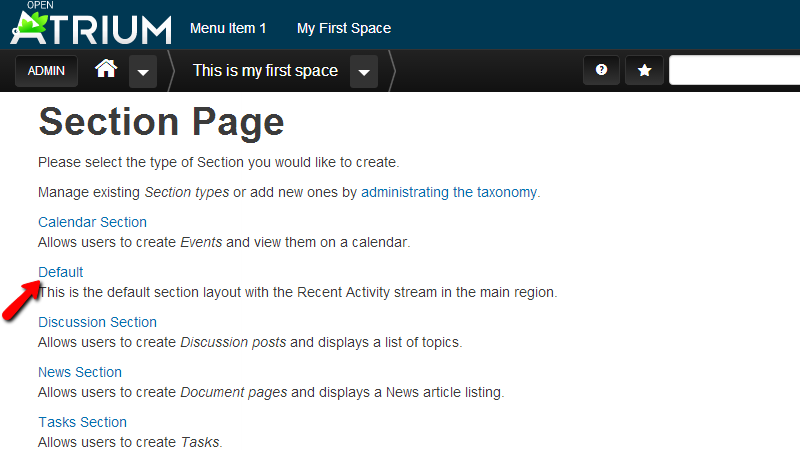
Once you click on the section type of page you would like to add you will be redirected to the same configuration page as the one in Option 1.
Step 2 Configure the new Section
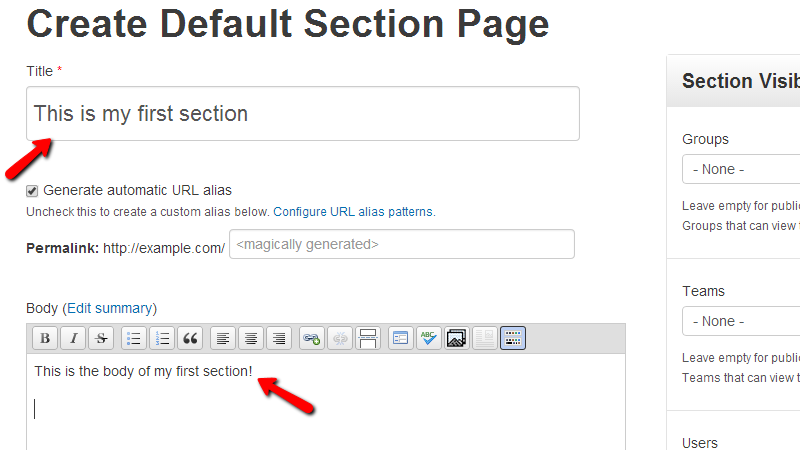
Now that you know where to begin with the creation of your new section it is time to learn a bit more about how the section should be configured. No matter which from the options in Step 1 you will choose you will always end up with the “Create Default Section Page” page.
Let’s review the configuration options you are presented with. From top to bottom we will split the options vertically as there is a sidebar full of options and main configuration area.
The main configuration area begins with the Title and the Body options. These two options are enough self-explanatory and we will not discuss them.
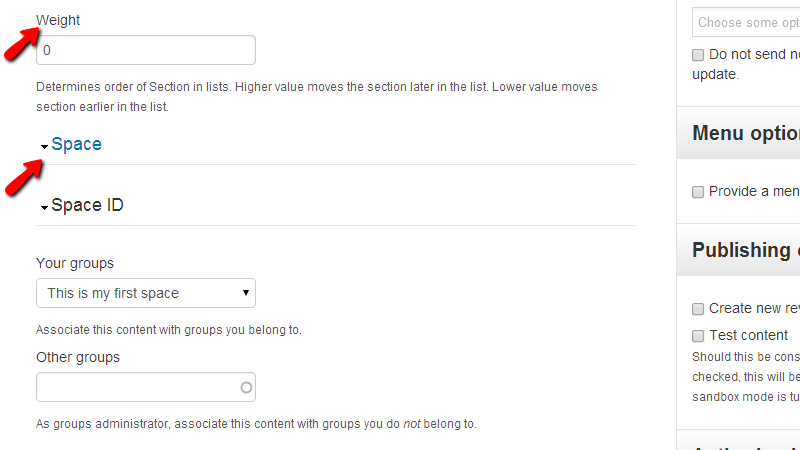
Next you will find the Weight option and the Space options. Now the Weight option is used for ordering your list of sections. Higher value moves the section to the bottom of the list while lower value will cause the section to be displayed at the top of the list. Usually you can have a list of sections as a block in the home page of your Space.
The Space option will bring a form where you will be able to choose if you would like to associate any of the groups you are participating in with this space or any other group.
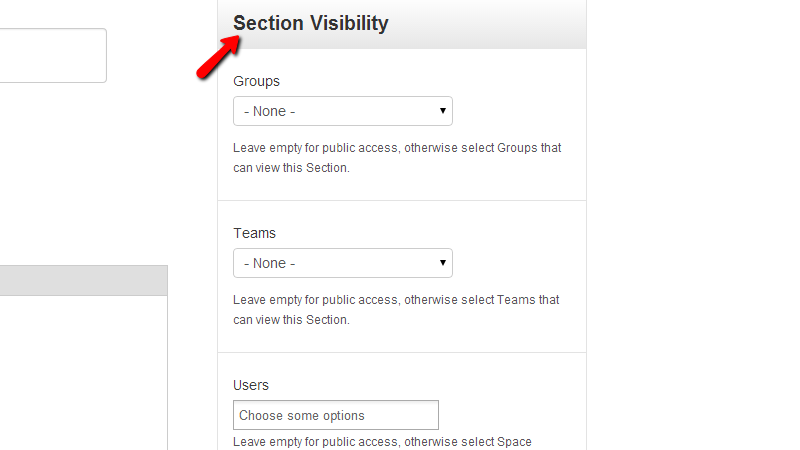
Let’s move to the sidebar where even more options are presented for you to configure. From the top to the bottom the sidebar begins with the Section Visibility block where you will be able to whom this section should be visible. You can choose from the existing Groups, Teams and of course Users.
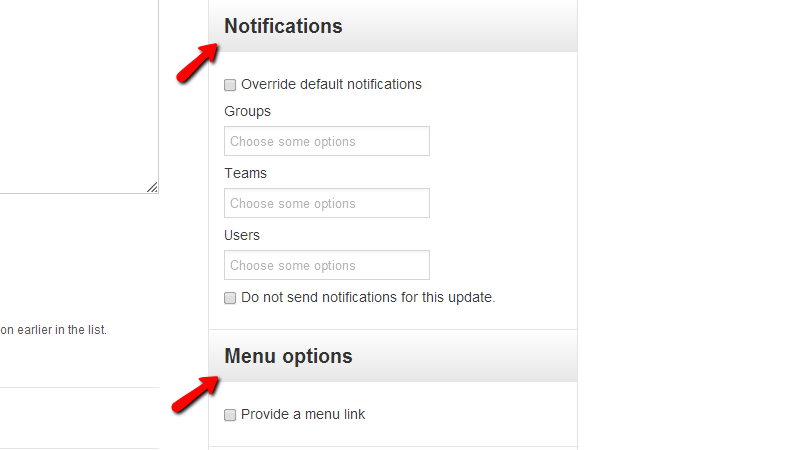
Next you will find the Notifications and Menu Options blocks where you will be able to configure to whom the notifications will be sent to and of course if you would like to have a menu link to this section.
The last two blocks of options are the Publishing options and also the Authoring Information. In the Publishing options block you will be able to configure the publishing of your section and in the Authoring Information block you will be able to configure the author, date and time when the section is published.
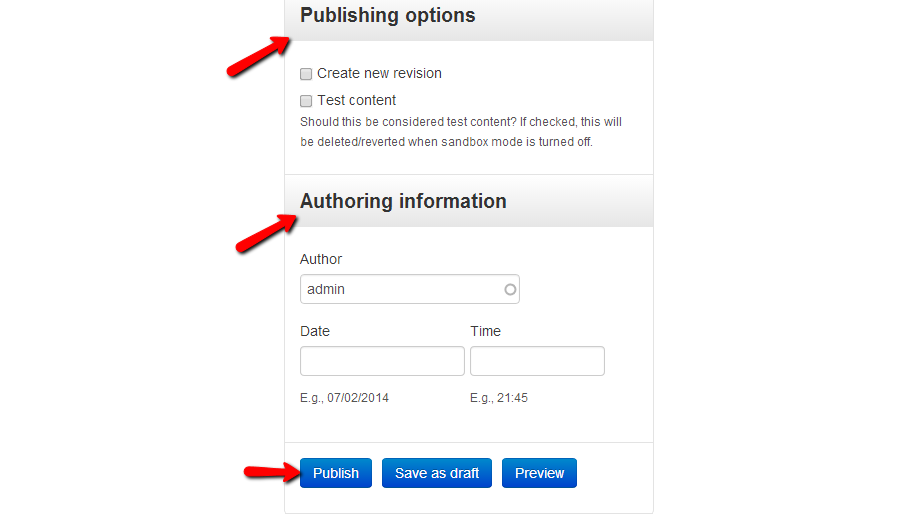
Of course when you are done configuring all of the options on that page at the bottom of the sidebar you will find the Publish button which will allow you to create your new section or the other optional buttons Save as draft (in order for the section to be publically unavailable) or Preview if you would like to preview the section.
Congratulations! You now know how to create a section within one of your already existing spaces!

Open Atrium Hosting
- Free Open Atrium Installation
- 24/7 Open Atrium Support
- Free Domain Transfer
- Hack-free Protection
- Fast SSD Storage
- Free Cloudflare CDN
- Free Open Atrium Transfer
- Immediate Activation