How to Configure the Appearance of your website
Updated on Mar 13, 2019
Open Atrium allows you to fully configure the look of your website either with a custom theme you can install or by changing the configuration of the overall appearance. In this tutorial we will show you how to configure the appearance of your website in Open Atrium.
To change the appearance of Open Atrium, you will need to:
Step 1 Enable/Disable Themes
By default Open Atrium comes with a set of themes which you will be able to enable if you would like to use such. In order to access the administrative page for the overall website appearance please navigate to Admin > Appearance.
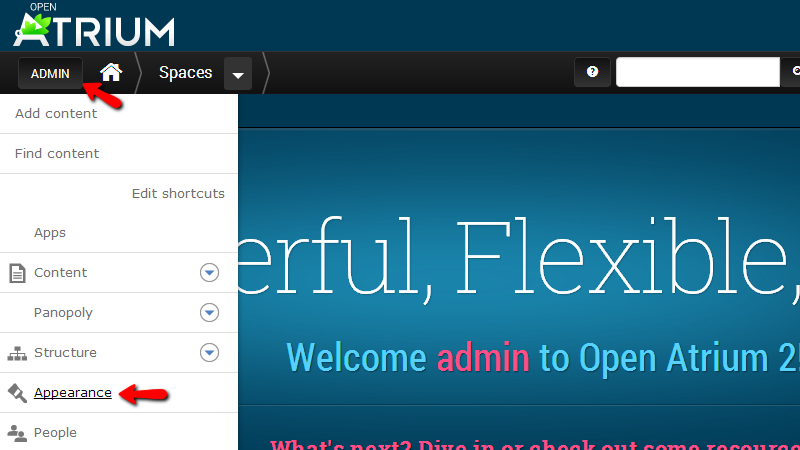
There you will be able to notice that the Appearance configuration page is actually separated on 4 configuration tabs for the different type of settings it offers. We will review the rest of the tabs in the next steps of this tutorial. Now let’s learn how to change the template of the platform to one of the already installed templates.
The themes of your website are separated on two major categories – Enabled themes and Disabled themes. In order to enable a theme from the disabled themes list you will need to simply click on the Enable link bellow the theme.
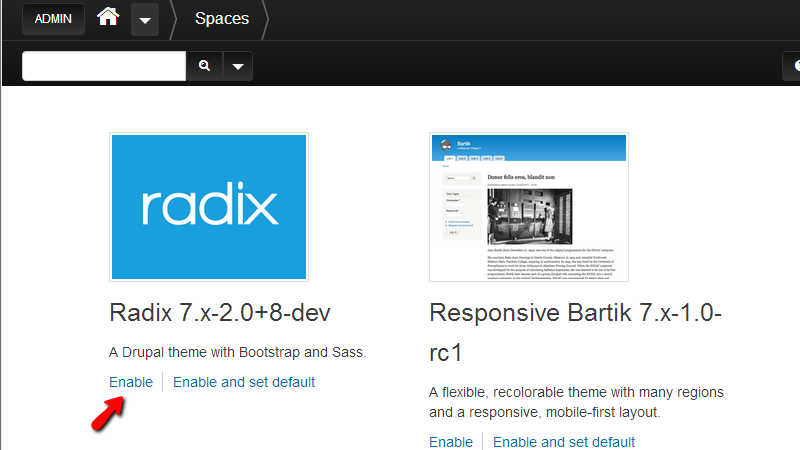
Once you enable a certain theme it will be moved to the list of Enabled Themes and there you will be able to set it as default theme via the Set default button next to the theme.
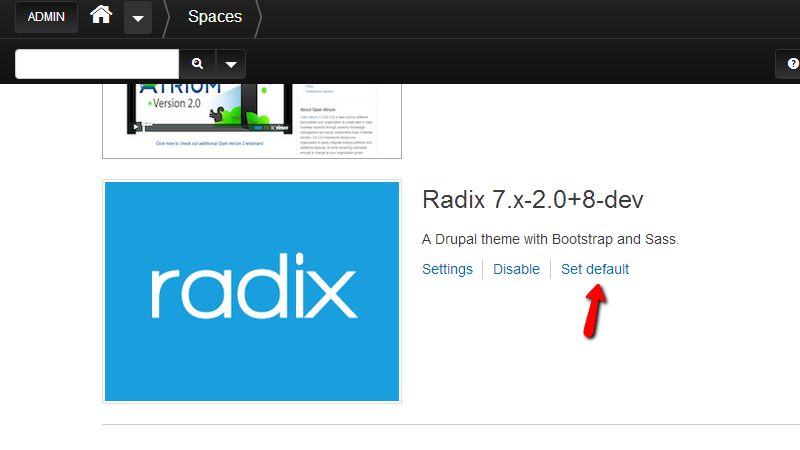
That is all you will need in order to activate a theme for your website.
Step 2 Configure the Theme
Each theme once set as default supports large amount of settings and in order for you to configure those you will need to click on the Settings tab from the tab list at the top of the page.
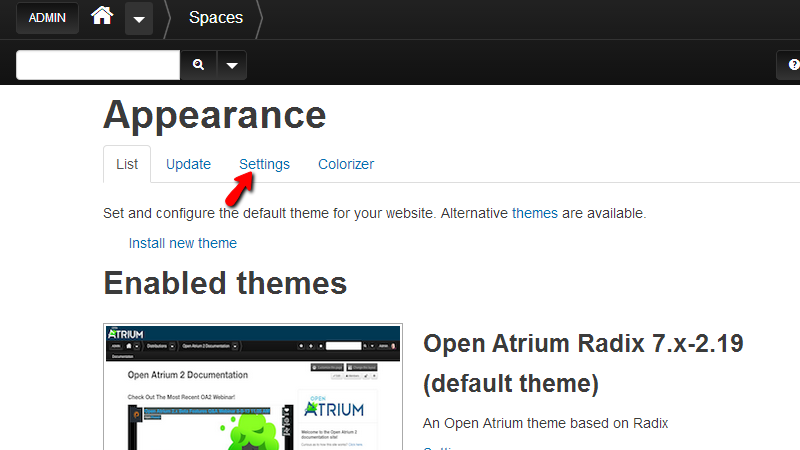
Each theme supports different amount of options you will be able to configure and for this reason you will be able to select if you would like the performed settings to be for all of the themes or for concrete theme using the horizontal menu right below the tabs on the Appearance page.
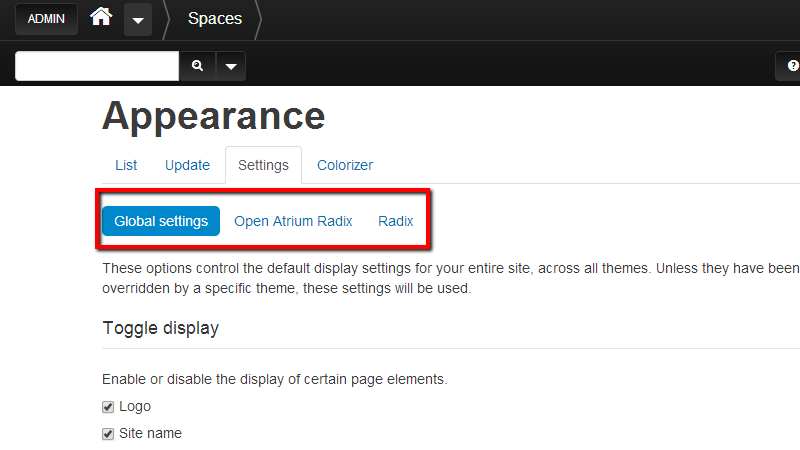
All of the supported settings are separated in 3 major sections:
- Toggle display – The options in this sections will enable or disable certain elements from the pages of your website. These options are self-explanatory se we will not discuss them.
- Logo image settings – Here you will be able to define if the activate template should use the provided default logo included in the theme package or not.
- Shortcut icon settings – This setting will allow you to use the default favicon of Open Atrium or not depending on your needs.
Once you are ready with these configuration please scroll down to the bottom of the page and use the Save Configuration button so you can be able to save the performed settings.
Step 3 Colorize your Website Style
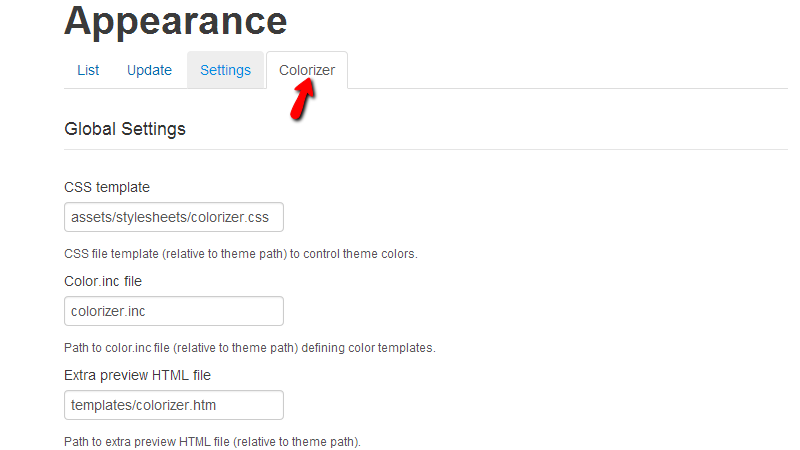
The fourth and final tab from the Appearance page is called Colorizer and there you will be able to configure the colors of your website. The available options on this page are separated on two sections - Global Settings and Color Scheme Settings.
In the Global Settings section you will be able to configure various paths to the CSS file of the theme, the color.inc file and also to the Extra preview HTML file.
The second section called Color Scheme Settings will provide you with the option to configure every single element of the website which is using colors. Additionally you will be able to choose one of the predefined color schemes from the Color scheme drop-down list.
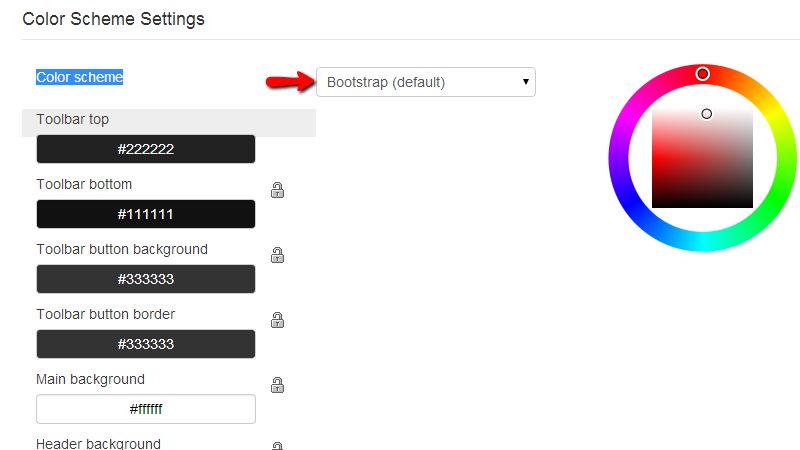
Of course once you are done with the settings please scroll down to the bottom of the page and use the Save Configuration button so your configuration can be saved.
Congratulations! You now know how to change the look and feel of your website using the Appearance configuration page!

Open Atrium Hosting
- Free Open Atrium Installation
- 24/7 Open Atrium Support
- Free Domain Transfer
- Hack-free Protection
- Fast SSD Storage
- Free Cloudflare CDN
- Free Open Atrium Transfer
- Immediate Activation
