How to Install Magento 2 Manually
Updated on Feb 27, 2025
In case your hosting provider does not have an application installer like we do (read about Softaculous here), then you can install Magento manually with just a few commands.
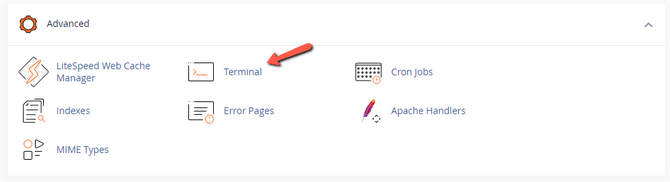
That means you will need at least some knowledge of using a command line or terminal. You can read this tutorial for more information. If you are our customer and wish to install Magento manually you can also take advantage of the Terminal tool in your cPanel account, under Advanced.
If you choose to use your own command line software you will need to connect to your cPanel account via SSH. Use your cPanel username and password that you received when purchasing our services with a command like this.
ssh cPanelUsernameHere@HostnameHere -p17177Replace cPanelUsernameHere with your actual cPanel user and HostnameHere with the hostname of your server with us. To find that out simply log into your account on FastComet.com and click on View Details next to the product you want to connect to. Just remember to whitelist your IP for SSH access.
Whether you use the Terminal in cPanel or you connect via your own SSH client, the steps for installing Magento manually are the same. Firstly, navigate to the directory you want to install Magento. We will use public_html for our example.
cd public_htmlThen, run this command to download Magento’s files. These are the files for the open-source Magento version, as it is the free one.
composer create-project --repository-url=https://repo.magento.com/ magento/project-community-edition <install-directory-name>Replace <install-directory-name> with a period and that will download the files in the current directory. Magento cannot be installed in a subdirectory, so ensure it is always in the root directory of your domain. The process might take a few minutes since there are a lot of files to download.
Moving away from the command line, the next step is to create a database. Fortunately, cPanel makes it extremely easy to do that via the Database Wizard. Check out our tutorial on how to create a database and assign a user and password to it. Note down the database’s name, user and password as you will need them for the next step.
By now Magento should have finished downloading and you can connect it and install it on your database. As Magento is an eCommerce platform it relies on a database for the majority of its operation. This last command is a bit long, so we will write it all out and then break it down.
bin/magento setup:install \
	--base-url=https://example.com
	--db-host=localhost \
	--db-name=magento \
	--db-user=magento \
	--db-password=magento \
	--admin-firstname=admin \
	--admin-lastname=admin \
	[email protected] \
	--admin-user=admin \
	--admin-password=admin123 \
	--language=en_US \
	--currency=USD \
	--timezone=America/Chicago \
	--use-rewrites=1 \
	--search-engine=opensearch \
	--opensearch-host=os-host.example.com \
	--opensearch-port=9200 \
	--opensearch-index-prefix=magento2 \
	--opensearch-timeout=15 \
	--disable-modules="Magento_InventoryElasticsearch,Magento_Elasticsearch7,Magento_Elasticsearch,Magento_OpenSearch"
Despite what it looks like, that is one command, yes. In reality, it is one command with a bunch of flags attached to it. Flags are like options and reading through them you can probably understand their purpose. All values the flags have go after the equals sign, no empty space. Here is a quick rundown.
- --base-url - Write the full URL of your website here. Ensure you include the protocol (http:// or https://) and www. if it has it;
- --db-host, name, user, and password - Place your database variables here. If the database is on the same server as your Magento application simply write localhost. Otherwise place the IP of the server the database is on. Name, user and password are the ones you used when creating the database;
- --admin-firstname, lastname, email, user, and password - Choose these variables depending on what you want your website’s admin user’s information to be. You must input a valid email address because you will be required to enable 2FA in order to open the Magento dashboard;
- --language - en_US is the default value for this flag and will set Magento’s language to American English. Change this as per your preferences;
- --currency - Set your Magento store’s currency via this flag;
- --timezone - This flag sets the timezone of your Magento website;
- --use-rewrites - In simple terms, enabling this option (value of 1) allows Magento to omit index.php in its URLs. (https://example.com/category/product instead of https://example.com/index.php/category/product). That makes the URLs more SEO-friendly;
- --search-engine - This specifies the search engine for catalog searches. There are MySQL, Elasticsearch and OpenSearch. The latter two are required for Magento 2.4. Change the command here according to your search engine. Instead of opensearch it will be elasticsearch if you are using Elasticsearch. Change the remaining values as necessary;
- --disable-modules - This is an optional flag that you should use if you are installing Magento 2.4 on a Shared Hosting environment that does not have access to Elasticsearch or OpenSearch. Disabling these modules will force Magento to use MySQL for its catalog searches. Not to worry, though, it is entirely possible to re-enable those modules later if necessary.
Notice
Our Shared Hosting customers do not need to worry about using the slow MySQL catalog searches. Elasticsearch is available as a Cloud App on our FastComet Marketplace. Since it is a Cloud App it is hosted offsite and you will be given all the vital information to connect it to your Magento 2 website. Here at FastComet we are fully dedicated to supporting your Magento 2 websites.
You are almost done! Once that command is done your Magento website and its database will be connected. You will also be given the admin URI for the dashboard. Make sure you note it down, as it is how you access the dashboard! It will look something like this.
https://yourdomain.com/admin_123
Everything is working together in harmony, but we strongly recommend you take one more step. Swissup Labs offer high-quality Magento modules that integrate perfectly with the application. It functions like Magento’s default marketplace for modules so users familiar with that will find it pleasantly familiar. It allows users to fully manage their Swissup Labs modules. Install the Swissup Labs module manager with this command.
composer require swissup/module-marketplace &&\
php bin/magento setup:upgrade &&\
php bin/magento marketplace:channel:enable swissuplabs
Whether you installed the last module or not, you are done with the installation of Magento. When you try to log into your dashboard you will be prompted to enable 2FA. If you are not familiar with 2FA, check out the previous part of our tutorial on how to set it up. When that is done, you are all set! Magento is at your disposal.

Magento 2 Hosting
- Free Installation
- 24/7 Magento Support
- Free Domain Transfer
- Hack-free Protection
- Fast SSD Storage
- Free Cloudflare CDN
- Free Magento Transfer
- Immediate Activation