How to Configure the Design Settings of Magento 2
Updated on Mar 13, 2019
With Magento’s version 2.1 changes some of the design options have switched menus inside the Admin Dashboard, so due to a request from our users, we have added this updated tutorial on how to find the design settings and use them to change your website's favicon, logo and footer copyright message among other things.
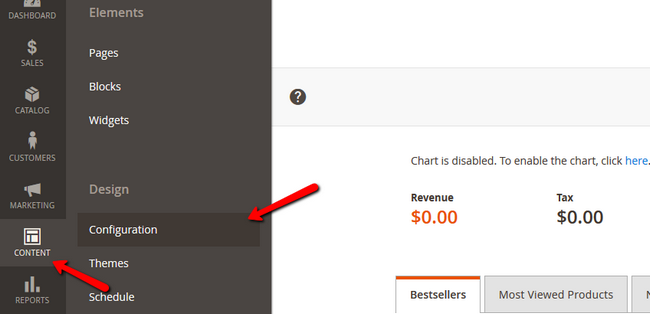
The first thing you will need to do is to log in your admin area inside your Magento website. Afterwards, navigate to CONTENT → Configuration.
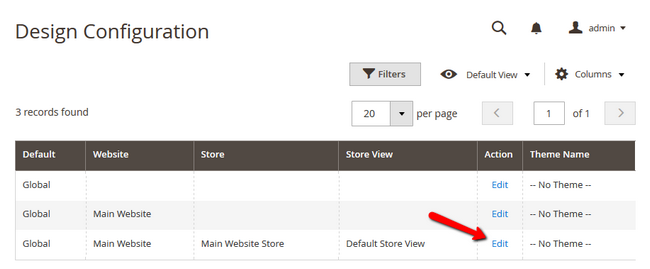
Now select the store and level on which you wish to edit the design by clicking on the Edit action.
Theme Warning
Note that some of these settings may not apply unless you choose the applied theme (if a custom one is applied at the moment)
Select the Other Settings submenu and expand the HTML Head option.
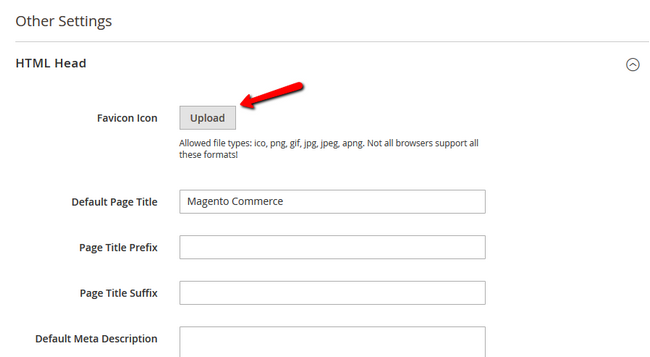
Here you will be able to add your favicon. Due note that Magento supports the following file types for favicon:
- .ico
- .png
- .apng
- .gif
- .jpg
- .jpeg
- .svg
While not all browsers support all these formats the most used and well known format for a favicon is the .ico.
The other important option here is the Default Title. This title will be used for any page that does not have a specific Title predefined for it. The prefix and suffix options can be to add a certain word phrase before or after all page titles in bulk.
To add a new Logo for your Store, expand the Header option which is right below the HTML Head one. The allowed formats are
- .png
- .gif
- .jpg
- .jpeg
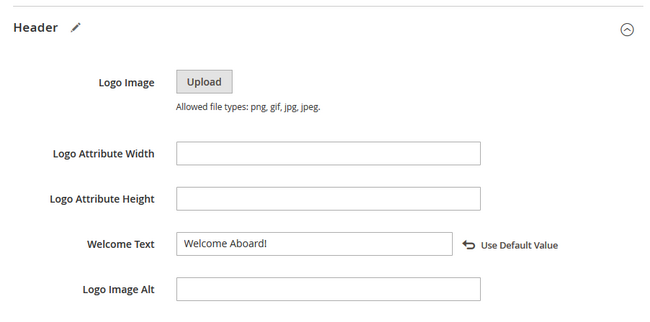
Now you can add/change the logo, configure its width and height as well as add a Welcome Message for your store and alternative text for the logo so search engines can crawl it correctly.
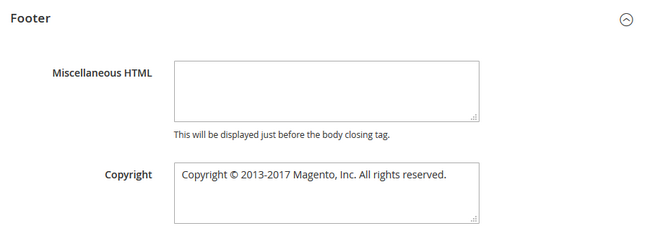
With this you can substitute the default Magento copyright message or any custom one that may appear with a theme you have enabled with your company's.
Don't forget to click the Save Configuration option in the upper right corner to save the changes you just made and Flush your Magento Cache if caching is enabled.

Magento 2 Hosting
- Free Installation
- 24/7 Magento Support
- Free Domain Transfer
- Hack-free Protection
- Fast SSD Storage
- Free Cloudflare CDN
- Free Magento Transfer
- Immediate Activation
