How to Manage Customers in Magento 2
Updated on Mar 13, 2019
Separating your customers in different groups according to their needs, can be advantageous and increase the overall satisfaction from the user experience. In this tutorial, we will show you how to create a new customer and customer group from inside the admin area of your website.
To manage your customers in Magento 2, you need to learn to:
Add a New Customer
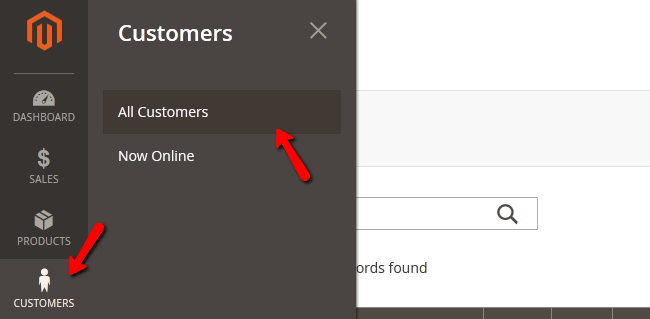
To manually add a new customer to your Magento 2 Store, you will need to refer to your admin area and navigate to Customers → All Customers.
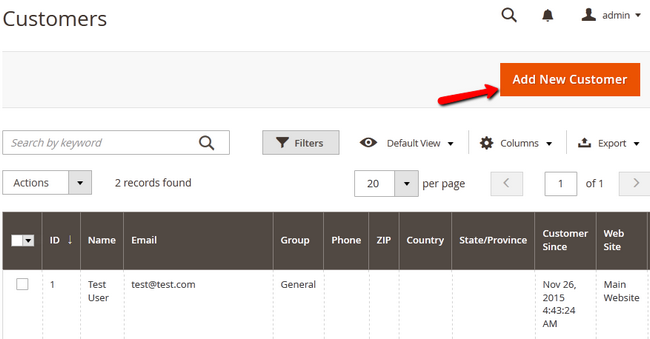
Here you will see all of the customers on your website and you will need to click on the Add New Customer button located at the top right corner of the page.
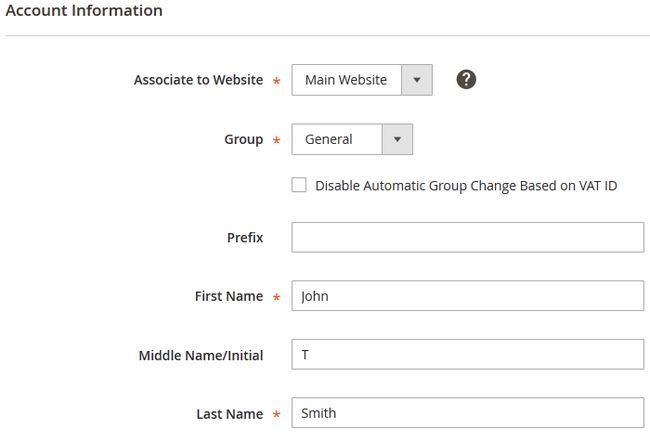
Now you have to populate the customer details in the appropriate fields in the Account Information tab.
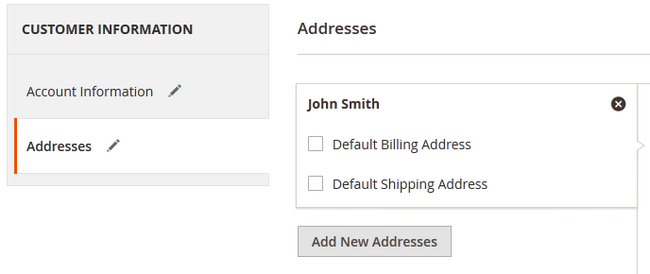
You can add a billing and shipping address for the customer in the Addresses tab.
Add a New Customer Group
Unlike the previous Magento versions, the Customer Group section is inconveniently separated from the Customers menu and located in the Stores menu.
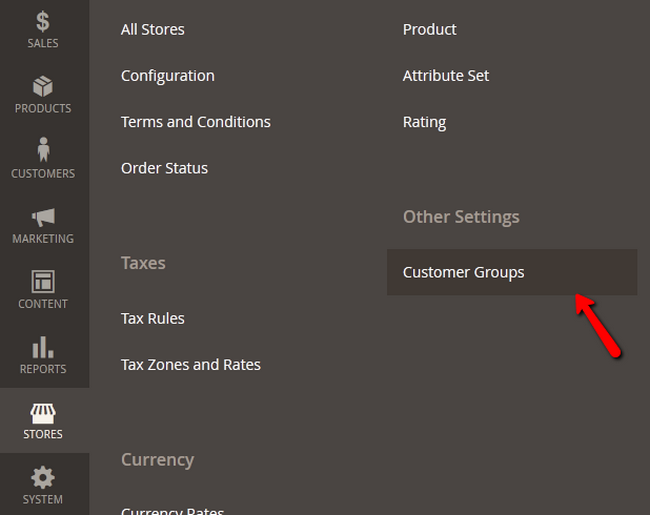
When you access the Customer Groups section, you will be able to see all currently existing customer groups, their tax classes and IDs. To create a new group, click on the Add New Customer Group button.
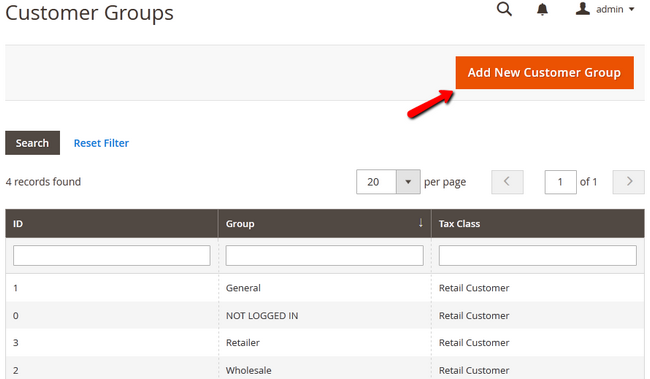
You will have to Name the group and select a Tax Class for it. Once you have done that, hit the Save Customer Group button to create this group.
As we made a customer group called Super Customers, we will now be able to move there the customers who spend the most amount of money on our store. They will benefit from the lowered Tax from the special Tax Class we have added for them which will certainly make them purchase even more goods from our Store.

Magento 2 Hosting
- Free Installation
- 24/7 Magento Support
- Free Domain Transfer
- Hack-free Protection
- Fast SSD Storage
- Free Cloudflare CDN
- Free Magento Transfer
- Immediate Activation
