How to Add a New Product in Magento 2
Updated on Mar 13, 2019
As with all stores, you will need to populate yours with products and configure each one of them. The process is seamless and easy to be completed by anyone.
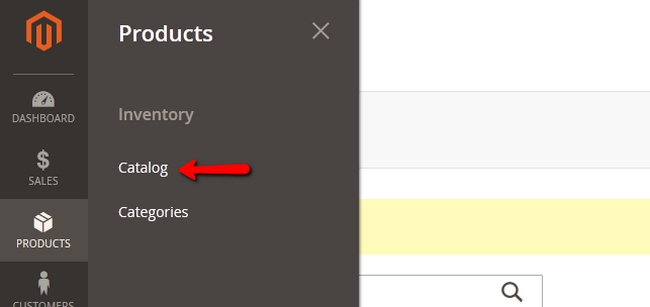
To add a new product, please access your admin area and navigate to the Products → Catalog from the main admin panel. If you still haven't created a Category, you can check out our How to Create Categories in Magento 2 tutorial.
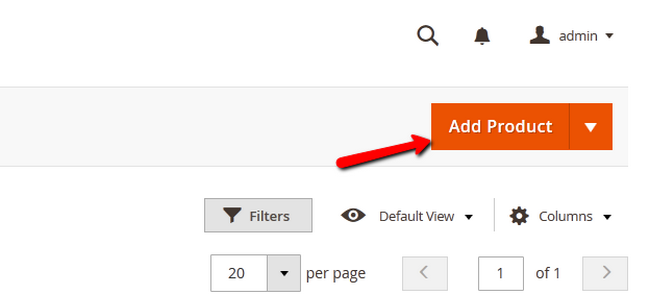
Click on the big orange Add Product button to start configuring a new Product.
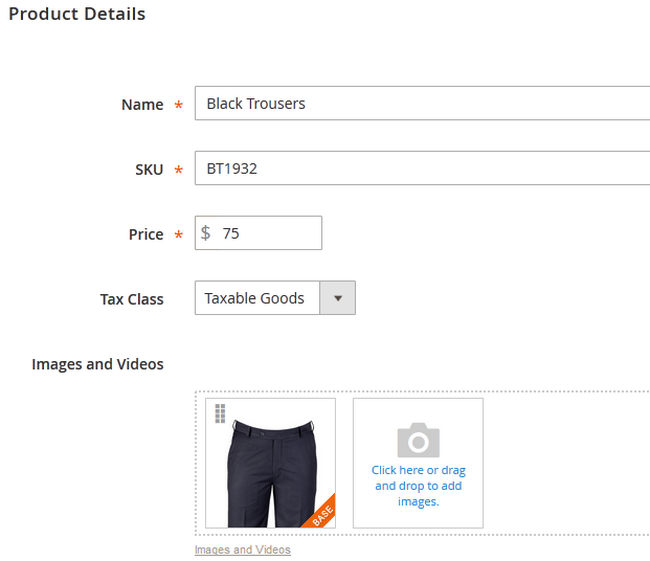
Now you will be able to configure:
- Name - The name of the product
- SKU - The Stock keeping Unit of the product (for tracking the inventory of your store)
- Price - The price value of the product
- Tax Class - The Tax Class for the product
- Images and Videos - Select an image/video representing the product
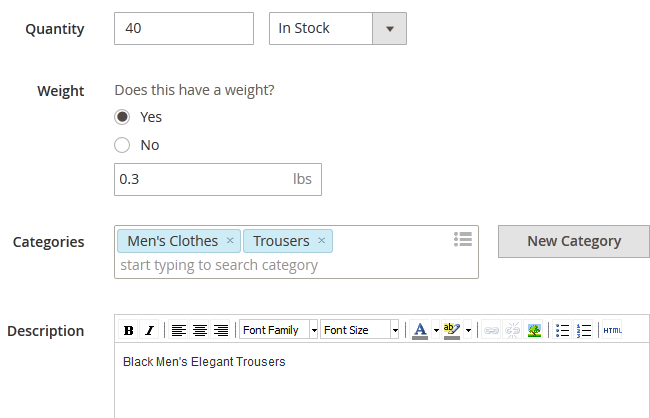
- Quantity - The amount of quantity currently in stock
- Weight - The weight of the product (for shipping purposes)
- Categories - The exact category you wish to place this product in
- Description - A short description regarding the features of the product
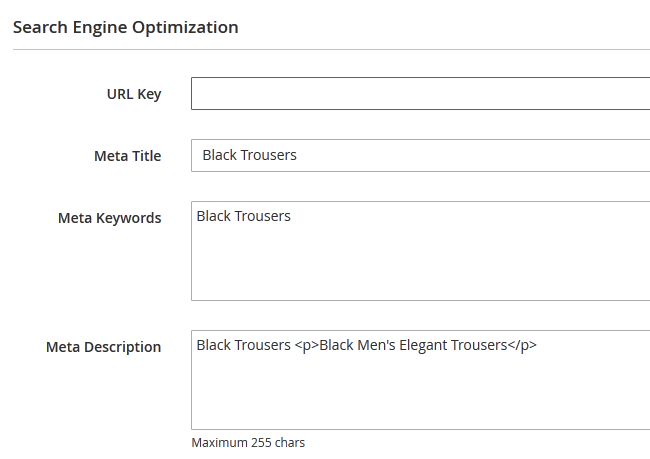
You should thing about the Search Engine Optimization (SEO) of your new product. If you click on the corresponding tab from the menu bar on the left you will be presented with:
- URL Key - This will be the end of the URL when your product is being accessed (example.com/magento/URLkey). If not filled, it will be automatically created from the product name
- Meta Title - Specifies the title of the web page appearing on the browser
- Meta Keywords - These keywords will help the search engines with indexing your product page
- Meta Description - Describes the content of the product page to the search engines
Before you add the product, you can add a new attribute by clicking on the Add Attribute button.
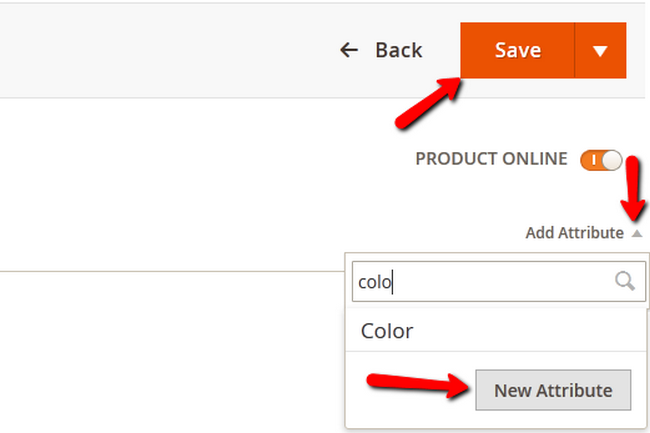
When you are done, click on the Save button to finalize the product creation process.
Congratulations, you can now add products to your Magento 2 based Store.

Magento 2 Hosting
- Free Installation
- 24/7 Magento Support
- Free Domain Transfer
- Hack-free Protection
- Fast SSD Storage
- Free Cloudflare CDN
- Free Magento Transfer
- Immediate Activation
