How to Manage your Customers in Magento
Updated on Mar 8, 2019
Different customer groups allow you to differentiate your customers into different tax groups and edit, add or remove customers accounts and their attributes in Magento.
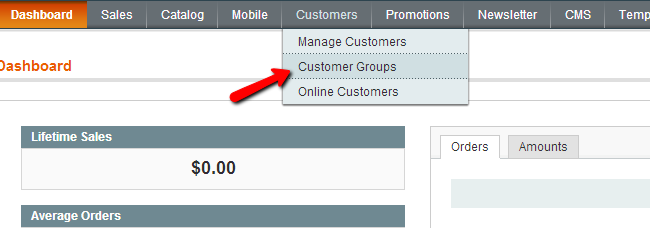
To access the Magento customers administration panel, please login your Magento Admin Dashboard and navigate to the Customers tab from the top menu. First, we will create a new customer group via the Customer Group menu under the Customers tab.

To add a new Customer Group click on the Add New Customer Group button on the top right corner of your screen.

On the new page input the new Group Name and select the desired Tax Class from the drop down menu.

When you are ready click on the Save Customer Group button on the top right corner. Now you should see your new Customer Group on the Customer Groups page. Let's add a customer to the newly created group to apply the desired Tax Class. To achieve this refer to the Customers → Manage Customers submenu.
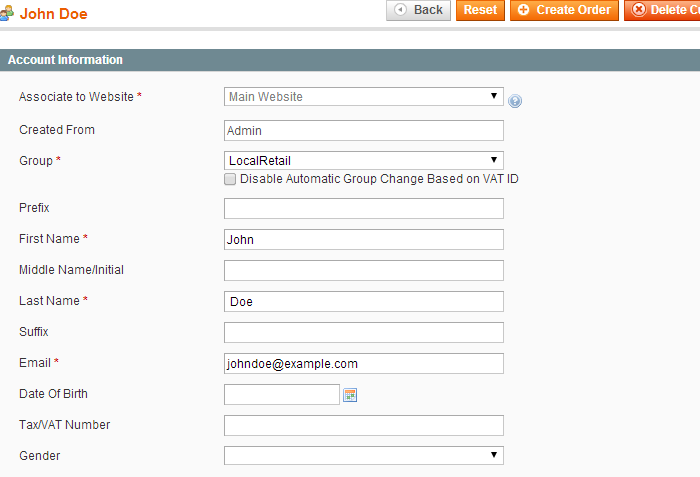
This will redirect you to the Manage Customers page where you should be able to see a list of all your Magento Store customers. To add a new customer click on the Add New Customer button on the top right corner. On the new page you should input your new customer information and select the desired Tax Group from the Group drop down menu.

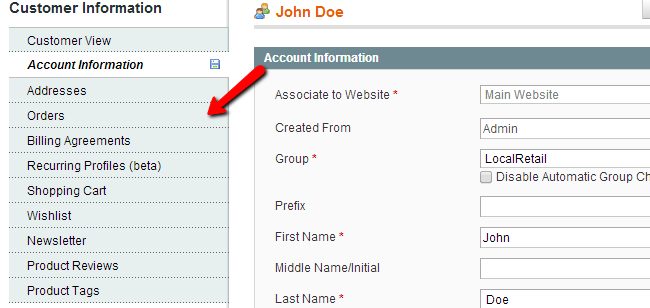
When you are ready, please click on the Save Customer button. When the new user is added to your Magento store additional options will be provided for you such as billing address, orders and Shopping Cart list associated with this customer. You can review and edit these settings from the menu on the left.

To edit an existing customer in your Magento store, please refer to the Manage Customers page and click the edit button next to the name of the customer you would like to modify.

With this, you have completed the tutorial and can now manage your customers in the admin area of Magento.

Magento Hosting
- Free Installation
- 24/7 Magento Support
- Hack-free Protection
- Fast SSD Storage
- Free Domain Transfer
- Free Magento Transfer
- Immediate Activation
- Free Cloudflare CDN
