Working With Databases
Updated on Jul 11, 2024
Laravel allows users to run database queries directly from within the application itself. This is a good way to work with the assigned database and add, remove, or view information from it. One method is to run the so-called raw SQL queries, and another is to use Eloquent, which we have mentioned previously in this tutorial. In this section of the tutorial, we will show you how to run raw SQL queries from the web.php file.
Using raw SQL queries will let us insert, retrieve, update, and delete data from the database assigned to the Laravel application. To begin, we must create a table in which we will be inserting our data. We will create a simple posts table for our example, but you can call it whatever you wish. We will use a couple of commands in the application's root directory to do that. We described them in the command and migrations section. The first command will create the migration for our new table.
php artisan make:migration create_posts_table
The migration file is located in databases/migrations. Its name has a timestamp from the moment you run the command. It is usually the last modified file. Open it and place this code within it.
<?php
use Illuminate\Support\Facades\Schema;
use Illuminate\Database\Schema\Blueprint;
use Illuminate\Database\Migrations\Migration;
class CreatePostsTable extends Migration
{
/**
* Run the migrations.
*
* @return void
*/
public function up()
{
Schema::create('posts', function (Blueprint $table) {
$table->bigIncrements('id');
$table->string('title');
$table->text('body');
$table->boolean('is_publish')->default(0);
$table->timestamps();
});
}
/**
* Reverse the migrations.
*
* @return void
*/
public function down()
{
Schema::dropIfExists('posts');
}
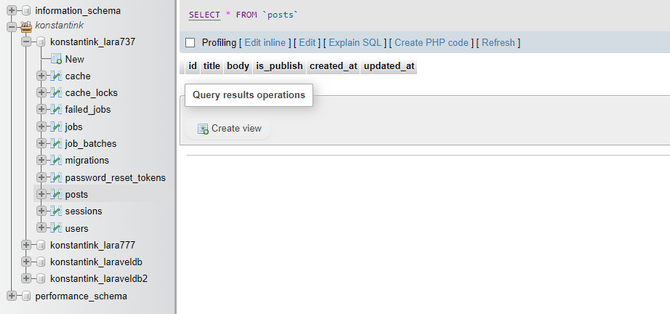
}This will add a new column for string, integer, timestamp, and text data in the new table. All of those columns are necessary for the table's proper functionality. Once that is done, it is time to actually run the command that will create the table.
php artisan migrate
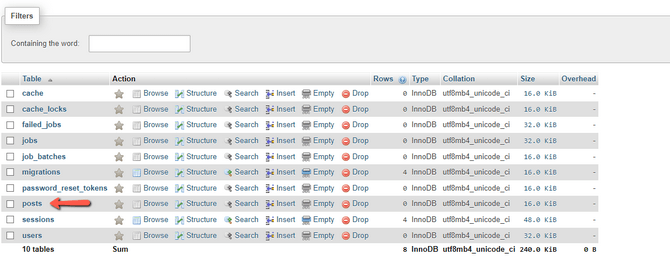
The table will appear in your database once the command finishes (it shouldn't take more than a moment).
Next, it's time to add an entry to the new table we just created. Open the web.php file located in the routes directory. The code below will add a simple entry with some plain text. Simply paste it at the bottom of the file.
Route::get('/insert', function () {
DB::insert('insert into posts(title,body) values(?,?)',['FastComet','Hello from FastComet']);
});
The last step is to go to the /insert URL of your application. Depending on where you are running the application, you might have to use localhost or the domain name you are using. In either case, enter the URL of your application in your browser (along with any subdirectory it might be in), as well as /public/insert at the end. That should show you a blank screen, but if you look at the posts table, you will see a brand-new entry!
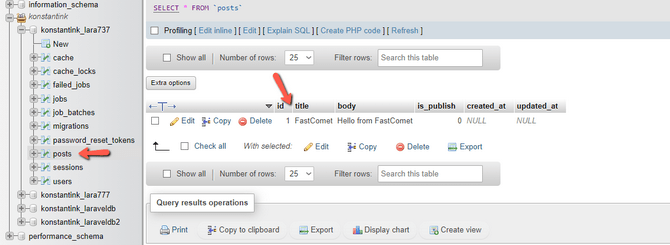
If you want to add something else, simply edit the title and body values of the code, and that will add another entry. Basically, the code sets /insert as the URL of the function. The function itself is DB:insert, and the values of the function are specified within the parenthesis. Now that we have something in our database, it is time to actually take a look at it in the browser.
Return to the web.php file and place this code under your previous route.
Route::get('/select',function(){
$results=DB::select('select * from posts where id=?',[1]);
foreach($results as $posts)
{
echo "title is : ".$posts->title;
echo "<br>";
echo "body is: ".$posts->body;
}
}); 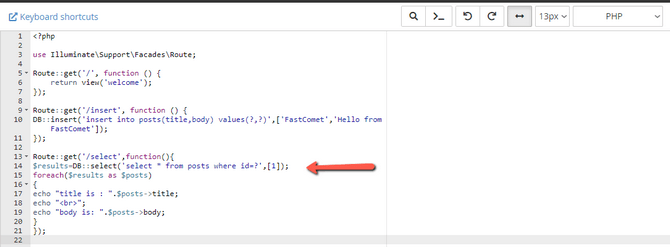
What this route will do is when we go to the /select URL, the application will retrieve data from the database. DB is the class that implements the select() method, which in turn contains two parameters: the select command and array representing the value of the id. In this case, it is 1. When we go to the /select URL in our browser, we will see the contents of that table.

Now that we have data in the table, how about we change what it says? Updating data in a database's tables is just as easy as adding or viewing it. It's all done with a route via the web.php file. Here is another block of code that will update or edit the data in the posts table.
Route::get('/update', function(){
$updated=DB::update('update posts set title="Laravel is Great" where id=?',[1]);
return $updated;
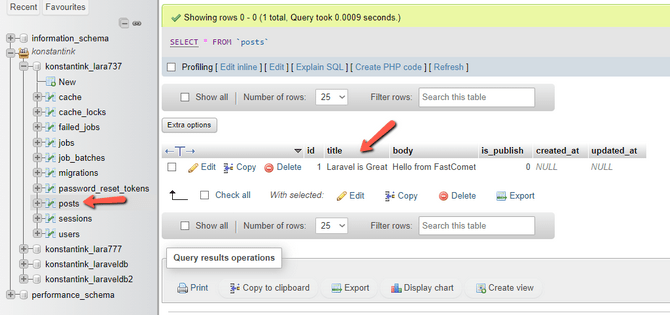
}); As you can see, we are using the DB class again, but with the update command this time. Once more, we have two parameters. The first one changes the title of the entry with ID 1, while the second one specifies the entry's ID: 1. When you go to /update in your browser, as you did for the previous routes, and then go back to your database, you should see it has changed.
And, finally, removing data from the database. Just as easy as the other routes, but this time, we invoke the delete command.
Route::get('/delete',function(){
$deleted=DB::delete('delete from posts where id=?',[1]);
return $deleted;
});
And since the specified ID is 1, this route will delete the entry with ID 1. Opening it in our browser will show either a blank screen or a single symbol on it, and when we go to the database itself, we will see the entry is no longer there.
With these four routes, you can easily manipulate any database table in your application. All you need to do is change the parameters to specify the correct table and ID, and you are set!