Sessions
Updated on Jul 11, 2024
You might already be familiar with the term "Sessions" when it comes to applications. You have probably seen a message on your browser claiming "Your session has expired" when trying to log into a website. Simply put, a session in this context, and the context of Laravel, is the time frame between you accessing an online application and closing it. Some applications allow sessions to persist for longer periods of time, of course, saving any temporary data you might have inputted or accessed.
And that is the purpose of a session: to store temporary data so you don't have to input it every time you access the application. For instance, login details or shopping cart data are temporary data that a session saves. In Laravel, sessions perform a similar task; in this part of our tutorial, we will learn all about them.
This Post Includes:
Session Configuration
Since there is not much else to say about what sessions are, aside from what we already mentioned above, let's instead focus on how sessions are configured in Laravel. To start, let's have a look at the config/session.php file. That is where all variables associated with sessions can be configured.
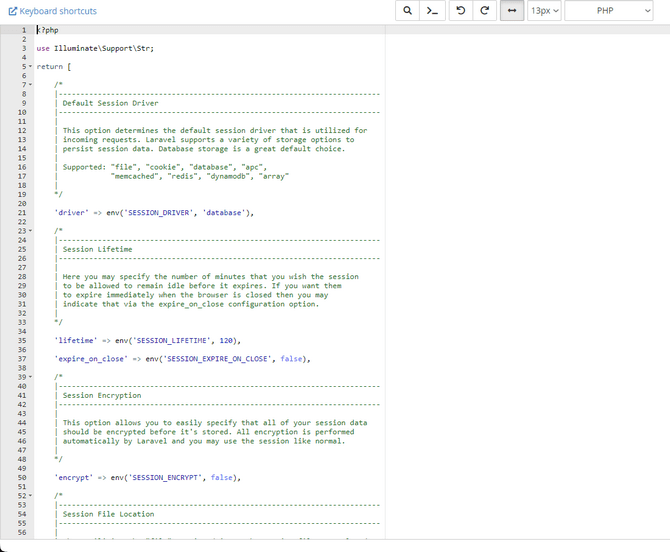
Your file should be like the image above if you are using a fresh Laravel installation. As you can see, it is full of comments from the developers about what each section does. We will sum them up here for your convenience.
- Driver - This option is at the top because it is the most important one. It specifies the method Laravel will use to save user data. The available drivers are:
- File - Session data will be stored in a file specified in the file options further below. Best for temporary usage, as distributed environments or big sessions struggle with it;
- Cookie - Sessions will be stored in client-side lightweight cookies, making them a fast driver. They are not saved on the server. That is great when there are storage or resource considerations. Of course, they bear the same risks as other browser cookies, so be aware of those;
- Database - Stores session data in the database, which naturally requires a database connection. Laravel will create a table called sessions. The name can be changed from the table option. More stable than the file driver;
- Redis - A Redis server is required for this driver to function, as all session data will be stored on it. Laravel already comes with Redis support, so you don't need to add that yourself. Such a driver is great for scalability and speed if a server is available;
- Memcached - Similar to Redis, this driver stores data on a Memcached server. It is also great for scalability and speed and is an alternative to Redis;
- Array - Finally, this driver uses a PHP array to store data. Sessions are stored in memory and are lost when the PHP process finishes. Highly unsuitable for production applications and mainly used for testing;
- Lifetime - This line specifies the number of minutes a session will last. After a session expires, user data must be entered anew. Additionally, the expire_on_close option can be used to decide if a session will expire as soon as the browser is closed or not;
- Encrypt - Enabling this option will encrypt all session data before it is stored. This is a quick and easy way to protect user data without any hassle. Simply turn it on, and Laravel will do the rest;
- Files - This line specifies the path to the storage file for the File session driver;
- Connection - Here, you can input the connection that the Database, Redis, or Memcached season drivers will use;
- Table - The default table for the Database session driver is called sessions, but you can change the name here;
- Store - If you are using a cache-driven session backend, you can specify the store it will use. Of course, the store must exist beforehand and must match a store within the application;
- Lottery - This line dictates the chances a session driver will sweep their storage and purge old sessions. Not all drivers need this; the chances are "X out of Y" on any given request. By default, they are 2 out of 100;
- Cookie - Here, you can specify the cookie's name used to identify a session by its ID. All new cookies will use this name;
- Path - This option allows you to change the path for which the cookie will be regarded as available. It is typically the root directory of your application;
- Domain - Use this line to change the cookie's domain used to identify a session. This will specify which domains your cookie is available for in the session;
- Secure - Here, you can decide that all session cookies are returned to the application solely via HTTPS. That will stop any cookies that are not secured from being stored;
- HTTP_Only - If enabled, JavaScript will be disallowed from accessing the value of the cookie, and the cookie will be available solely through HTTP;
- Same_Site - This option determines how the cookies behave when cross-site requests occur. This is useful when trying to protect your application from CSRF attacks. There are four values: lax, strict, none, and null. The default is lax;
- Partitioned - Finally, enabling this option will tie the cookie to the top-level site in a cross-site context. A browser can accept such cookies only when flagged as Secure and Same_Site is set to none.
As you can see, configuring your application's session behavior is very straightforward. The developers have truly made it easy to get into and change to fit your needs. Next, let's learn how to work with session data!
Working With Session Data
Finally, in our tutorial about Sessions in Laravel, we will explain how to work with data. We will show you a few examples of how to store, retrieve, flash, reflash, check, and delete data from your sessions. The most convenient way to do that is to use the Global Session Helper that Laravel comes equipped with. It is a streamlined way of interacting with sessions within the application, utilizing the session() function. It can be used in several different places throughout the application, too!
- Controllers - The most common place session data is interacted with. The Helper can be used to work with session data based on the logic of the application within these controllers;
- Routes - Within Route files (routes/web.php), you can interact with session data that is based on the functionality of your application;
- Middleware - Middleware session data can be used to modify said data before it arrives at the application's core logic, for instance;
- Views - Views are where you will interact with session data the least. Nonetheless, you can control how content is rendered based on session data in your Blade Views.
As you can see, the Helper is rather flexible. Next, let's examine how to use it, specifically the session() function. As mentioned previously, we will discuss the Helper's core functionalities and show you the exact code necessary to utilize them.
- Store Data - To store data in a session, you can use the session() function by providing a key and a value. The key is basically an identifier under which the specific data will be stored. In our example below, username is our key, and JaneSmith is our value. We are storing the username JaneSmith in the username session data;
- session([‘username’ => ‘JaneSmith’]);
- Retrieve Data - Now that you have some data stored, you can use the session() function to retrieve it. Simply invoke the key you want to see, and the application will show all the data under it;
- $value = session(‘key’);
- Flash Data - When flashing data to a session, that data will be stored for only one request. After that, it is deleted. It is handy when you want to display a message to a user, for instance, that then disappears;
- session() ->flash( ‘key’, ‘value’);
- Reflash Data - Reflashing data to a session will keep it for an additional request instead of for just a single one. That is handy if you expect to flash said data often. The function does not need any parameters to be passed, as it simply extends the lifespan of data for one additional request;
- session() ->reflash();
- Delete Data - If you want to get rid of data in your session, you can use forget() to do so;
- session() -> forget(‘key’);
- Checking Data - You can also use the session() function to see if a specific key exists in the session;
- if (session() ->has(‘key’)){ }
- Accessing Session Instance - If you need direct access to the session instance itself, you can also use the Helper for that. Simply call on the session() function without any arguments;
- $sessionInstance = session();
This streamlined approach to working with session data is one of Laravel's many outstanding features. It is easy to understand, and the code is consistent, straightforward, and hassle-free. Whether in a Controller, View, or any other part of your application, the Global Session Helper will make working with your session data a breeze!