Environment Configuration
Updated on Jul 11, 2024
Being a PHP framework, Laravel can be configured to suit many different environments. For example, you can configure your Laravel application to use one cache driver on your local machine and a different one on a production server. In this part of our tutorial, we will explore the various configuration variables that can be changed to suit your application's environment. Let's start with the first environment file you will likely see: .env.
This post includes:
The .ENV File
The name of this file literally comes from the word "environment". Within it, you will find several environmental variables that can be adjusted or new ones added. A fresh Laravel installation comes with an example file called .env.example. The application will not use any values in this file, as it is designed only to use the actual .env to pull environmental values from. You can rename the file and delete the "example" part to activate it. Remember that "dotfiles" (files with a dot in front of them) can appear hidden on Linux systems, so don't panic if you can't find yours. Just enable the visibility of such files, and you'll find it in no time. This is what the .env.example file has in it by default.
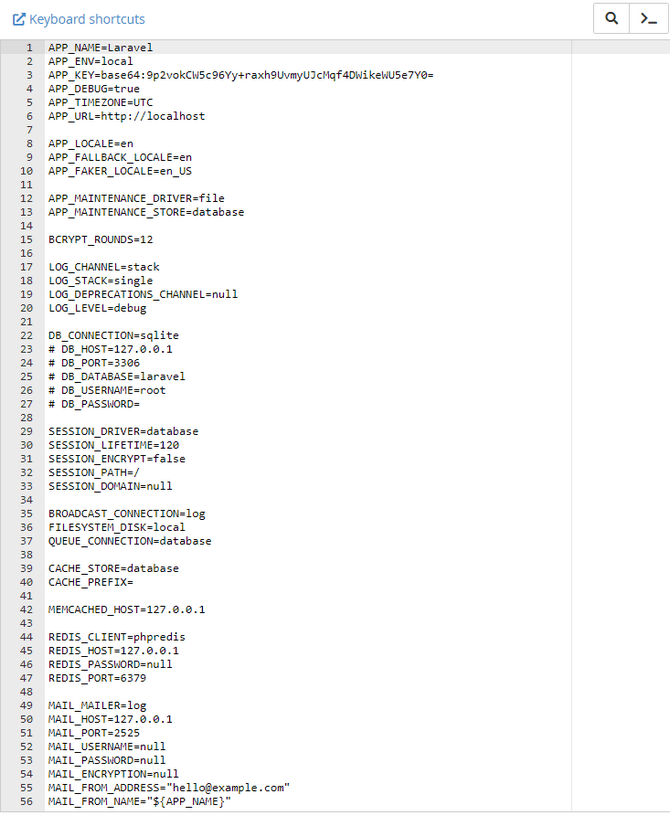
Even if you are not experienced with Laravel, you can probably understand what some of these variables do. Just remember that some of them can be overridden by the external environment itself: server or environment-level variables. The example file is also excellent if you are working with others and need to bounce ideas off one another. Any value placed in it will not affect the application, and you can show your team what needs to be done or edited, for instance.
Since it is such an important file, the .env file should also be well protected. If it is ever compromised, it will give the attackers access to sensitive information about your application or even the server it is running on. However, Laravel has an encryption function that allows you to protect the .env file precisely for that reason. It is straightforward to use, too! Start by using this simple command.
php artisan env:encrypt

As you can see, the output gave us a decryption key. If you would like to input your own decryption key, you can use this command instead, where you type your key immediately after the = symbol, no space.
php artisan env:encrypt --key=
The length of the encryption key should be 32 alphanumeric characters. Once you have encrypted the file, its contents will be moved to the .env.encrypted file. Now, you might be asking yourself how this will help if the original .env file is still there, in full view. After all, we mentioned how it contains valuable information about the application, but that information got encrypted in a different file entirely. You are very correct to be slightly confused, and we will explain.
The point of encrypting the .env file is to share it without worry that malicious parties can obtain it. Typically, the original .env file is not included when the application is added to a version control system like Git, for instance, making sharing them inconvenient. However, an encrypted file can be committed to version control, and the decryption key can then be shared with all involved parties. That way, your application is safe in two ways: firstly, you always have the original, and secondly, only people with the key can open the encrypted file and, therefore, will not obtain all the sensitive information in it.
With that said, however, let's move on to a few more details about the .env file. The first thing you might have noticed is that there are no empty spaces anywhere in it. Empty spaces can only be used in the values (what you type after the = symbol), and what you write must be surrounded by quotes. For instance, if you want your app's name to have separate words, it has to look like this.
APP_NAME="My First Laravel Application"
Finally, you can also turn debug mode on or off through this file. Anyone who has developed any application will tell you that debug mode is one of the most valuable tools you can use. Turning the mode on or off is as easy as changing the value of the APP_DEBUG= variable to either true or false. If debug mode is enabled, detailed error messages with stack traces will be shown on every error that occurs within your application. If disabled, a simple generic error page will instead appear.
As you can see, the .env file is critical, and we strongly encourage you to read the >documentation provided by Laravel itself. It contains even more in-depth and technical information that is beyond the scope of this tutorial.
The Config Directory
We mentioned this directory earlier in our tutorial and will elaborate on it now. This is how the config directory looks for a brand-new Laravel install.
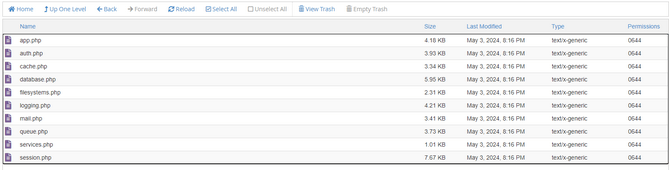
As you can see, many configuration files are here, and you might recognize many of them. Specifically, that they had values in the .env file earlier. Let's open one of these files, and we will explain. Here is the database.php file, for example.
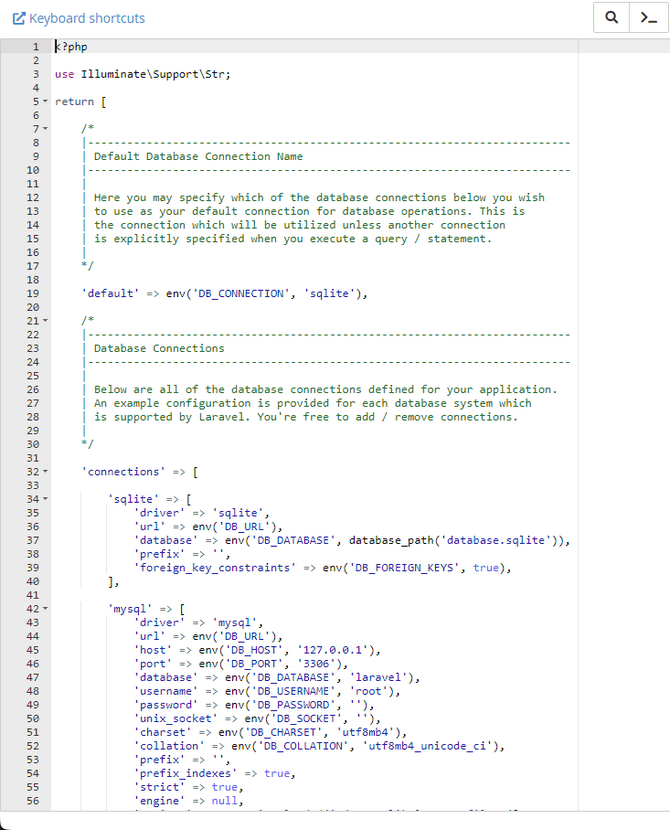
You will notice that the variables in this file are the same as those in the .env file. This file tells your application to bounce over to .env and retrieve the values from there. You can change the values from the files in the config directory as well, but if they exist in the .env file, we recommend doing that there. It is more convenient that way, and anyone looking at your application will check that file first before going deeper.
That said, the files in the config directory also contain valuable information. You may have noticed that there are explanations in the screenshot above. That applies to all the files in this directory since the Laravel developers are awesome enough to provide first-hand documentation about each variable right in its file.
Finally, regarding the config directory and its files, you can cache all the files to boost your application. That way, your application will use that file for its configuration instead of referring to the .env file every time. The process of caching your configuration is very simple and needs a single command.
php artisan config:cache
You can use this command to clear the cache.
php artisan config:clear
Keep in mind that this command should be run during your application's production deployment process. In other words, use it when your application is ready, and you are launching it online, not while developing it.
That concludes our look at the config directory. Please make sure to read through all the files yourself, as they contain a ton of useful information and will tell you what they are used for.