Email Configuration
Updated on Jul 11, 2024
Laravel is fully capable of sending emails, too! It comes equipped with a straightforward email API powered by Symfony Mailer. Symfony Mailer is an all-in-one mail component of the Symfony framework. Laravel uses several Symfony components throughout its framework, such as Mailer, ErrorHandler, HttpFoundation, and HttpKernel, to name a few. The Mailer component works in conjunction with the Laravel framework to provide a straightforward approach to sending emails locally or via a cloud service.
Laravel is capable of sending emails via several different drivers.
To start sending emails with any of these drivers, you must first set them up individually. Fortunately, that is extremely simple! You can mostly do that via the config/mail.php file within your application.
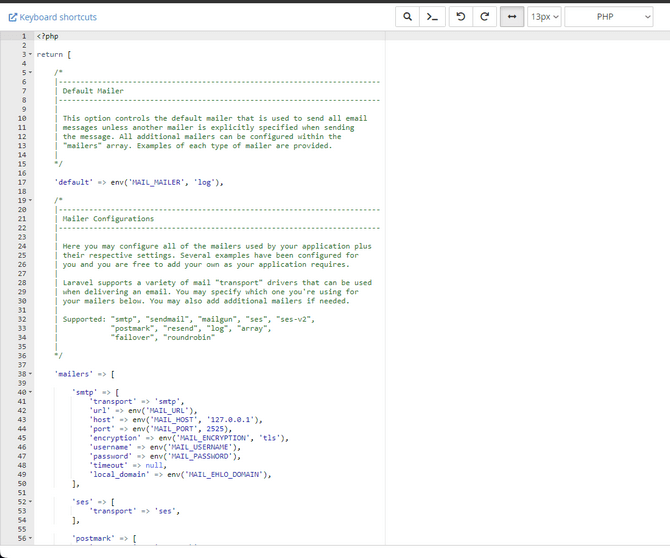
Within it, you will find a configuration array for each driver and a line to define the default driver for your application. Additionally, you can also assign different transport for each driver with this file, allowing your application to use a different driver for different messages. For instance, you can use SMTP for transactional emails but Postmark for newsletters. You will also find a configuration array for each driver in the file. Mailgun or Postmark are usually recommended as they are API-based, not SMTP. Now, let's take a look at how to set up each individual driver.
Instructions For Each Mailer:
Mailgun
To start, you must install the Mailgun transport on your application. That is super easy since all you need to do is run this command.
composer require symfony/mailgun-mailer symfony/http-client
Once installed, move on to the config/mail.php configuration file, where you must set mailgun as the default.
Next, go to the config/services.php file and ensure it contains the following options.
'mailgun' => [
    'transport' => 'mailgun',
    'domain' => env('MAILGUN_DOMAIN'),
    'secret' => env('MAILGUN_SECRET'),
],
If you are not using the United States Mailgun region, you must define your region manually like this.
'mailgun' => [
    'domain' => env('MAILGUN_DOMAIN'),
'secret' => env('MAILGUN_SECRET'), 'endpoint' => env('MAILGUN_ENDPOINT', 'api.eu.mailgun.net'), ],
And that is it! Your application is now set up to send emails using Mailgun as its default driver.
Postmark
The configuration for Postmark is similar to Mailgun. Begin by installing the transport with this command.
composer require symfony/postmark-mailer symfony/http-client
Once done, go to the config/mail.php file again and set postmark as the default driver. Then, go to the config/services.php and ensure these options are in it.
'postmark' => [
    'token' => env('POSTMARK_TOKEN'),
],
Postmark also allows for separate message streams. That way, you can have multiple Postmark mailers, each with its own separate message stream. To do that, look to the config/mail.php file for this configuration array.
'postmark' => [
    'transport' => 'postmark',
    'message_stream_id' => env('POSTMARK_MESSAGE_STREAM_ID'),
],
Simply insert your message stream ID and you are set.
AmazonSES
To start sending emails via Amazon's Simple Email Service (SES), you must first install their Software Development Kit (SDK). Fortunately, it is as easy as running this command.
composer require aws/aws-sdk-php
Then, set the default driver to ses in your config/mail.php file. Afterward, head to the config/services.php file and ensure this configuration is included.
'ses' => [
    'key' => env('AWS_ACCESS_KEY_ID'),
    'secret' => env('AWS_SECRET_ACCESS_KEY'),
    'region' => env('AWS_DEFAULT_REGION', 'us-east-1'),
],
Fill in the necessary AWS information within the parenthesis. To use AWS temporary credentials via a session token, add a token key to the config/services.php file.
'ses' => [
    'key' => env('AWS_ACCESS_KEY_ID'),
    'secret' => env('AWS_SECRET_ACCESS_KEY'),
    'region' => env('AWS_DEFAULT_REGION', 'us-east-1'),
    'token' => env('AWS_SESSION_TOKEN'),
],
Finally, if you want Laravel to pass additional options to the AWS SDK SendMail method when an email is sent, you can define an options array within the configuration.
'ses' => [
    'key' => env('AWS_ACCESS_KEY_ID'),
    'secret' => env('AWS_SECRET_ACCESS_KEY'),
    'region' => env('AWS_DEFAULT_REGION', 'us-east-1'),
    'options' => [
        'ConfigurationSetName' => 'MyConfigurationSet',
        'EmailTags' => [
            ['Name' => 'foo', 'Value' => 'bar'],
        ],
    ],
],
SMTP
Finally, the SMTP method of sending email via Laravel is even easier to set up. You don't need to install any additional mailers since all the necessary settings are located in the .env file. When you open it, you should see this.
MAIL_MAILER=smtp
MAIL_HOST=mailpit
MAIL_PORT=1025
MAIL_USERNAME=null
MAIL_PASSWORD=null
MAIL_ENCRYPTION=null
MAIL_FROM_ADDRESS="[email protected]"
MAIL_FROM_NAME="${APP_NAME}"
That is the default configuration that comes with any .env file. But, as you can see, it is straightforward to understand. At the top, you have your mailer, which is already set to smtp. After that, you will find all the options for the mail host you want to use.
- MAIL_HOST - Write the hostname of the email service provider you want to use. If you are uncertain what the hostname is, they will be able to give it to you;
- MAIL_PORT - There are two email ports: 465 and 587. Which one you use depends on your choice of encryption below. If you chose SSL, then use 465. For TLS, use 587;
- MAIL USERNAME and MAIL_PASSWORD - Input the email address and its password from which you want your application to send emails;
- MAIL_ENCRYPTION - As we mentioned above, there are two types of encryption: SSL and TLS. They are both equally secure, but we ourselves recommend SSL;
- MAIL_FROM_ADDRESS - You can specify an email address the recipient will see as the sender;
- MAIL_FROM_NAME - Finally, you can specify the name the recipient will see as the sender.
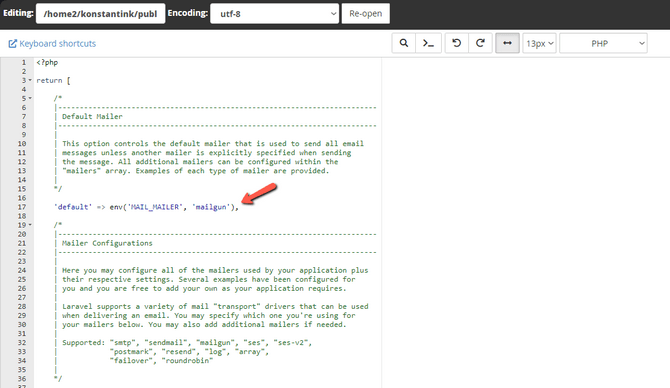
And that is it! You have now set up your Laravel application to send emails via SMTP. Before we move on, though, you might have noticed something about this line in the config/mail.php file.
'default' => env('MAIL_MAILER', 'mailgun'),
Even though Mailgun is defined as the host, it is the MAIL_MAILER variable before it. That means the application will use MAIL_MAILER by default, as specified in the .env file. If unable to, though, it will switch to Mailgun to try and send the email.
Additional Configurations
Finally, before we move on, you can set up a couple of additional configurations for your outbound emails.
Firstly, you can set up a backup email transport that will attempt to deliver your emails if your default mailer is down or otherwise unable to send emails. It is super easy to set it up. Simply go to the config/mail.php file and find the failover array. Within it, specify the transports you want to use if the default one is unavailable like this.
'mailers' => [
    'failover' => [
        'transport' => 'failover',
        'mailers' => [
            'postmark',
            'mailgun',
            'sendmail',
        ],
    ],
],
To finalize the configuration, scroll up and change the default mailer to failover.
'default' => env('MAIL_MAILER', 'failover'),
That way, if our default mailer (specified in the MAIL_MAILER line of the .env file) fails, the application will use the failover array and the other mailers specified in it. It will try them in the order they are provided until one works.
As for the second configuration you can actually distribute your mailing workload across multiple transports. This is handy if you send out a lot of emails, for instance, and don't want to overload any one transport. That is achieved by the roundrobin transport, and you can set it up in the config/mail.php file of your application. Simply find its array and fill in your additional transports like this.
'mailers' => [
    'roundrobin' => [
        'transport' => 'roundrobin',
        'mailers' => [
            'ses',
            'postmark',
        ],
    ],
    // ...
],
And then, scroll up and change the default transport to roundrobin like this.
'default' => env('MAIL_MAILER', 'roundrobin'),
Your application will now distribute the emails using the transport from the .env file and the transports from the roundrobin array. The roundrobin transport will select a random email transport for each message, ensuring a balanced load across all of them.