Creating a Database
Updated on Jul 11, 2024
Before assigning a database to your Laravel application, we have to create it. The web hosting control panel our services utilize is cPanel, and MariaDB is the database management system. We will focus on those two in this tutorial.
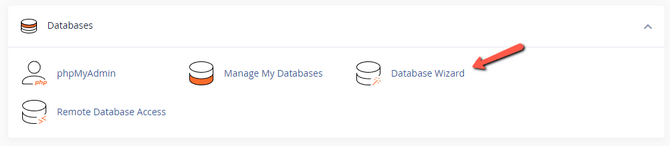
There are several ways to create a database in cPanel. The easiest is to use the Database Wizard tool in the Databases section. We have a wonderful tutorial on the topic, but we will also explain the process here for your convenience.
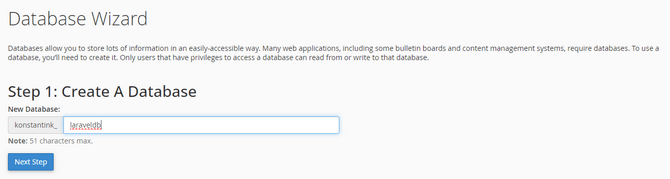
The tool is designed to simplify database creation and takes just a few clicks. First, input the name of your database and click Next Step. Remember that since this is cPanel the name will always be prefixed by your cPanel username.
The next step is to create a database user. We typically use the database's name from the previous step for convenience, but you can put in whatever works for you. Then, write a password. It is best to use a password generator, as you can choose what symbols to include, and it will always generate a strong one.
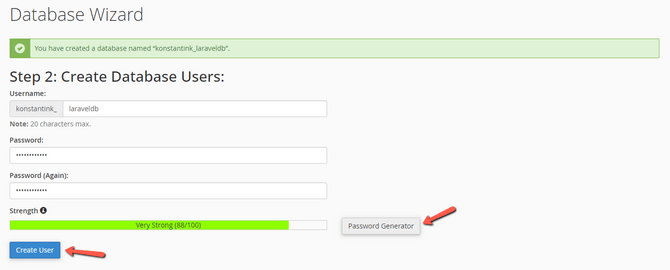
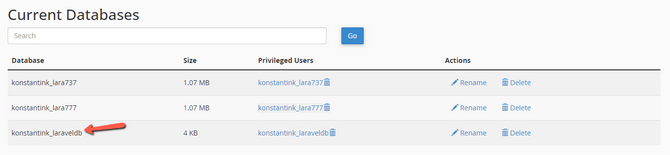
Click Create User and proceed to the final step. You will see the database's name and user; here, you can select what privileges to give that user. There is a tick for all privileges, but you can pick and choose if you would like. When you are ready, click Make Changes. With that, you have created a MariaDB database! You can go to the Manage My Databases tool in the Databases section, and you will see it there.
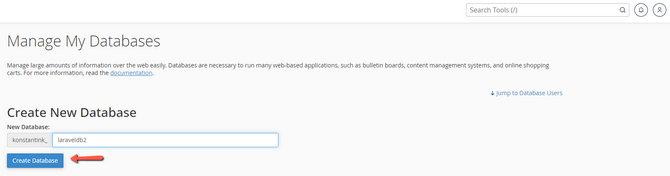
You can even create databases from that tool. The process is not as straightforward, but we will show it for your information. First, write a name for the database and then click Create Database.
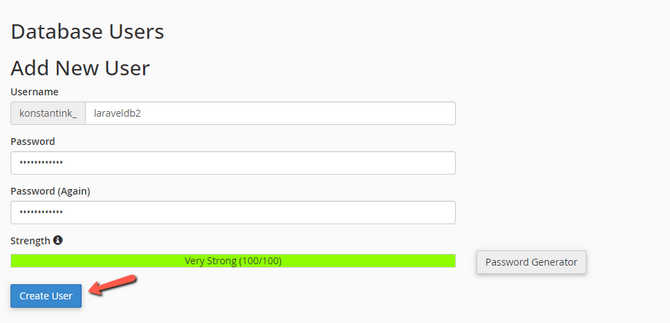
Return to the previous page when the database is created and scroll down to Add New User. Give the user a name and a password (there is a password generator here, too), then click Create User.
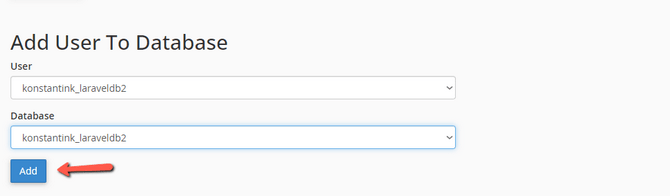
Finally, go back one last time and scroll to the bottom of the page to Add User to Database. Select the database and user you want to pair and click Add.
Select the privileges and finally click Make Changes. A green message in the top right will inform you that the user has been successfully added to the database. Go back one last time, and you will be able to see the database and its user in the list.
And those are the ways to create databases in cPanel. Very easy, as you can see. Now, let's move on to the more Laravel-specific part of this tutorial and discuss how to assign your new database to your application.