How to use the Menu Manager in Joomla
Updated on Mar 13, 2019
This tutorial reviews the Menu Manager in Joomla and what it offers. With Joomla, it is easy to add menus to your website and configure them afterwards.
To fully manage your menus in Joomla you will need to know how to:
Access the Menu Manager
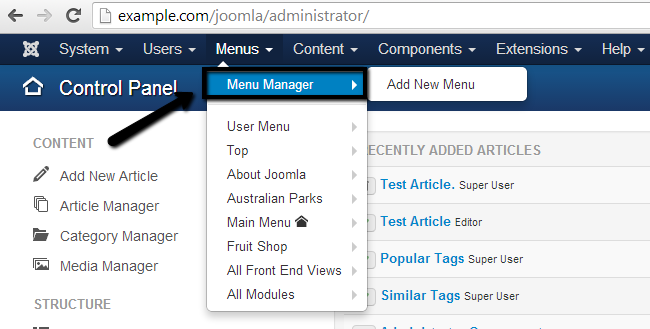
To access the Menu Manager, log into your website as administrator, navigate to the Menus -> Menu Manager.
Create a New Menu
Once you access the Menu Manager, you can manipulate all menus on your website the way you like. Let us create a new menu first. You need to click on the New button at the top-left corner of the screen.

Edit the following options:
- Title - Enter the title of your new menu.
- Menu Type - The system name of the new menu.
- Description - Enter a short description for your new menu.
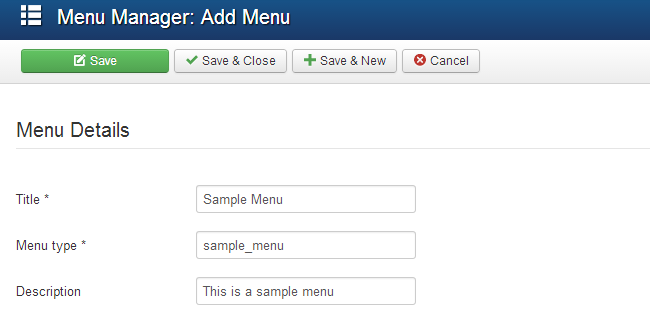
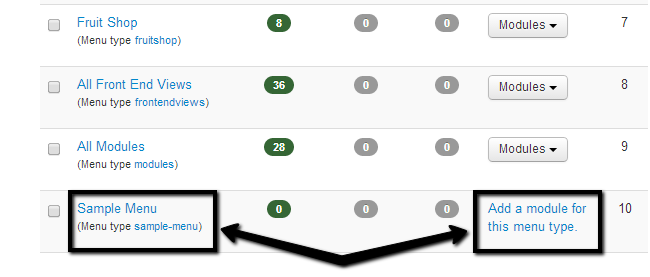
When you are ready with the data for your new menu, simply click on the Save & Close button to create it. Locate your newly created menu and click on the Add a module for this menu type button next to it.
Edit the following options:
- Title - Enter the title of your new menu module.
- Module -Set the module as published, select template position for it, etc.
- Menu Assignment - Select the pages where the module should appear.
- Module Permissions - Set the permissions for the new module.
- Advanced - Set layout, caching options, tags, etc.
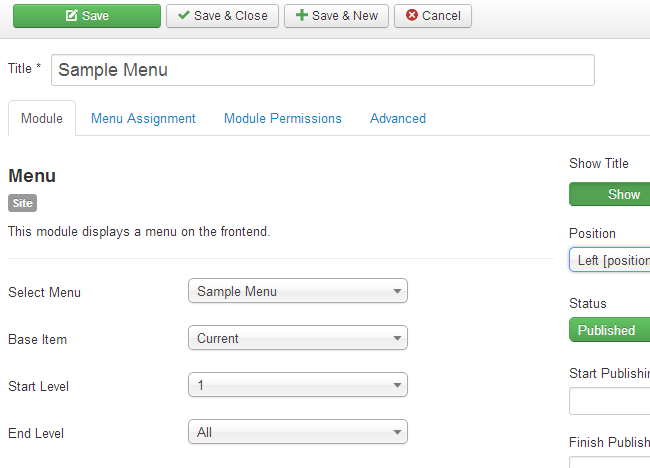
Click the Save & Close button to keep the changes.
Add Items to a Menu
Once you have created new navigation menus in Joomla, you need to add items to them. To add a new item on the existing menu, you need to log into your website as administrator. Navigate to the Menus tab, locate the menu that you would like to add items to and then click on the Add New Menu Item.
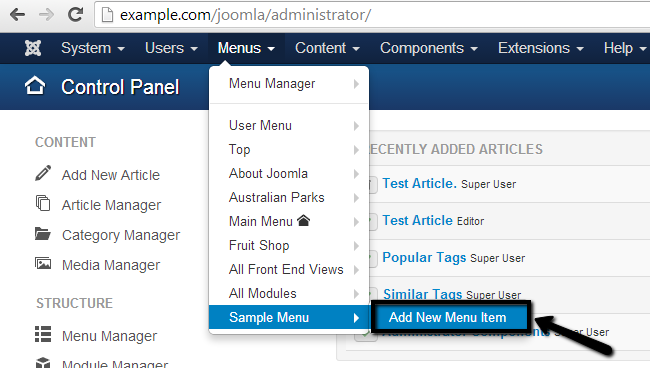
Edit the following options:
- Title - Enter the title for the new menu item.
- Details - Select menu item type, status, parent item (if any), etc.
- Link Type - Enter a link title attribute, custom css, link image, etc.
- Page Details - Enter the page details for the new menu item.
- Metadata - Enter the metadata for the new menu item. This is a good SEO practise.
- Module Assignment -Assign modules to the item.
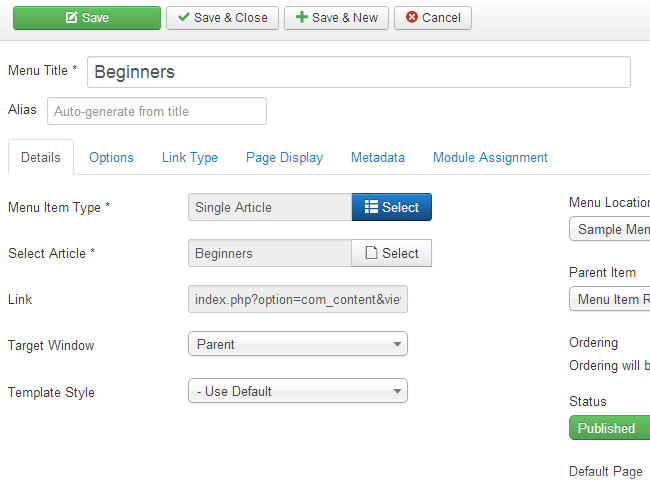
Click on the Save & Close button to create the new menu item.
Delete a Menu
To remove a menu from your website, access the Menu Manager.
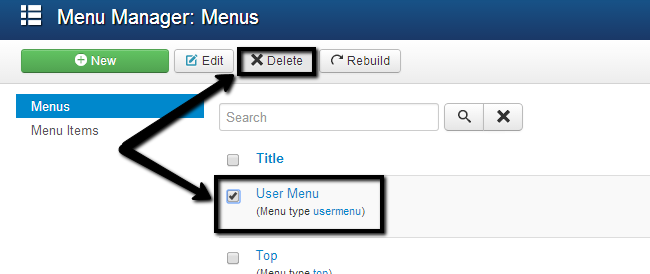
Select the checkbox next to your menu and click the Delete button at the top. With this the menu will be removed from the manager and your Joomla instance.

Joomla Hosting
- Free Installation
- 24/7 Joomla Support
- Hack-free Protection
- Fast SSD Storage
- Free Domain Transfer
- Free Joomla Transfer
- Free Cloudflare CDN