How to Manage Templates in Joomla
Updated on Mar 13, 2019
This tutorial will review the process of managing the templates assigned on your website. This is quite easy with the use of Joomla, which will also allow you to edit just about everything on the default template on your website front or back end.
To Manage your Joomla Templates, you have to be able to:
Set a Default Template
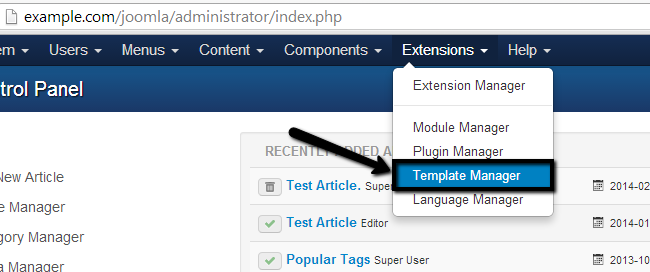
To review all of the templates on your website and select your default one, you need to log into your website as administrator. Then simply navigate to the Extensions tab from the top menu and then Template Manager.
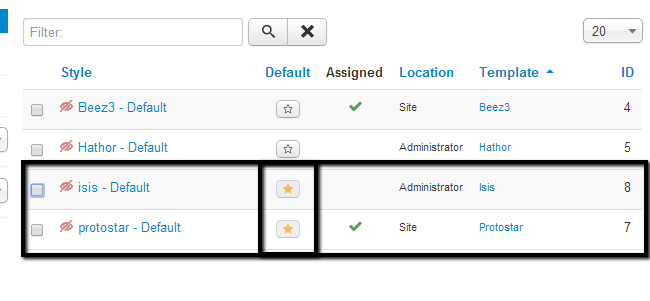
Once you access the Template Manager in Joomla, you will see a list with the available templates on your website. There are two types of templates – for the front end of your website as well as the back end. Also, the default template will be marked with a yellow star. In our case, the default templates used for the front and back end respectively are Protostar and Isis.
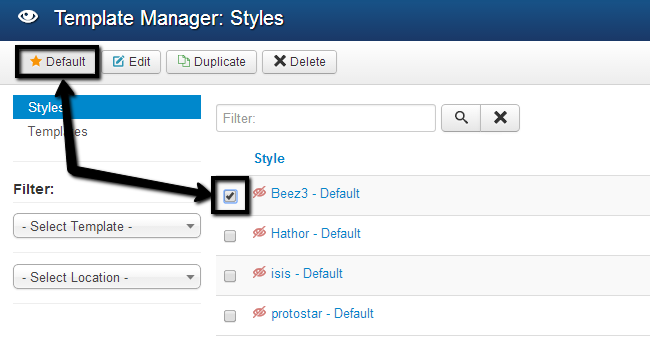
Select a template through the check-box next to it and click on the Default button at the top to make it the default on your website.
Edit the Template's Style
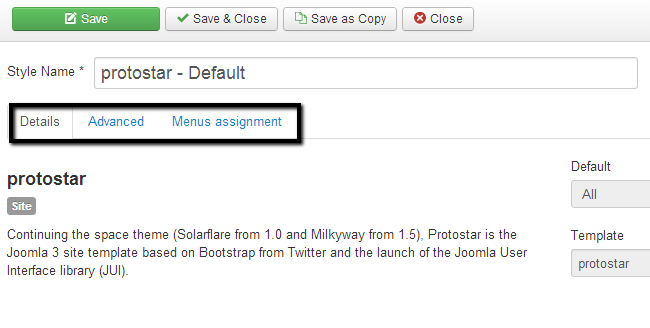
You also have the ability to edit the template’s option. Click on the name of the default template on your website and edit the following options:
- Details - This will simply display some information for the template that you are editing.
- Advanced - Edit colors, title, logo, description, etc.
- Menu Assignment - Assign menus to your template so they can become visible on your website.
When you are ready with the changes, simply click on Save & Close.
Edit Templates
Access the Template Manager and select the Templates tab.

Locate the default template on your website and click on it’s name.
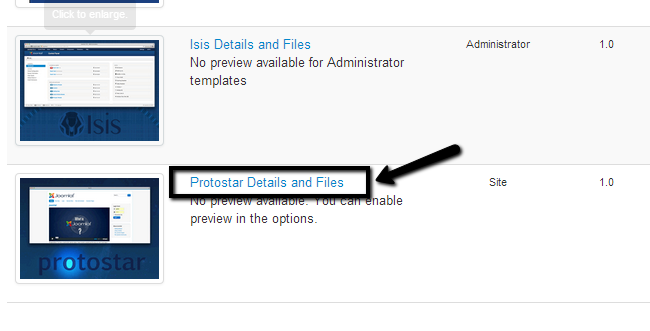
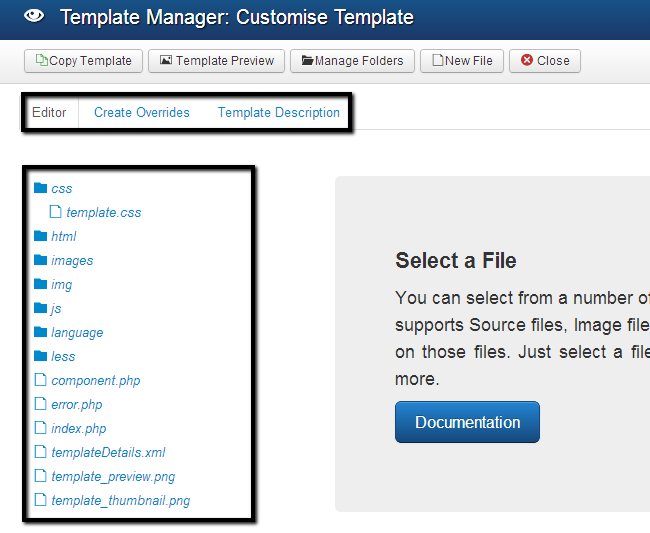
Edit the following options:
- Editor - This will allow you to edit css, images and just about anything else on your template. This will require development knowledge so it is intended for advanced users.
- Create Overrides - Overrides for different modules, components, layouts.
- Template Description - This will only provide some additional information about your template.
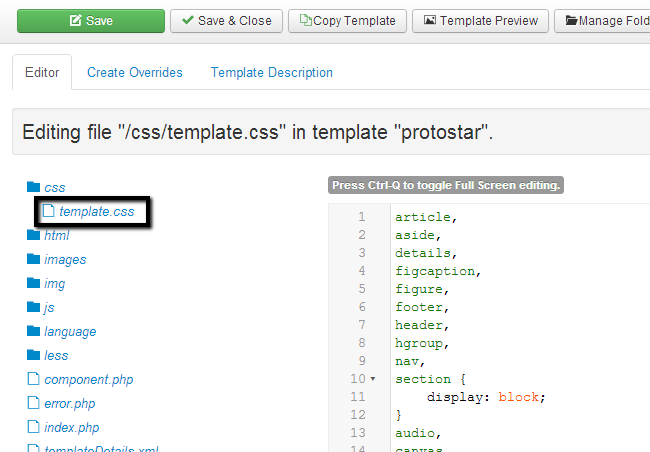
When you open a certain of the template’s files for editing, simply click on the Save & Close button to keep the changes.
Congratulations! You now know the basics in setting and edititing templates for Joomla.

Joomla Hosting
- Free Installation
- 24/7 Joomla Support
- Hack-free Protection
- Fast SSD Storage
- Free Domain Transfer
- Free Joomla Transfer
- Free Cloudflare CDN
